ENGLISH
20
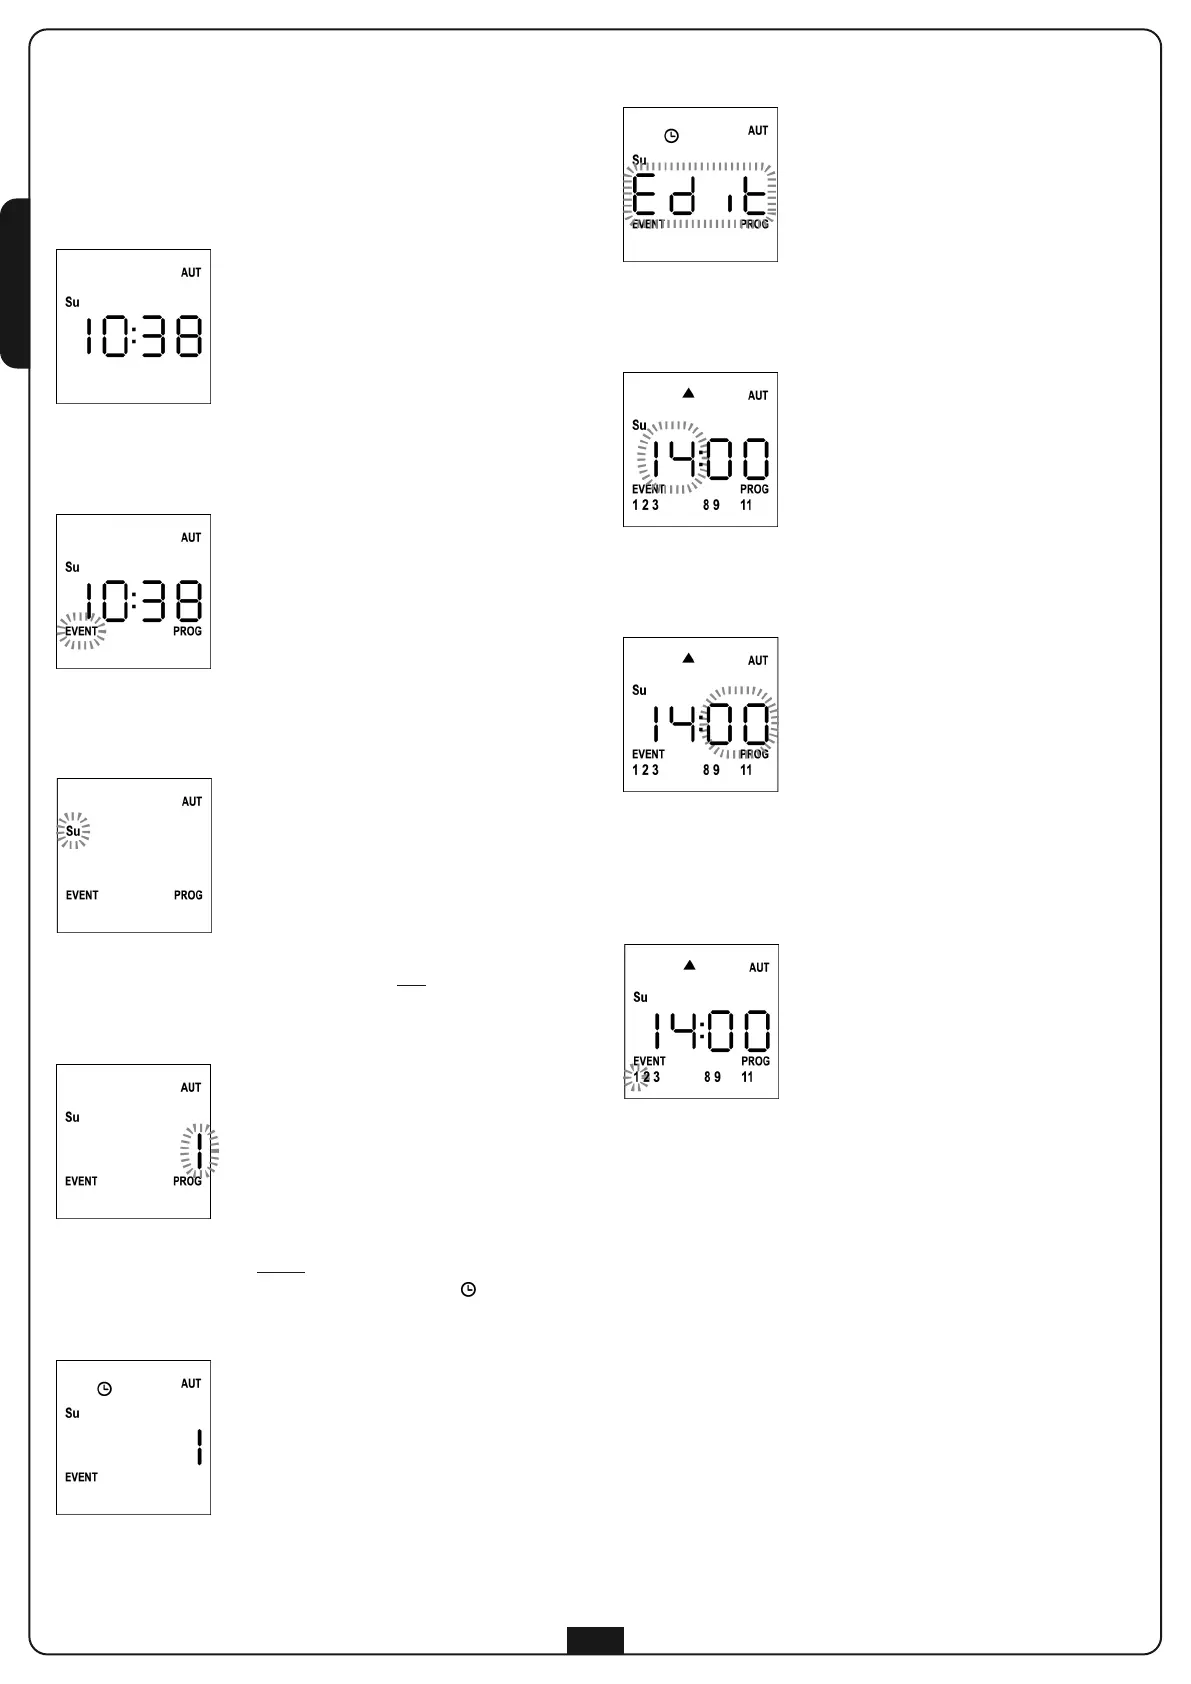
Editing scheduled events
This procedure allows you to edit a scheduled event.
1. The remote must be in AUTO mode.
If it is in MANUAL mode, press SELC for 10 seconds,
the display shows (example)
2. Press the MENU key until the PROG icon turns on while
EVENT blinks
3. Press the MENU key to confirm:
EVENT is steadily on and the icon of the day (e.g. Su) blinks.
4. Select the day whose event you want to edit by using the
UP / DOWN keys and press MENU to confirm.
The display will show event number 1
5. Select the event to be edited
(1 to 5).
NOTE: When an event is scheduled the icon turns on,
the display shows (example)
6
. Press the MENU key to confirm, Edit blinks:
7. Press the MENU key to change the event settings.
The hour digits blink:
8. Set the time using the UP and DOWN keys and press the
MENU key to confirm. The minute digits blink:
9. Set the minutes using the UP and DOWN keys and press the
MENU key to confirm.
The icon of Channel 1 blinks showing its state ON (active)
or OFF (inactive)
10. Set the channels which must transmit for this event:
using the UP and DOWN keys, select the ON (active) or
OFF (off) state of the channel, press MENU to confirm and
proceed to set the next channel.
11. Repeat this procedure for all 12 channels.
NOTE: This step allows you to associate multiple
channels to the same event by creating groups of
channels that will be activated simultaneously.
When channels are activated they stay on.