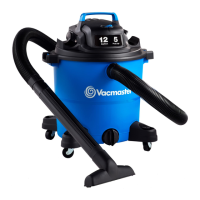
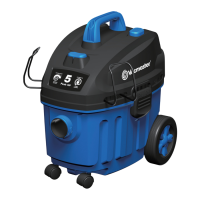
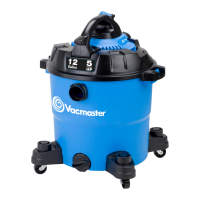
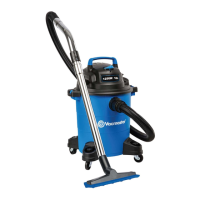
The Vacmaster VOC1218PF is an 18L, 1250W wet and dry vacuum cleaner designed for versatile cleaning tasks, including artificial lawns and outdoor areas. It is engineered for optimal performance and is suitable for use with both liquids and dry materials. The appliance features double insulation for enhanced safety, meaning protection against electric shock does not rely solely on basic insulation, and there is no provision for protective earthing.
Users must carefully read and understand all instructions before using the vacuum cleaner. Never leave the appliance switched on unattended. If leaving the work area, switch off the appliance or unplug it from the power supply. Do not vacuum or use the cleaner near flammable liquids, gases, or explosive vapors such as gasoline, other fuels, lighter fluids, cleaners, oil-based paints, natural gas, hydrogen, or explosive dusts like coal dust, magnesium dust, grain dust, or gunpowder, as sparks inside the motor can ignite these substances. This vacuum cleaner is not suitable for vacuuming asbestos or asbestos dust. Avoid vacuuming anything that is burning or smoking, such as cigarettes, matches, or hot ashes. Always ensure the hose and connections are pointed away from the user's face, hair, ears, and eyes during operation, and never direct the nozzle towards persons or animals. Clear the working area of any items or possessions not intended to be vacuumed before operation. Keep the power cord away from heated surfaces. Do not expose the appliance to rain and store it indoors. To unplug, grasp the plug, not the cord. Do not use the vacuum cleaner with a damaged cord, plug, or other parts. Do not pull or carry the appliance by its cord, use the cord as a handle, close a door on the cord, or pull the cord around sharp edges or corners. Do not handle the plug or vacuum cleaner with wet hands.
To reduce the risk of health hazards from vapors or dusts, do not vacuum toxic materials. Regularly check that the float valve, positioned underneath the motor, can move freely. Do not use or store the vacuum cleaner near hazardous materials. Do not use this vacuum cleaner with a torn filter or without the filter installed. The appliance should not be used as a toy, and close attention is necessary when used by or near children. To reduce the risk of injury from accidental starting, unplug the power cord before changing or cleaning the filter. Unplug from the power supply when not in use and before carrying out maintenance. Do not cover the ventilation openings; ensure they are free of dust, lint, hair, or anything that may reduce airflow. Keep hair, loose clothing, fingers, and all parts of the body away from openings and moving parts. If the supply cord is damaged, it must be replaced by the manufacturer, a qualified service agent, or similarly qualified persons to avoid a hazard. This appliance can be used by children aged 8 years and above, and persons with reduced physical, sensory, or mental capabilities, or lack of experience and knowledge, if they have been given supervision or instruction concerning safe use and understand the hazards involved. Children shall not play with the appliance, and cleaning and user maintenance should not be performed by children without supervision. For additional protection, it is recommended that this vacuum cleaner be used in conjunction with a residual current device (RCD) with a rated residual current of 30mA or less. If foam or liquid escapes from the machine, switch it off immediately. Regularly check the float valve for free movement and signs of damage.
When using as a blower:
Direct air discharge only at the work area. Do not use the Wet/Dry Vacuum as a sprayer. Do not direct air at bystanders. Keep children away when blowing. Always wear safety goggles.
Technical Specifications:
- Model Number: VOC1218PF
- Motor: 220-240V~50Hz
- Power Input: 1250W
- Tank Volume: 18L
- Net Weight: 5.38kg
- Protection Class: IPX4 (protected against splashing water from any direction)
Assembly:
A Phillips screwdriver is required for assembly.
- Remove all contents from inside the vacuum cleaner container.
- Attach the carry handle into the slots on top of the power head and secure with supplied screws (Fig. 1).
- Turn the container upside down and insert the feet with casters into the slots, applying pressure until they click into place. Secure them with supplied screws (Fig. 2).
- The vacuum cleaner comes ready for both wet and dry vacuum cleaning with the washable cartridge filter and pre-filter pre-installed. If the cartridge filter is not installed, refer to the instructions on pages 8 & 9.
- Secure the power head back on the container using the latches. Insert the locking end of the hose into the suction port of the container and lock it into place (Fig. 3).
- Choose the desired accessories and/or extension wands and push-fit them onto the hose nozzle (Fig. 4).
Floor Nozzle Attachments:
To remove a floor nozzle attachment, release the push clips on either side of the floor head holder; the attachment will drop out from underneath (Fig. 5). Only one floor nozzle should be attached at a time. To insert a new attachment, place one side into the bottom of the floor head holder and secure one clip. Push the other side up into place, ensuring it is securely fitted (Fig. 6).
- Hard Floor Nozzle: Suitable for wet or dry suction on hard floor surfaces. Ensure the squeegee is towards the back of the floor head holder and brushes towards the front.
- Artificial Grass Tool: Specifically designed for use on artificial lawns. Ensure the front lip faces away from the user and in the direction of vacuuming.
Operation:
- Switching On/Off: Connect the mains plug to a suitable power outlet. The "I" position is ON, and the "O" position is OFF.
- Wet & Dry Vacuum Operation:
- Verify that the washable filter and pre-filter are installed and the container latches are secured.
- Secure the locking end of the hose into the vacuum suction port.
- Push the desired accessories onto the hose nozzle. The airflow regulation allows you to change vacuum cleaner suction; for best cleaning results, fully close the airflow regulation (Fig. 7).
- Plug the power cord into a power outlet.
- Turn on the motor by assigning the switch to the "I" ON position.
- Once vacuuming is complete, switch to the "O" OFF position and unplug the power cord.
- NOTE: If vacuuming a mixture of wet and dry surfaces, fully clean and dry the filter and collection tank after each use.
Installing Cartridge Filter:
WARNING: Before installing, removing, or cleaning the vacuum cleaner filter, ensure the power cord is unplugged and switched off.
-
To prepare for wet or dry vacuuming, install the cartridge filter over the filter cage (①) with the flat end towards the vacuum power head. Carefully push the filter until it sits flush, forming a tight seal (Fig. 8).
-
Place the filter retainer cap on top of the cartridge filter over the raised lip and tighten the retainer lock clockwise to secure against the internal filter cage (Fig. 9).
-
Place the nylon pre-filter over the cartridge filter, ensuring the whole filter is covered, and secure the drawstring. Replace the power head and secure it in place (Fig. 10).
- IMPORTANT: Check the filter regularly for optimal performance. An old or blocked filter will reduce suction performance.
- IMPORTANT: The vacuum cleaner is equipped with a float valve (②) which is operational during wet suction (Fig. 11). Suction power decreases when the maximum filling level is reached. When this happens, switch off the vacuum cleaner immediately and empty the container.
-
Blower Operation:
- WARNING: Keep bystanders clear from blowing debris.
- WARNING: Wear a dust mask if blowing creates dust that might be inhaled.
- Ensure the container and any collected waste are emptied and the filter is dry before using as a blower.
- Insert the locking end of the hose into the blower port on the rear side of the power head (Fig. 12).
- Turn on the motor by turning the switch to the 'I' ON position.
Cleaning Artificial Lawns and Outdoor Areas:
-
Everyday Cleaning with Dry Suction:
- Clear large objects and debris from the lawn surface to prevent blockages or damage (Fig. 13).
- Fit the artificial grass tool attachment to the floor head holder and attach this to the end of the extension wands and hose (Fig. 14).
- NOTE: The artificial grass tool is specially developed for cleaning long fibers of artificial lawns.
- Turn the motor on by assigning the switch to the 'I' ON position.
-
Remove Stubborn Dirt with Wet Suction:
- Stubborn dirt or mud compacted into the surface is easier to remove if the lawn is wet.
- Use a hose or watering can directly onto the stubborn dirt, allowing it to loosen and absorb water (Fig. 15).
- Using the artificial grass tool, vacuum up areas to remove dirt deep in the lawn fibers.
-
Brass Round Brush for Moss and Plant Removal:
- Nature often causes moss to grow back into artificial lawns, especially in damp, protected areas. The brass brush removes moss without chemicals, as its soft fibers are gentle to surfaces compared to steel brushes.
- WARNING: Always test the effect of the brass brush in a small area. Check that the brush does not damage your type of artificial lawn or stonework before cleaning large areas.
- Fit the brass round brush tool to the end of the extension wands and hose (Fig. 16).
- Work the moss in a gentle back and forth motion to dislodge roots, and the moss will be collected by the vacuum cleaner.
-
Detailed Areas:
- For corners around your lawn, use the crevice tool.
- Fit the crevice tool to the end of the extension wands and hose (Fig. 17).
- Use the crevice tool for final spot cleaning and to reach edges and corners of the lawn and around plant pots (Fig. 17).
-
Other Outdoor Areas:
- Use the hard floor tool for other outdoor flooring, decking, or stonework.
- Fit the hard floor attachment to the floor head holder and attach this to the end of the extension wands and hose (Fig. 18).
Maintenance:
WARNING: Remove the power cord from the power supply before carrying out any maintenance.
- Keep all safety devices, air vents, and the motor housing free of dirt and dust. Use a soft, dry brush to clean the equipment regularly.
- Clear all dirt or debris from the collection tank after each use. Allow to dry before replacing the power head. Do not use cleaning agents or solvents, as they may damage the appliance.
- Check the hose, attachments, and power cord to verify they have not been damaged or blocked by debris.
Cleaning Washable Cartridge Filter & Nylon Pre-filter:
- Remove the filter and clean by gently tapping or brushing dirt off. For optimal performance, it is recommended to replace the old filter with a new one regularly.
- Use a mild soap and water solution to wash the cartridge filter and nylon pre-filter, then rinse with clean water. Allow the filters to air dry before re-installing (Fig. 19 & 20).
Troubleshooting:
WARNING: To reduce the risk of electric shock, unplug before troubleshooting.
-
Problem: The vacuum doesn't work.
- Possible Cause: No power.
- Solution: Check the power supply and fuse.
- Possible Cause: Functional fault in the power cord, switch, or motor.
- Solution: Have the damaged part checked by qualified personnel or contact the after-sales helpline.
-
Problem: Low suction power and high operating noise/vibrations.
- Possible Cause: Suction nozzle, hose, or tank inlet is blocked.
- Solution: Check the suction nozzle, hose, and tank inlet for obstructions.
- Possible Cause: Cartridge filter is blocked.
- Solution: Remove the cartridge filter and clean.
- Possible Cause: Float valve has closed.
- Solution: Empty the container of any liquid waste and ensure the float valve located underneath the filter is able to move freely.
-
Problem: The vacuum turns off on its own.
- Possible Cause: The power cord is disconnected from the power supply.
- Solution: Make sure the plug is connected to the power supply.
-
Problem: Dust is escaping from the motor cover.
- Possible Cause: The filter is missing or damaged.
- Solution: Install the filter correctly or replace it if it is damaged.
Recycling and Disposal:
This marking indicates that the product should not be disposed of with other household wastes throughout the EU. The machine must be delivered in rigid packaging to avoid damage during transportation. The packaging and the machine itself are manufactured from recyclable materials and should be disposed of accordingly.