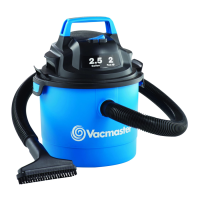
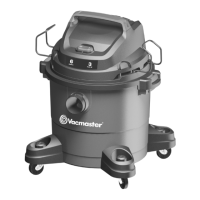
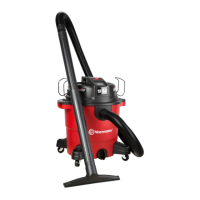
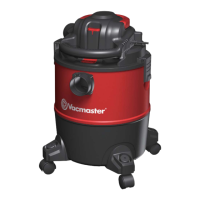
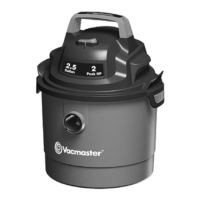
The Vacmaster VOM205P 1101 is a 2.5-gallon, 2 Peak HP wet/dry vacuum cleaner designed for both household and commercial use. This versatile appliance is engineered for optimal performance, capable of picking up both liquids and dry materials.
Function Description:
The Vacmaster VOM205P 1101 serves as a multi-functional cleaning device, capable of dry vacuuming, liquid vacuuming, and blowing. Its primary function is to efficiently remove debris, dust, and liquids from various surfaces. The vacuum is double-insulated, eliminating the need for a separate grounding system and enhancing user safety. It is designed for ease of use and maintenance, with features that support both quick clean-ups and more extensive tasks.
Important Technical Specifications:
- Capacity: 2.5 Gallons
- Motor: 2 Peak HP
- Power: 110V-120V
- Insulation: Double-insulated, grounding not required. Uses only identical replacement parts for servicing.
- Filters: Comes with a reusable cloth filter for dry vacuuming and a foam wet filter for liquid vacuuming. A fine dust filter is recommended for very fine dust like drywall or fireplace soot.
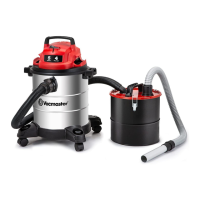
- Hose: 1-1/4" x 4' Hose (Part Number: 551012108)
- Accessories: Includes a crevice tool (Part Number: 551012109) and a 2-in-1 utility nozzle (Part Number: 551012112).
- Weight: Not specified, but designed to be portable and mountable.
Usage Features:
- Dry Vacuum Operation:
- Ensure the power cord is disconnected before setup.
- The reusable cloth filter must completely cover the filter cage against the power head.
- Place the power head back on the collection tank and secure with latches.
- Insert the larger end of the hose into the vacuum port.
- Attach desired accessories (e.g., crevice tool, utility nozzle) to the free end of the hose.
- Plug the power cord into an outlet.
- Turn the motor ON (switch to 'I' position) to begin vacuuming.
- Turn the motor OFF (switch to 'O' position) and unplug after use.
- Safety Warning: Do not vacuum flammable gases, vapors, or explosive dusts (e.g., lighter fluid, solvent-type cleaners, oil-based paints, gasoline, alcohol, aerosol sprays, coal, magnesium, grain, gunpowder). Do not vacuum toxic materials.
- Filter Note: Do not use the dust filter for liquid vacuuming.
- Liquid Vacuum Operation:
- Verify the power cord is disconnected.
- Remove the reusable cloth filter and install the foam wet filter over the filter cage.
- Place the power head back on the collection tank and secure.
- Insert the larger end of the hose into the vacuum port.
- Attach desired accessories.
- Plug the power cord into an outlet.
- Turn the motor ON (switch to 'I' position) to begin vacuuming.
- Turn the motor OFF (switch to 'O' position) and unplug after use.
- Important: When vacuuming large quantities of liquids, do not immerse the nozzle completely in the fluid. Leave a gap at the tip of the nozzle opening to allow air inflow. The machine is fitted with a float valve that stops the suction action when the collection tank reaches its maximum capacity. If this happens, turn off the machine, disconnect from power supply, and drain the liquid.
- Filter Note: Do not use the reusable cloth filter for liquid vacuuming.
- Blower Operation:
- Ensure the power cord is disconnected.
- The collection tank must be empty.
- Remove the hose from the vacuum port.
- Insert the larger end of the hose into the blower port on the backside of the power head.
- Verify the power switch is in the 'O' (OFF) position before plugging the power cord into the outlet.
- Hold the loose end of the hose firmly.
- Turn the motor ON (switch to 'I' position) to begin blowing.
- Safety Warning: Always wear safety goggles (complying with ANSI Z87.1 or CSAZ94.3 in Canada) before using the blower. Keep bystanders clear from blowing debris. Wear a dust mask if blowing creates dust that might be inhaled.
- Wall Mounting Support:
- The vacuum comes with a wall mounting support for convenient storage.
- Important: Do not mount the rack over 5 feet from the floor. Secure screws to a stud, not just drywall. Do not hang from or sit on the vacuum when mounted. Do not use the vacuum while it is mounted. Empty the tank before mounting.
- Mark hole locations, drill 1/8-inch pilot holes, and secure the mounting support to a wall stud with the provided screws.
- Place the vacuum into the support.
- Polarized Plug: The appliance has a polarized plug (one blade wider than the other) to reduce the risk of electrical shock. It will fit in a polarized outlet only one way. If it doesn't fit, reverse the plug. If it still doesn't fit, contact a qualified electrician. Do not change the plug.
- Extension Cords: Refer to the provided A.W.G. wire size table for appropriate extension cord length and gauge. Only use extension cords rated for outdoor use.
Maintenance Features:
- General Cleaning:
- Always disconnect the plug from the power outlet before removing the power head from the collection tank for cleaning or servicing.
- Empty all dirt and debris from the collection tank and hose.
- Important: Clean or change the filter regularly for best performance. Always use a dust filter for dry vacuuming. If the machine is used without the dust filter, the motor will burn out, and the warranty will be voided. Always keep spare dust filters on hand.
- The filter is designed to stop small dust particles. The filter should be used for dry pick-up only. A dry filter is necessary to pick up dust. If the dust filter is wet, it will clog quickly and be very difficult to clean. Handle the filter carefully when removing it for cleaning and replacing it. Check the filters for tears or small holes; a small hole can let dust pass through and out of the filter. Do not use a filter with holes or tears; replace it immediately.
- Installing & Cleaning Reusable Cloth Filter (Dry Vacuuming):
- Disconnect the power cord.
- Remove the power head and place it upside down.
- Slide the reusable cloth filter down over the filter cage, ensuring the cage is completely covered.
- Place the power head onto the collection tank.
- To clean, remove the power head and filter. Clean the filter by gently tapping or brushing off dirt. For thorough cleaning, use a mild soap and water solution, rinse with clean water, and allow to air dry for 24 hours before reinstalling.
- Installing & Cleaning Foam Wet Filter (Liquid Vacuuming):
- Disconnect the power cord.
- Remove the power head and place it upside down.
- Carefully slide the foam wet filter down over the filter cage, ensuring the cage is completely covered.
- Place the power head onto the collection tank.
- To clean, remove the power head and filter. Use a mild soap and water solution, rinse with clean water, and allow to air dry before installing.
- Troubleshooting: The manual provides a troubleshooting guide for common issues like "Vacuum will not operate," "Dust comes from motor cover," and "Reduced efficiency and motor/speed vibration," along with possible causes and corrective actions. For example, if the vacuum does not operate, possible causes include no power supply or a faulty power cord, with corrective actions such as checking breakers/fuses or unplugging and checking/repairing the cord.
Warranty:
The Vacmaster VOM205P 1101 comes with a limited two (2) year warranty against defects in workmanship and materials for normal household use. For commercial, industrial, or rental use, a 90-day limited warranty applies. Keep your receipt as proof of purchase. The warranty does not cover misuse, negligence, abuse, accidents, improper maintenance, repairs, alterations, consumables (filters, accessories), normal wear and tear of parts (hose, nozzles, casters), normal deterioration of exterior finish, products with tampered/removed serial numbers, or products purchased from unauthorized retailers. For service, contact Customer Service at 1-866-384-8432.