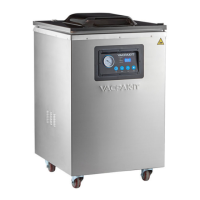
The VACPAK-IT Chamber Vacuum Packaging Machine is designed for efficient and reliable vacuum packaging of various food items, extending their freshness up to five times longer than traditional storage methods. This machine is suitable for both dry foods like pasta, cereal, and flour, as well as fresh meats, vegetables, and even frozen liquids.
Function Description
The primary function of the VACPAK-IT machine is to remove up to 95% of air from a package, creating a vacuum seal that preserves food. The process involves placing items in a suitable vacuum chamber pouch, laying the pouch flat across the seal bar in the chamber, closing the lid, and initiating the vacuum cycle. The machine then removes air, heats and seals the pouch, and cools the seal to prevent melting.
Important Technical Specifications
The model covered in this manual is the #186VMC16F, which features two 16-inch seal bars.
General Specifications:
- Machine Size: 20¼"W x 22½"D x 40"H
- Chamber Dimensions: 16½"W x 17"D x 4"H
- Material: Stainless Steel Body & Transparent Lid
- Voltage: 120V
- Wattage: 1180W
- Plug Type: NEMA 5-15P
- Pump Type: Oil, 1.5HP
- Pump Power: 1/4 HP
- Pump Life: 200,000+ Cycles
- Vacuum Time: Adjustable from 5-90 Seconds (standard setting: 40 seconds)
- Seal Time: Adjustable from 0-6 Seconds (standard setting: 1.2 seconds)
- Certifications: ETL
Usage Features
Control Panel:
The control panel features a Vacuum Gauge to indicate pressure, an LED Display for current cycle time, and several indicator lights:
- "Cooling" Light: Illuminates when adjusting cooling time and during the cooling process.
- "Sealing" Light: Illuminates when adjusting seal time and during the sealing process.
- "Vacuum" Light: Illuminates when adjusting vacuum time and during the vacuum process.
- "Gas" Light: This unit does not have a gas flush option; this setting should be set to 0.0 seconds.
Adjusting Timing Controls:
- Set Button: Used to select and adjust vacuum or sealing time.
- Down & Up Arrow Buttons: Used to decrease/increase vacuum, sealing, or cooling time. Adjustments are made in small increments (e.g., 0.1 seconds for seal time) to prevent over-sealing or melting.
- Stop Button: Immediately stops the vacuum cycle and seals the bag. This is useful for fragile foods to prevent crushing.
Operational Notes:
- The lid lock should always be disengaged during operation and is only for storage.
- Filler plates can be used in the chamber to reduce vacuuming time by occupying space.
- The machine can accommodate pouches up to 16"x 16".
- Leave at least 2 inches of space between the item and the top of the pouch.
- For items with sharp objects (bones, stems), cover them with a folded paper towel to prevent punctures.
- Ensure the pouch lies flat across the seal bar without wrinkles and does not extend outside the chamber.
- Close the lid firmly for 3-4 seconds to start the vacuum cycle.
Food Storage Guidelines:
The manual provides a comprehensive table for typical and vacuum-sealed storage durations for various foods:
- Fresh Beef & Veal: 1-2 Weeks (typical) / 1 Month (vacuum fridge) / 1-3 Years (vacuum freezer)
- Ground Meat: 1-2 Weeks / 1 Month / 1 Year
- Fresh Pork: 1 Week / 2-4 Weeks / 2-3 Years
- Fresh Fish: 3-4 Days / 2 Weeks / 2 Years
- Fresh Poultry: 1 Week / 2-4 Weeks / 2-3 Years
- Smoked Meats: 2-4 Weeks / 6-12 Weeks / 3 Years
- Fresh Produce (Blanched): 1-2 Weeks / 2-4 Weeks / 2-3 Years
- Fresh Fruits: 3-4 Days / 2 Weeks / 2-3 Years
- Hard Cheeses: 2-4 Days / 6-12 Weeks / 6 Months
- Sliced Deli Meats: 1-2 Weeks / 6-12 Weeks / Not Recommended
- Fresh Pasta: 1 Week / 2-3 Weeks / 6 Months
Important Safety & Food Preparation:
- NEVER vacuum pack garlic, fungi (mushrooms), or soft cheese (Brie, Camembert, Ricotta), as a dangerous chemical reaction can occur.
- Vegetables should always be blanched (cooked until crispy, then submerged in cold water) to kill enzymes that cause out-gassing when vacuumed.
Maintenance Features
Oil Filling and Draining:
- Caution: The machine is shipped without oil. Running the pump without oil will cause damage.
- Ensure the oil level is past the fill line before starting.
- Only add oil through the designated oil port.
- Filling Oil: Use a screwdriver to open oil window #1, open the screw cap of the oil filling port, fill oil until it is 1/2-3/4 position (between MIN and MAX on the indicator), then screw the cap tightly and reinstall the cover.
- Draining Oil: Use a screwdriver to open oil window #2, place a container under the draining port, twist off the screw cap to drain, then screw the cap tightly and reinstall the cover.
- Ventilation: Always use the machine in a well-ventilated area, as inhaling gas expelled from the pump can be harmful.
Routine Cleaning:
- After each use or when dirty, remove the seal bar and wipe down the chamber, lid, and exterior with a damp cloth and mild soap.
- The seal bar should be wiped clean with a damp cloth only.
- Avoid: Acetone, acetone-based, or abrasive cleaners on the lid or plastic parts, as they can cause discoloration, scratches, or burns.
- Clean the stainless steel housing with traditional stainless steel cleaning material.
- Regularly inspect the power cord for tears, frays, or damage. Do not use the machine if the power cord is damaged.
Troubleshooting:
The manual provides solutions for common issues:
- Unit won't turn on: Check power cord, plug, power switch, and LED screen illumination.
- Not achieving a complete vacuum: Adjust vacuum time, ensure bag is properly placed across the seal bar without wrinkles, check seal quality (clear, not spotty/milky), and ensure sealer and bag are clean and dry.
- Bag loses vacuum after being sealed: Check for punctures from sharp items (cover with paper towel), and ensure fruits/vegetables are properly prepared (blanched/frozen) to prevent gas release.
- Pouch not sealed properly: Adjust seal time, ensure sealer and bag are clean and dry, and ensure bag is properly placed across the seal bar without wrinkles.
- Buttons not working: Unplug and re-plug the machine to reset programming.
Environmental Conditions:
- No flammable or explosive gas surrounding.
- Suitable temperature range: 41-105 Fahrenheit.
- Maintain a distance of 4 inches between the unit and walls for ventilation.
- Keep away from heat sources or steaming devices.
- Keep the machine on a flat, level surface.
- Maintain an upright position when moving to prevent pump damage.