4 Installation
66 Installation and maintenance instructions 0020244064_00
4.4 Minimum clearances
▶ Comply with the clearances that are shown in the plan.
▶ Ensure that the water-supply connections can be ac-
cessed for checks.
Leaving additional space around the product is helpful for the
installation and for maintenance work.
4.5 Clearance from combustible parts
▶ Ensure that no highly flammable parts come into contact
with the components as these may reach temperatures of
over 80°C.
▶ Ensure that there is a minimum clearance between the
highly flammable parts and the hot components.
– Minimum clearance: 200 mm
4.6 Observing the requirements for the
product's installation site
▶ Ensure that the room in which the product is installed is
not heated to the maximum recommended room temper-
ature.
– Recommended room temperature: 20 ℃
▶ Do not install the product above another unit that may
damage it (e.g. above a cooker that produces steam and
grease) or in a room with a high level of exposure to dust
or in a corrosive environment.
▶ Do not install the product below a unit from which liquids
may flow.
▶ Ensure that the room in which you want to set up the
product is sufficiently protected against frost.
4.7 Wall-mounting the product
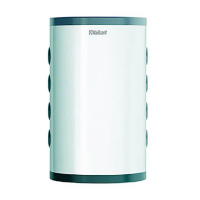
Applicability: VPS R 100/1 M
Caution.
Risk of injury caused by the product tip-
ping.
If the product is not properly secured to the
wall, you cannot rule out that the product will
tip.
▶ Use the four fixing points to secure the
product to the wall.
▶ Check how tight the nuts are. After tight-
ening them, the threaded pins must pro-
trude out of the nuts.
1. Ensure that the wall offers sufficient load-bearing capa-
city to bear the weight of the product when it has been
filled.
– Weight when filled with water: 135 kg
2. Check whether the supplied fixing accessories are suit-
able for the wall type.
3. Remove the fixing screws from the cylinder below the
pallet.
4. Secure the lower cover below the cylinder.
Conditions: The load-bearing capacity of the wall is sufficient; the fixing
material is permitted for the wall
▶ Attach the wall-fixing strips to the cylinder.
▶ Secure the cylinder to the wall.
Conditions: The load-bearing capacity of the wall is not sufficient
▶ Ensure that wall-mounting apparatus on-site has a suf-
ficient load-bearing capacity. Use individual stands or
primary walling, for example.
 Loading...
