EasyManua.ls Logo

VALBERG CYCLONIC S11 - User Manual

VALBERG CYCLONIC S11
50 pages
Go to English
Print Icon
To Next Page IconTo Next Page
Loading...
970392 - CYCLONIC S11
Aspirateur
Vacuum Cleaner
Stofzuiger
Aspirador
CONSIGNES D'UTILISATION ....................02
INSTRUCTIONS FOR USE ....................14
GEBRUIKSAANWIJZINGEN ....................24
INSTRUCCIONES DE USO ....................36
2/2
05/2021-01
FR
CONDITION DE GARANTIE
Ce produit est garanti pour une période de 2 ans à partir de la date d’achat*, contre
toute défaillance résultant d’un vice de fabrication ou de matériau. Cette garantie ne
couvre pas les vices ou les dommages résultant d’une mauvaise installation, d’une
utilisation incorrecte ou de l’usure anormale du produit.
*sur présentation du ticket de caisse.
EN
WARRANTY CONDITIONS
This product is guaranteed against faults caused by defects in manufacturing or the
materials used for a period of two years, starting from the date of purchase.* This
warranty does not cover defects or damage caused by failure to install the device
correctly, incorrect use of the product, or excessive wear and tear.
*proof of purchase required.
NL
GARANTIEVOORWAARDEN
Dit product wordt gegarandeerd voor een periode van 2 jaar vanaf de aankoopdatum*,
voor elke storing die het gevolg is van een fabricagefout of het materiaal. Gebreken of
schade door slechte installatie, onjuist gebruik of abnormale slijtage van het product
worden niet gedekt door deze garantie.
*op vertoon van kassabon.
ES
CONDICIONES DE GARANTÍA
El certificado de garantía de este producto tiene una duración de 2 años a partir de la
fecha de compra* que se limita a los defectos de fabricación y averías del material.
Se excluyen de la garantía deficiencias o daños originados por una mala instalación,
errores en la manipulación o por un uso inadecuado.
*previa presentación del comprobante de compra.
ELECTRO DEPOT
1 route de Vendeville
59155 FACHES-THUMESNIL - FRANCE
NOT OK OK
EN 50419 :2006 LOGO
Question and Answer IconNeed help?

Do you have a question about the VALBERG CYCLONIC S11 and is the answer not in the manual?

Overview

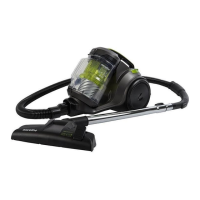
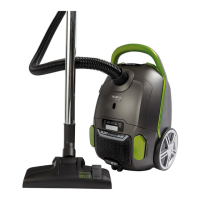
This document describes the VALBERG 970392 - CYCLONIC S11 vacuum cleaner, a versatile appliance designed for household use.

Function Description

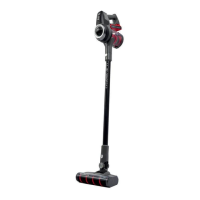
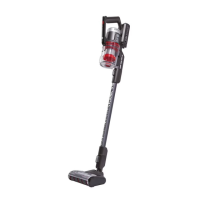
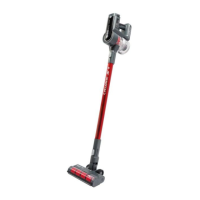
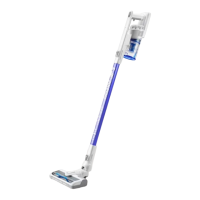
The VALBERG 970392 - CYCLONIC S11 is a cordless stick vacuum cleaner that can be used as a handheld vacuum or a stick vacuum. It is designed for general household cleaning tasks, including carpets, hard floors, furniture, and hard-to-reach areas. The vacuum features a dust cup for collecting debris and a HEPA filter system for efficient air filtration. It operates on a rechargeable battery, offering both low and high power suction modes.

Important Technical Specifications

  • Model: 970392 - CYCLONIC S11
  • Vacuum Power Output: 350 W max.
  • Dust Cup Capacity: 0.5 L
  • Suction Power: ≥85 W
  • Noise Level: <84 dB
  • Vacuum Pressure: ≥16 kPa
  • Rechargeable Battery: 2000 mAh (T-DC38P)
  • Operating Voltage: 220 V, 50 Hz
  • Protection Class: Class II
  • AC Adapter Model Identifier: ZD12D250060EU
    • Input Voltage: 100-240 V
    • Input AC Frequency: 50/60 Hz
    • Output Voltage: 25 V
    • Output Current: 0.6 A
    • Output Power: 15 W
    • Average Active Efficiency: 84.28 %
    • Efficiency at Low Load (10 %): 74.28 %
    • No-load Power Consumption: 0.10 W
  • Battery Charging Time: Approximately 5 hours
  • Battery Usage Times (fully charged):
    • Handheld Vacuum:
      • Low Power: 45 minutes
      • High Power: 10 minutes
    • Stick Vacuum:
      • Low Power: 30 minutes
      • High Power: 8 minutes

Usage Features

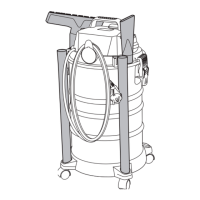
The vacuum cleaner is equipped with several components to facilitate various cleaning needs:

  • Dust cup release button (A): For easy emptying of the dust cup.
  • HEPA filter cover (B) and HEPA filter (S): Part of the filtration system.
  • High/low speed button (C): To switch between different suction power levels.
  • On/Off button (D): To power the vacuum on and off.
  • Battery LED indicator (E): Shows battery charging status (red for charging, green for fully charged).
  • Battery charging port (F): Where the charger plug is inserted.
  • Battery release button (G) and Battery (H): For removing and replacing the rechargeable battery.
  • Dust cup (I): Collects vacuumed debris.
  • Metal tube release button (J) and Metal tube (K): Connects the handheld unit to the floor brush.
  • Floor brush release button (L) and Floor brush (M): For cleaning various floor types.
  • Crevice tool (N): Ideal for hard-to-reach places.
  • Mini brush (O): For stubborn dirt on furniture, smooth floors, and carpets.
  • Wall mount (P), AC charger (Q), and Wall plugs and screws (R): For convenient storage and charging.

Assembly and Operation:

  1. Battery Charging: The battery must be charged before first use. Insert the charger plug into the battery charging port (F) and then into a mains socket. The battery can be charged while attached to or separated from the vacuum cleaner. The LED indicator (E) will be red during charging and turn green when fully charged.
  2. Filter Assembly: Attach the HEPA filter (S) to the filter cover (B) by rotating it clockwise towards the lock symbol. Slide the HEPA filter into the top of the handheld vacuum until it is firmly secured. Screw the central part of the filter into the dust cup (I) on the lower part of the filter system.
  3. Battery Insertion: Insert the charged battery (H) into the handheld vacuum until it clicks into place.
  4. Accessory Attachment: Attach the brush (M, O) or crevice tool (N) to the metal tube (K) until firmly secured. Alternatively, attach the metal tube to the handheld vacuum, or directly attach the brush or crevice tool to the handheld vacuum.
  5. Wall Mount Installation: Choose a suitable, dry, and clean location away from heat sources and direct sunlight. Ensure the wall can support the vacuum's weight. Mark drill holes approximately 83 cm above the floor for the floor brush to rest gently. Drill holes, insert wall plugs (R), and screw the wall mount (P) to the wall. Avoid piercing electrical cables or water pipes.
  6. Powering On/Off: Press the On/Off button (D) to turn on the vacuum. The LED indicator (E) will turn green. Press the High/low speed button (C) to switch between power settings. Press the On/Off button (D) again to turn off the vacuum.
  7. Disassembly: To detach the metal tube from the floor brush or handheld vacuum, press the appropriate release button (J or L) and pull the components apart. The mini brush or crevice tool can be removed by twisting and pulling.

Maintenance Features

Regular cleaning and maintenance are crucial for optimal performance and longevity of the vacuum cleaner.

General Cleaning:

  • Always turn off and unplug the unit from the power supply before cleaning.
  • Never immerse the unit in water or any other liquid.
  • Detach all accessories from the main unit.
  • Clean the unit with a soft, slightly damp cloth, ensuring no liquid enters the unit.
  • Do not use abrasive products, metal brushes, scourers, wire sponges, or sharp utensils.
  • Dry the unit thoroughly after cleaning.

Cleaning the Dust Cup and Filters:

  • Empty the dust cup (I) after each use or when it reaches the MAX mark.
  • To empty the dust cup, detach its base.
  • To remove the dust cup, press the red dust cup release button (12-1) and turn it anticlockwise towards the unlock symbol (12-2).
  • Clean the filters and central part of the filter whenever they are full, if there is a loss of suction, or on a quarterly basis.
  • To detach the HEPA filter cover (B) from the handheld vacuum, use its handle (13-1).
  • Unscrew and remove the lower part of the filter system (13-2). Wipe the dust cup, cover, and central part of the filter with a dry cloth.
  • To separate the HEPA filter (S) from the filter cover (B), turn it anticlockwise towards the unlock symbol (14-1).
  • Clean the HEPA filter with water and allow it to dry naturally and thoroughly before reuse (14-2).
  • Only use dry, intact filters to prevent damage.
  • Reassemble all parts in reverse order after cleaning.

Cleaning the Floor Brush:

  • Regularly remove hair, fur, and debris from the floor brush (M) to maintain optimal performance.
  • To unlock the clip securing the right side of the brush, press the brush release button (15-1) towards the unlocked symbol.
  • Pull the right side of the brush, then slide the left side off the pin that holds it in place (15-2).
  • If the brush is very dirty, wash it with water and let it dry completely.

Cleaning Accessories:

  • Detach the metal tube from the accessories or the handheld vacuum.
  • Remove any obstructions and wash with water.
  • Dry thoroughly before using or storing.

Troubleshooting:

The manual provides solutions for common issues:

  • Unit not working: Fully charge the battery, check charger connection, press power button. If issues persist, consult a qualified technician. Empty the dust cup if full.
  • Weak suction/motor vibration: Remove blockages from the nozzle, clean or replace the filter.
  • Short operating time after charging: Fully charge the battery as indicated in the charging section. If the battery is old, ask a qualified technician to install a new one.
  • Brush not spinning: Cut tangled threads with scissors. Remove and clean the brush, ensuring it spins smoothly upon reassembly.

Storage:

  • Always unplug the unit before storing.
  • Store in a fresh, dry, and clean place, out of reach of children and pets.
  • Retain the original packaging for storage during extended periods of non-use.

VALBERG CYCLONIC S11 Specifications

General IconGeneral
BrandVALBERG
ModelCYCLONIC S11
CategoryVacuum Cleaner
LanguageEnglish

Related product manuals