English – Installation Instructions
Attention: This device shall only be connected to power supplies compliant
to EN60950-1, chapter 2.5 ("limited power source").
Risk of damage to the device
Use the device only indoors and in dry environments.
Do not expose it to dripping or splashing water.
Do not let the contact areas of the board get dusty and do not touch
them with your bare hands.
EC Declaration of Conformity
Hereby, Vanderbilt International (IRL) Ltd declares that this radio equipment type is
in compliance with all relevant EU Directives for CE marking. From 20/04/2016 it is
in compliance with Directive 2014/30/EU (Electromagnetic Compatibility Directive)
and Directive 2014/35/EU (Low Voltage Directive). From 13/06/2016 it is also in
compliance with Directive 2014/53/EU (Radio Equipment Directive).
The full text of the EU declaration of conformity is available at:
http://pcd.vanderbiltindustries.com/doc/SPC
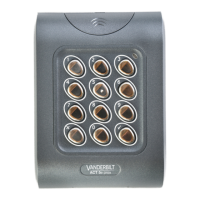
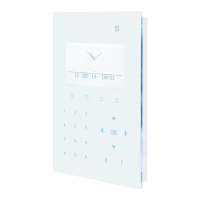
Product Description
The slim and elegant SPCK520 and SPCK521 Compact Keypads are designed
with ease of operation in mind. Both keypads are equipped with capacitive touch
keys and voice annunciation support.
The SPCK521 Compact Keypad comes with proximity detection for two card
technologies (EM4102 and Mifare).
Two optional flush mount products, SPCY520 and SPCY521, enable the keypads
to be recessed into the wall.
An optional SiWay RF-Module (SPCW114) is available which provides a wireless
interface (868 MHz) for SiWay detectors.
Opening the Keypad
1. Loosen the screw at the bottom of the keypad by a couple of turns (Fig. 1, item
1).
2. Using a screwdriver, push the clips to disengage the front cover (Fig. 1, item
2).
3. Lift the cover no higher than about 1 cm to avoid breaking the restraining lugs
and then pull the cover gently down and away from the unit (Fig. 2).
Fig. 3: Keypad Front Cover - Underside
Rotary switches for manually setting X-BUS address
Connector socket for plugin wireless module (refer to the
SPCW101/110/111/112/114 Installation Instructions)
Fig. 4: Keypad Base
Securing lugs for mounting keypad front cover
Cable entry breakout (top)
Cable entry breakout (base)
Mounting screw holes for tamper plate
Front cover securing screw
Opening clips for front cover
Connector socket (for connector header on keypad front cover)
Mounting the Base
To maximise visibility of the touch keys, mount the keypad away from direct
sunlight.
Ensure that the unit is mounted on surfaces that are sufficiently rigid.
Standard Mounting
1. Mark 4 holes on the wall for the fixing screws aligned to the fixing holes on the
four corners of the keypad base.
2. Drill the holes and screw the base of the unit into the wall.
Socket Mounting
There are a number of screw holes for mounting the keypad on various European
outlet sockets.
Flush Mounting
Refer to the SPCY520 Installation Instructions for details of how to flush mount the
keypad.
For back tamper protection, use the two fixing holes in the breakout plate
(Fig. 4, item 6).
Connecting Cables
1. Insert the cable through one of the cable entry holes (Fig. 5, item 1 or Fig. 5,
item 2).
2. Ensure that the cables are securely threaded through the cable channels. If
necessary, use micro cable ties through the cable anchor points (Fig. 5, item
3).
3. Connect the individual wires to the push wire terminals (Fig. 5, 6, 7).
Fig. 7: Push Wire Terminals
Closing the Keypad
1. Hook the top of the front cover into the securing lugs of the keypad base (Fig.
4, item 1) and press downward.
2. Press firmly to ensure that the two clips on the base engage fully with the
corresponding recesses in the front cover.
3. Tighten the screw at the bottom of the unit.
Keypad Setup
When you apply power to the compact keypad, the keypad enters into an
initialization mode to calibrate the capacitive touch keys. This initialization mode
lasts about 30 seconds.
Do not touch the keypad keys during the initialization mode.
The keypad is delivered with a protective film printed with alphabetical characters
to facilitate initial system setup. This film can be removed after the system has
been configured.
Refer to the SPCK520/SPCK521 User Guide for details of how to adjust the
brightness of the keypad screen and numerical characters.
Wiring the X-BUS Interface
The X-BUS interface connects expanders and keypads to the SPC controller. The
X-BUS can be wired in a number of different configurations depending on the
installation requirements.
Maximum system cable length = number of expanders and keypads in the
system X maximum distance for cable type.
UTP category: 5 (solid core)
Fig. 8 shows the wiring of X-BUS devices in spur configuration. If using a spur
configuration, the last device is not wired back to the controller.
Fig. 8: Wiring X-BUS Devices
Refer to the SPC4xxx/5xxx/6xxx Installation & Configuration Manual of the
connected controller for further wiring instructions, specifications, and limitations.
X-BUS Addressing
Refer to the SPC4xxx/5xxx/6xxx Installation & Configuration Manual of the
connected controller for addressing, reconfiguration, device location, monitoring,
editing of names, X-BUS type of communication, and failure timer.
Technical Data
128 x 64 pixels (approx. 6 x 20 characters)
SPCK520: Max. 210 mA at 12V DC
SPCK521: Max. 210 mA at 12V DC
SPCK520: Max. 55 mA at 12V DC
SPCK521: Max. 95 mA at 12V DC
X-BUS on RS-485 (307 kb/s)
Supported card
technologies
SPCK521:
(EM 4102 and Mifare)
Supported via integrated speaker
Max. 90 % (non-condensing)
 Loading...