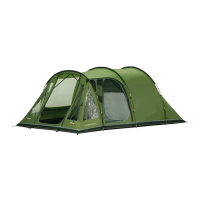
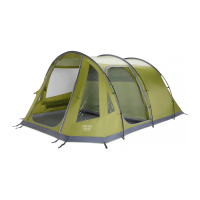
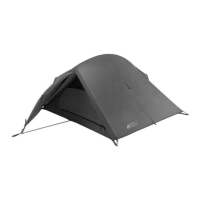
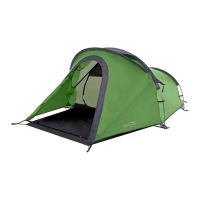
TENT PITCHING INSTRUCTIONS – ICARUS 500/600 (UK)
FLYSHEET FIRST PITCHING:
• Assemble poles and lay them on the ground
• Open out flysheet and position in required direction
• Insert all poles through the pole sleeves on outside of fly sheet
• Poles are colour coded to match corresponding pole sleeve entry points
• Locate one end of each pole at one side of the tent into the metal pin
system attached to the groundsheet
• Make sure poles locate into correct pin system, all poles follow corresponding
flysheet seams to pin system
• Push poles into an arch from opposite ends and locate pole ends into
corresponding metal pin
• Tighten all the tensions straps at the base of the poles.
• Attach all flysheet pole clips onto poles
• Securely peg out the rear corners of the tent
• Pull the tent forward until taut and peg out the main corners at the other end
of the tent using the V pegs
• “Walk” flysheet forward, away from pegged points, until tent takes shape
• Pull the tent until the groundsheet is taut and peg out the main corners at the
other end of the tent
• Ensure the tent is in a straight line
• Peg out the remaining poles and pegging points using pin pegs at the base
of poles
• The groundsheet should be flat and wrinkle free
• Peg out ALL guy lines using pin-pegs ensuring that guy line fabric attachment points are evenly tensioned.
INNER ATTACHMENT:
• Open out inner tent inside flysheet and position doorways to correspond with the living area
• Suspend the inner by attaching toggles of inner tent through rings on inside of flysheet
• The inner attachments are colour coded to match the clips on the roof of the flysheet
• Do the rear first and work forward
• In humid or very wet weather the underside of the flysheet may become laden with condensation
TENSION BAND SYSTEM:
• Remove Tension Band System from pockets and attach into the corresponding clips at the apex of the
pole
• Adjust the straps until they are taut
• DO NOT OVERTENSION. Excess tension will alter the shape of the tent
• Tension bands are designed to stabilise the tunnel structure of the tent
• The bands are not required to be used in calm weather
RING & PIN SYSTEM:
• Locate one end of pole onto the corresponding metal pin (figure 1)
• Peg the corners of the tent through the metal rings using pin-pegs (figure 2)
• Pegs should be positioned at a 45 degree angle to ensure maximum grip
………………………………………………………………………………………………………………………………………………………………………………………………………......