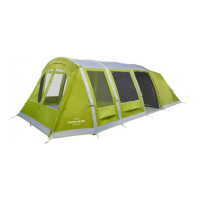
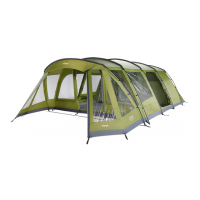
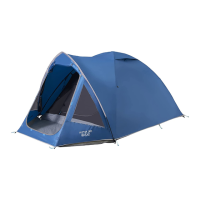
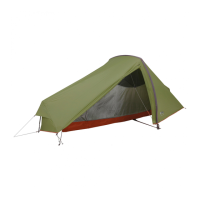
TENT PITCHING INSTRUCTIONS – MARNA (UK)
Flysheet First Pitching
Assemble poles and lay them on the ground
Open out flysheet and position in required direction
Insert all poles through the pole sleeves on outside of flysheet
Poles are colour coded to match corresponding pole sleeve entry points
Locate one end of each pole at one side of the tent into the metal pin system attached to the groundsheet
Make sure poles locate into correct pin system, all poles follow corresponding flysheet seams to pin system
Push poles into an arch from opposite ends and locate pole ends into corresponding metal pin
Tighten all the tensions straps at the base of the poles.
Stand the completed rear pole uprightso that it can stand unaided using the tension from the rear panel. (Stand pole completely vertical then
move the ends of the pole back approx. 30cm)
Repeat this process for the remaining poles
“Walk” flysheet forward, away from pegged points, until tent takes shape
Pull the tent until the groundsheet is taut and peg out the main corners at the other end of the tent
Ensure the tent is in a straight line
Peg out the remaining poles and pegging points using pin pegs at the base of poles
Attach all flysheet pole clips onto poles
The groundsheet should be flat and wrinkle free
Peg out ALL guy lines using pin-pegs ensuring that guy line fabric attachment points are evenly tensioned.
Inner Attachment:
Open out inner tent inside flysheet and position doorways to correspond with the living area
Suspend the inner by attaching toggles of inner tent through rings on inside of flysheet
The inner attachments are colour coded to match the clips on the roof of the flysheet
Do the rear first and work forward
It is advisable to remove the inner when taking down the tent when wet.
Ring & Pin System:
Locate one end of pole onto the corresponding metal pin (figure 1)
Peg the corners of the tent through the metal rings using pin-pegs (figure 2)
Pegs should be positioned at a 45 degree angle to ensure maximum grip
Aufbauanleitung - MARNA (DE)
Mit Außenzeltaufbau zuerst
Stecken Sie die Stangen zusammen und legen Sie sie auf den Boden
Außenzelt auslegen und korrekt ausrichten.
Stecken Sie alle Stangen durch die Gestängekanäle an der Außenseite des Außenzelts ein.
Die Stangen sind farbcodiert und farblich auf die zugehörigen Gestängekanaleingangspunkte abgestimmt.
Befestigen Sie ein Ende jeder Stange auf einer Seite des Zelts in dem an der Bodenplane befestigte Metallstiftsystem.
Achten Sie darauf, dass die Stangen in das korrekte Stift-System eingesteckt werden; alle Stangen verlaufen an den zugehörigen
Außenzeltnähten entlang zum Stift-System.
Schieben Sie die Stangen von den gegenüberliegenden Seiten in eine gewölbte Form und stecken Sie die Stangenenden in die zugehörigen
Metallstifte ein.
Alle Spanngurte unten an den Stangen fest anziehen.
Stellen Sie die komplette hintere Stange aufrecht hin, so dass sie ohne Hilfe durch die Spannung der Rückwand stehen kann. (Stellen Sie die
Stange ganz vertikal auf, ziehen Sie dann die Enden der Stange ca. 30cm nach hinten)
Wiederholen Sie dies mit den übriggebliebenen Stangen
Mit dem Außenzelt vorwärts "gehen", weg von den Verankerungspunkten, bis das Zelt Gestalt annimmt.
Zelt ziehen, bis die Bodenplane straff ist, und die Hauptecken auf der anderen Seite des Zelts mit Heringen feststecken.
Achten Sie darauf, dass sich das Zelt in einer geraden Linie ausgerichtet befindet.
Übrige Stangen und Verankerungspunkte mithilfe der Stiftheringe unten an den Stangen fixieren.
Befestigen Sie alle Außenzelt-Halterungsklemmen an den Stangen.
Die Bodenplane sollte glatt und knitterfrei sein.
Stecken Sie ALLE Spannschnüre mit den Arretierstiften aus und stellen Sie sicher, dass die Befestigungspunkte der Spannschnüre am Gewebe
gleichmäßig unter Spannung sind.
Innenbefestigung:
Legen Sie die Innenzelte im Außenzelt aus und richten Sie die Eingänge so aus, dass sie in den Wohnbereich führen.
Die Aufhängung des Innenzelts erfolgt, indem die Knebel des Innenzelts durch die auf der Innenseite des Außenzelts befindlichen Ringe gesteckt
werden.
Die Innenhalterungen sind farbcodiert und farblich auf die auf dem Dach des Außenzelts befindlichen Klemmen abgestimmt.
Beginnen Sie hinten und arbeiten Sie sich nach vorn.
Es ist ratsam, das Innenzelt zu lösen, wenn Sie das Zelt bei Nässe abbauen.
Ring-und-Stift-System:
Fixieren Sie ein Ende der Vorbaustange am dazu passenden Metallstift
Stecken Sie die Ecken des Zelts durch die Metallringe, indem Sie die Arretierstifte benutzen.
Die Heringe sollten in einem Winkel von 45 Grad platziert werden, um maximalen Halt zu erzielen.