3
TABLE DES MATIÈRES
AVANT DE DÉBUTER
A. Outils requis . . . . . . . . . . . . . . . . . . . . . . . . . . . . . . . . . . . . . . . . . . . . . . . . . . . .4
B. Matériel requis . . . . . . . . . . . . . . . . . . . . . . . . . . . . . . . . . . . . . . . . . . . . . . . . . .4
C. Vérification des produits . . . . . . . . . . . . . . . . . . . . . . . . . . . . . . . . . . . . . . . . . .4
D. Manipulation des miroirs et pharmacies . . . . . . . . . . . . . . . . . . . . . . . . . . . .4
E. Électricité et plomberie . . . . . . . . . . . . . . . . . . . . . . . . . . . . . . . . . . . . . . . . . . .5
F. Hauteur du mobilier et des barres de soutien . . . . . . . . . . . . . . . . . . . . . . . .6
É
TAPES D’INSTALLATION
1a. Préparation des murs . . . . . . . . . . . . . . . . . . . . . . . . . . . . . . . . . . . . . . . . . . .6
1b. Pharmacie : Fixation de la barre de soutien en Z . . . . . . . . . . . . . . . . . . . .7
2. Dégager l’accès électrique de la pharmacie principale . . . . . . . . . . . . . . .7
3. Installation de la pharmacie principale . . . . . . . . . . . . . . . . . . . . . . . . . . . .7
4. Installation de la pharmacie prolongée s’il y a lieu . . . . . . . . . . . . . . . . . .7
5. Meuble-lavabo - barre galavanisée en L . . . . . . . . . . . . . . . . . . . . . . . . . . .8
6. Enlever le tiroir du meuble-lavabo . . . . . . . . . . . . . . . . . . . . . . . . . . . . . . . .8
7. Installation du meuble-lavabo et de la lingerie . . . . . . . . . . . . . . . . . . . . .8
8. Installation du comptoir . . . . . . . . . . . . . . . . . . . . . . . . . . . . . . . . . . . . . . . .8
9. Dosseret avec robinet . . . . . . . . . . . . . . . . . . . . . . . . . . . . . . . . . . . . . . . . . . .9
10. Soutien en contreplaqué pour le dosseret . . . . . . . . . . . . . . . . . . . . . . . . . .9
11. Installation du dosseret avec robinet mural . . . . . . . . . . . . . . . . . . . . . . . .9
12. Tablette décorative . . . . . . . . . . . . . . . . . . . . . . . . . . . . . . . . . . . . . . . . . . . . .9
13. Éclairage d’ambiance . . . . . . . . . . . . . . . . . . . . . . . . . . . . . . . . . . . . . . . . . .10
14. Installation de la tablette . . . . . . . . . . . . . . . . . . . . . . . . . . . . . . . . . . . . . .10
15. Réinstaller le ou les tiroir(s) . . . . . . . . . . . . . . . . . . . . . . . . . . . . . . . . . . . .10
16. Installation de la barre à serviette . . . . . . . . . . . . . . . . . . . . . . . . . . . . . . .10
17. Installation du lavabo . . . . . . . . . . . . . . . . . . . . . . . . . . . . . . . . . . . . . . . . .11
18. Installation du robinet mural MIX 28 . . . . . . . . . . . . . . . . . . . . . . . . . . . . .11
19. Installation du robinet mural FLO ou AXI . . . . . . . . . . . . . . . . . . . . . . . . .11
20. Application du silicone . . . . . . . . . . . . . . . . . . . . . . . . . . . . . . . . . . . . . . . . .11
E
NTRETIEN . . . . . . . . . . . . . . . . . . . . . . . . . . . . . . . . . . . . . . . . . . . . . . . . . . . . . . . . . . . . . .13
GARANTIE . . . . . . . . . . . . . . . . . . . . . . . . . . . . . . . . . . . . . . . . . . . . . . . . . . . . . . . . . . . .14, 15
CONTENTS
BEFORE YOU START
A. Required tools . . . . . . . . . . . . . . . . . . . . . . . . . . . . . . . . . . . . . . . . . . . . . . . . . . . . . .4
B. Required material . . . . . . . . . . . . . . . . . . . . . . . . . . . . . . . . . . . . . . . . . . . . . . . . . .4
C. Product inspection . . . . . . . . . . . . . . . . . . . . . . . . . . . . . . . . . . . . . . . . . . . . . . . . . .4
D. Handling of medicine cabinets and mirrors . . . . . . . . . . . . . . . . . . . . . . . . . . . . .4
E. Electricity & plumbing . . . . . . . . . . . . . . . . . . . . . . . . . . . . . . . . . . . . . . . . . . . . . . .5
F. Height: furniture and support bracket . . . . . . . . . . . . . . . . . . . . . . . . . . . . . . . . .6
I
NSTALLATION STEPS
1a Wall preparation . . . . . . . . . . . . . . . . . . . . . . . . . . . . . . . . . . . . . . . . . . . . . . . . . .6
1b. Medicine cabinet: Fasten the Z-shape support bracket . . . . . . . . . . . . . . . . . .7
2. Releasing the electric access of the medicine cabinet . . . . . . . . . . . . . . . . . . .7
3. Installing main medicine cabinet . . . . . . . . . . . . . . . . . . . . . . . . . . . . . . . . . . . .7
4. Installing extended medicine cabinet if applicable . . . . . . . . . . . . . . . . . . . . .7
5. Vanity : installing L-shaped support bracket . . . . . . . . . . . . . . . . . . . . . . . . . .8
6. Removing the sink base drawer . . . . . . . . . . . . . . . . . . . . . . . . . . . . . . . . . . . . .8
7. Installing the sink base and the linen cabinet . . . . . . . . . . . . . . . . . . . . . . . . .8
8. Installing the countertop . . . . . . . . . . . . . . . . . . . . . . . . . . . . . . . . . . . . . . . . . . .8
9 Backsplash: preparation for backsplash with faucet . . . . . . . . . . . . . . . . . . . .9
10. Installing the support bracket for the backsplash . . . . . . . . . . . . . . . . . . . . . .9
11. Installing the backsplash with wall mount faucet . . . . . . . . . . . . . . . . . . . . . .9
12. Shelf: Installing wall brackets for decorative shelf . . . . . . . . . . . . . . . . . . . . . .9
13. Installing the under shelf LED mood lighting (optional) . . . . . . . . . . . . . . . .10
14. Shelf installation . . . . . . . . . . . . . . . . . . . . . . . . . . . . . . . . . . . . . . . . . . . . . . . . .10
15. Reinstall drawer(s) . . . . . . . . . . . . . . . . . . . . . . . . . . . . . . . . . . . . . . . . . . . . . . .10
16. Towel bar installation . . . . . . . . . . . . . . . . . . . . . . . . . . . . . . . . . . . . . . . . . . . . .10
17. Sink installation . . . . . . . . . . . . . . . . . . . . . . . . . . . . . . . . . . . . . . . . . . . . . . . . .11
18. Installing Mix 28 wall mount faucet . . . . . . . . . . . . . . . . . . . . . . . . . . . . . . . .11
19. Installing FLO 175 or AXI 175 wall mount faucet . . . . . . . . . . . . . . . . . . . . . .11
20. Application of silicone sealant . . . . . . . . . . . . . . . . . . . . . . . . . . . . . . . . . . . . .11
M
AINTENANCE . . . . . . . . . . . . . . . . . . . . . . . . . . . . . . . . . . . . . . . . . . . . . . . . . . . . . . . . . . . . . .13
WARRANTY . . . . . . . . . . . . . . . . . . . . . . . . . . . . . . . . . . . . . . . . . . . . . . . . . . . . . . . . . . . . .14, 15
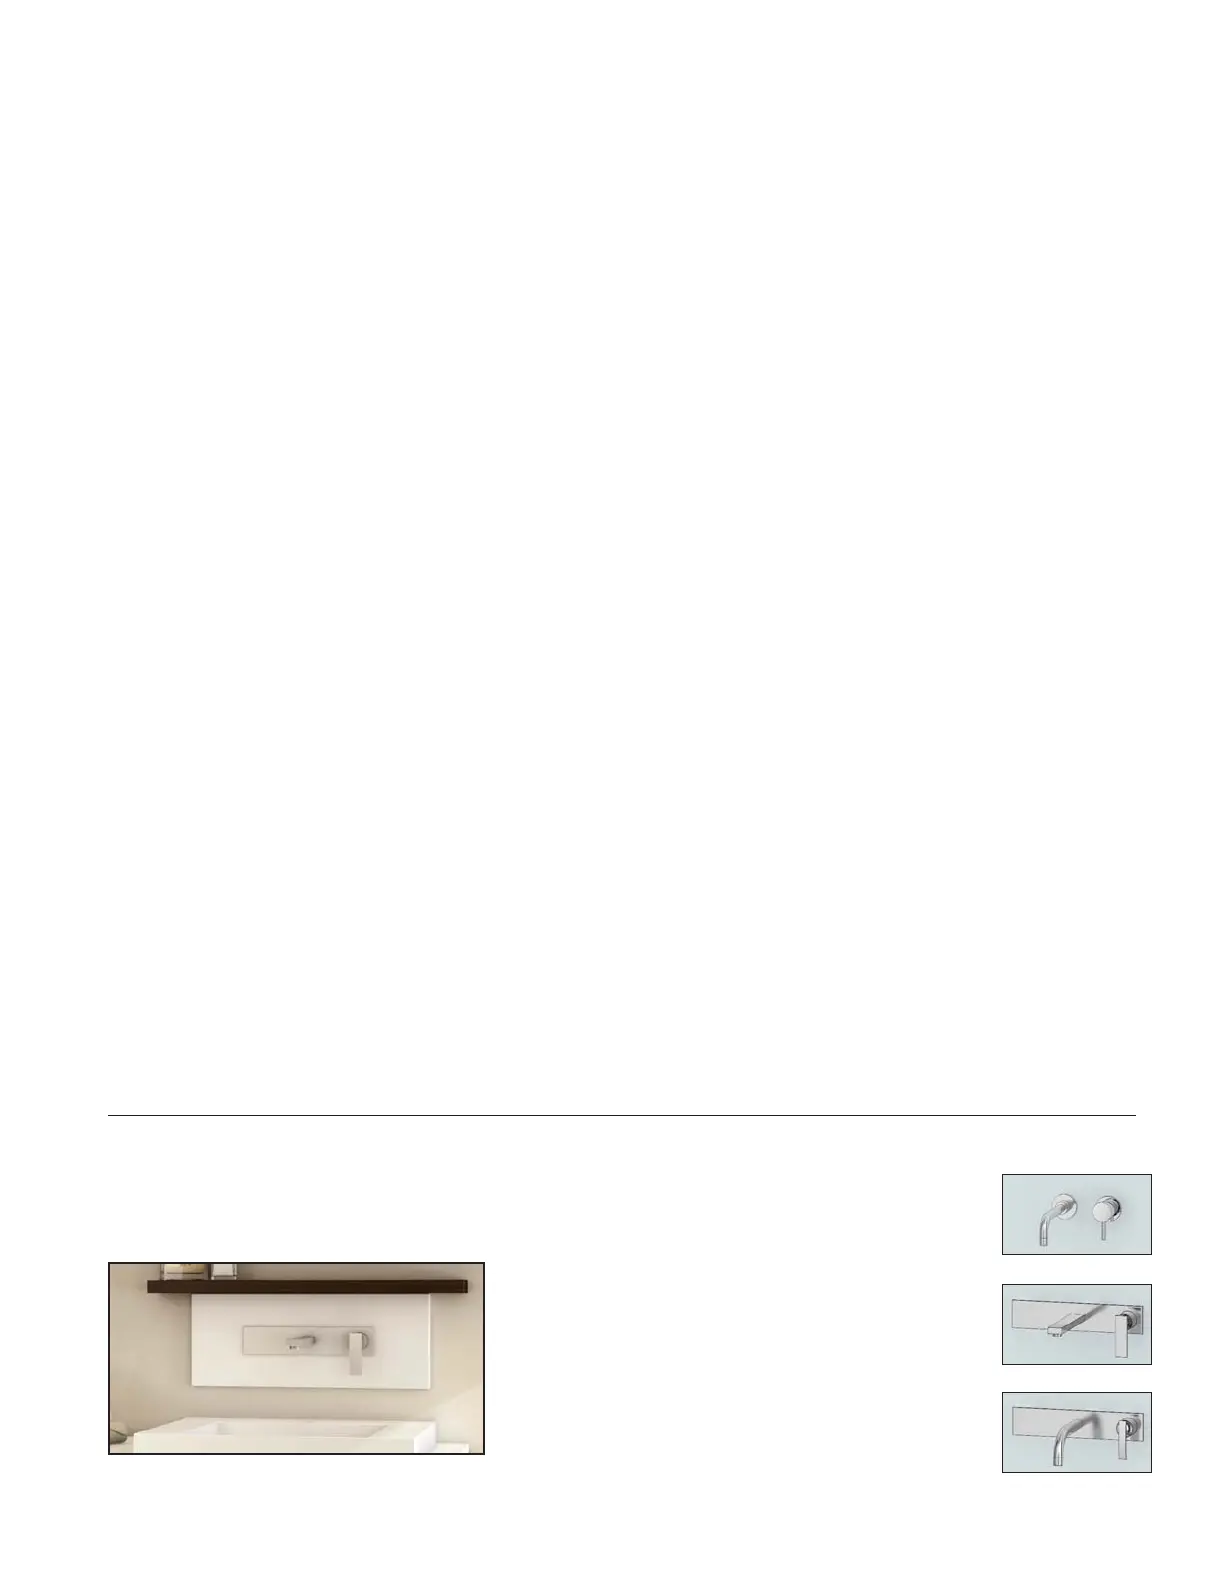
FLO
AXI
MIX
OPTION
DOSSERET (9” H) ET ROBINET VANICO-MARONYX PRÉ-INSTALLÉ
9”H BACKSPLASH WITH VANICOMARONYX PREINSTALLED
FAUCET
ROBINETS
• CHOIX DE 3 MODÈLES CERTIFIÉS CSA : FLO, AXI ET MIX.
• CHROME POLI OU NICKEL BROSSÉ.
•DRAIN À BOUTON POUSSOIR INCLUS.
• A
VEC AÉRATEUR LAMINAR ANTI-ÉCLABOUSSURES ET 2
FLEXIBLES DE 30”.
FAUCETS
•C
HOICE OF 3 CSA CERTIFIED MODELS : FLO, AXI AND MIX.
•POLISHED CHROME OR BRUSHED NICKEL.
•POP-UP DRAIN INCLUDED.
•WITH LAMINAR ANTI-SPLASH AERATOR AND TWO 30”
FLEXIBLES FOR EASY HOOK UP.