6
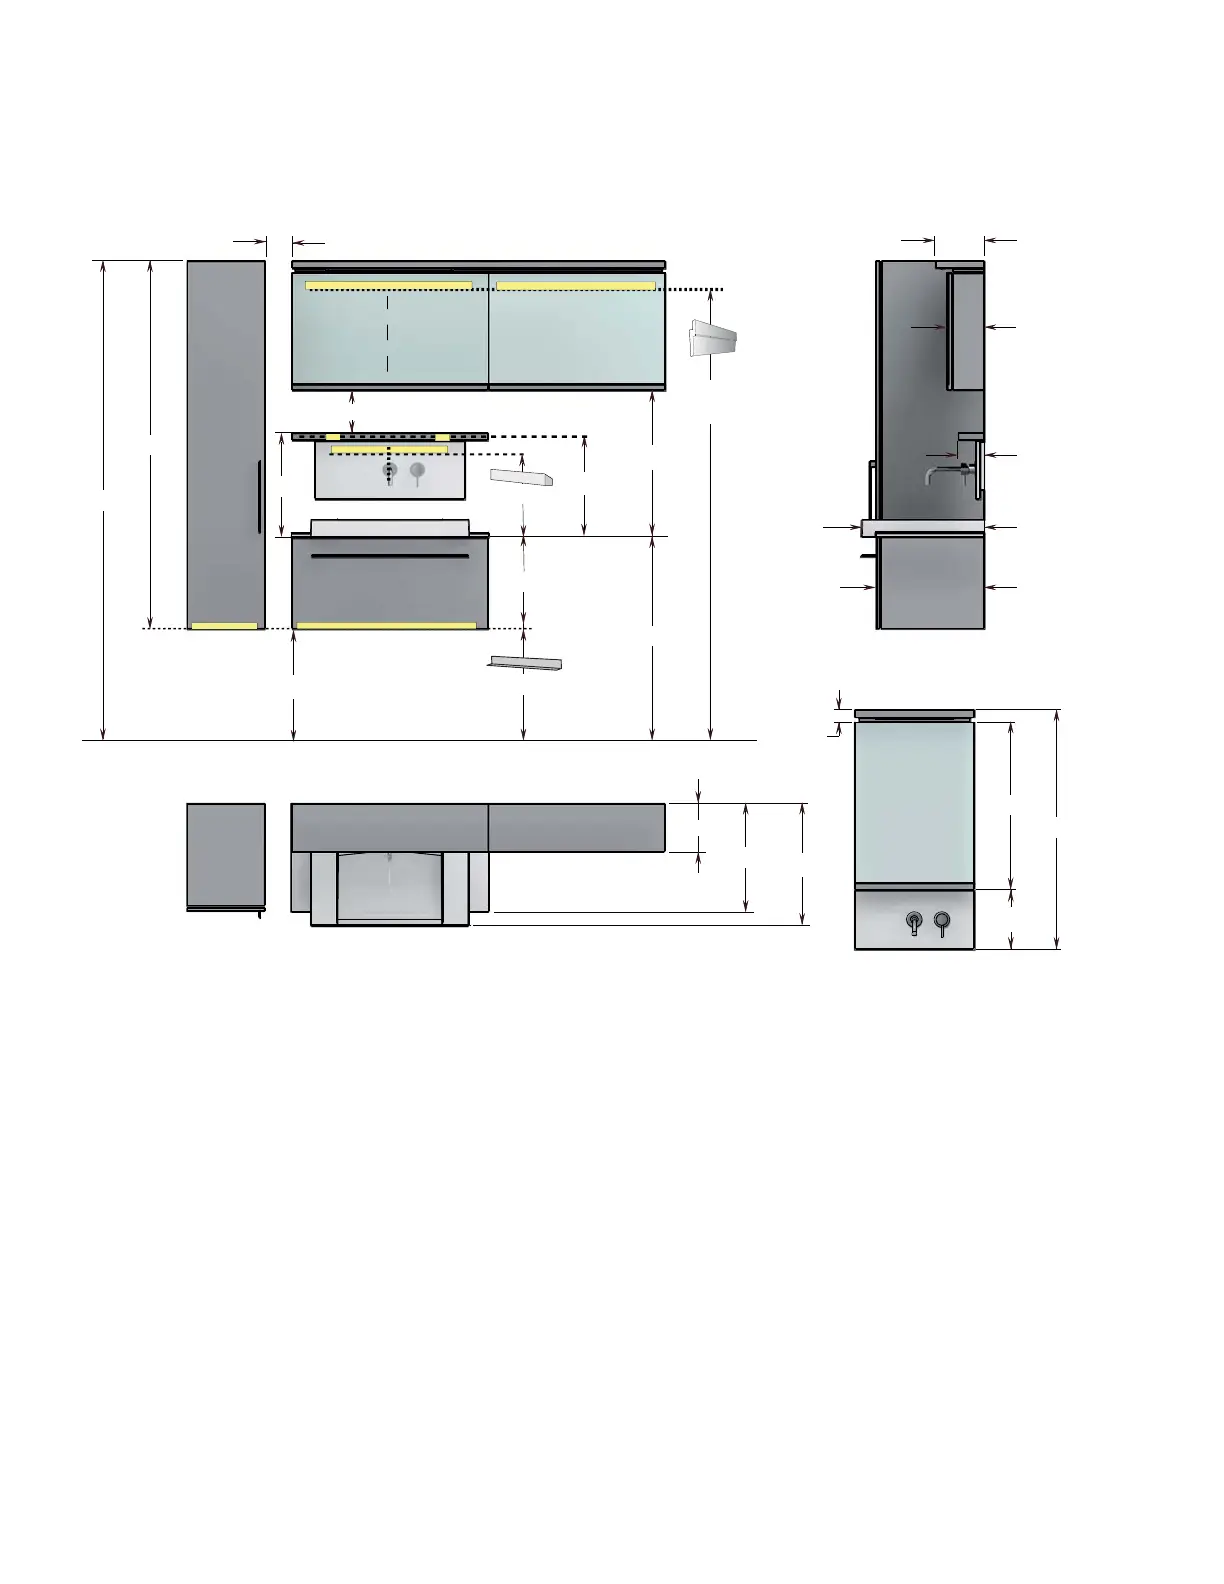
F. HAUTEUR DU MOBILIER ET
DES BARRES DE SOUTIEN
F. HEIGHT : FURNITURE AND
SUPPORT BRACKET
1a. PRÉPARATION DES MURS 1a. WALL PREPARATION
En vous servant des dimensions mentionnées sur le bon de
livraison Vanico-Maronyx, PRÉ-MARQUEZ AU MUR L’EM-
PLACEMENT EXACT DE VOTRE NOUVEL AGENCEMENT, en
laissant l’espace désiré à partir du mur latéral et le début de
votre agencement. Indiquez également le centre de votre
lavabo.
DÉTECTEZ LES EMPRISES (2” X 4”) vis-à-vis les modules qui
composent l’agencement acheté (meuble-lavabo, pharmacie
et lingerie s’il y a lieu). S’il n’y a pas d’emprise der-
rière le mobilier, ouvrez le mur et ajoutez des
morceaux de 2” X 4” ou de plywood ½ po minimum
pour assurer un support mural suffisant.
Using the dimensions on the Vanico-Maronyx packing slip, PRE-
MARK ON THE WALL THE EXACT LOCATION OF THE
ARRANGEMENT, leaving the desired space from the lateral wall
to where the leading edge of your furniture is to be located. Also
indicate the center of the sink.
LOCATE THE STUDS (2” X 4”) where the modules will be placed
(vanity, medicine cabinet and/or linen cabinet, if applicable). If
there are no studs behind the furniture, open the wall and add few
pieces of 2” X 4” studs or minimum ½ inch plywood to
ensure a sufficient support.