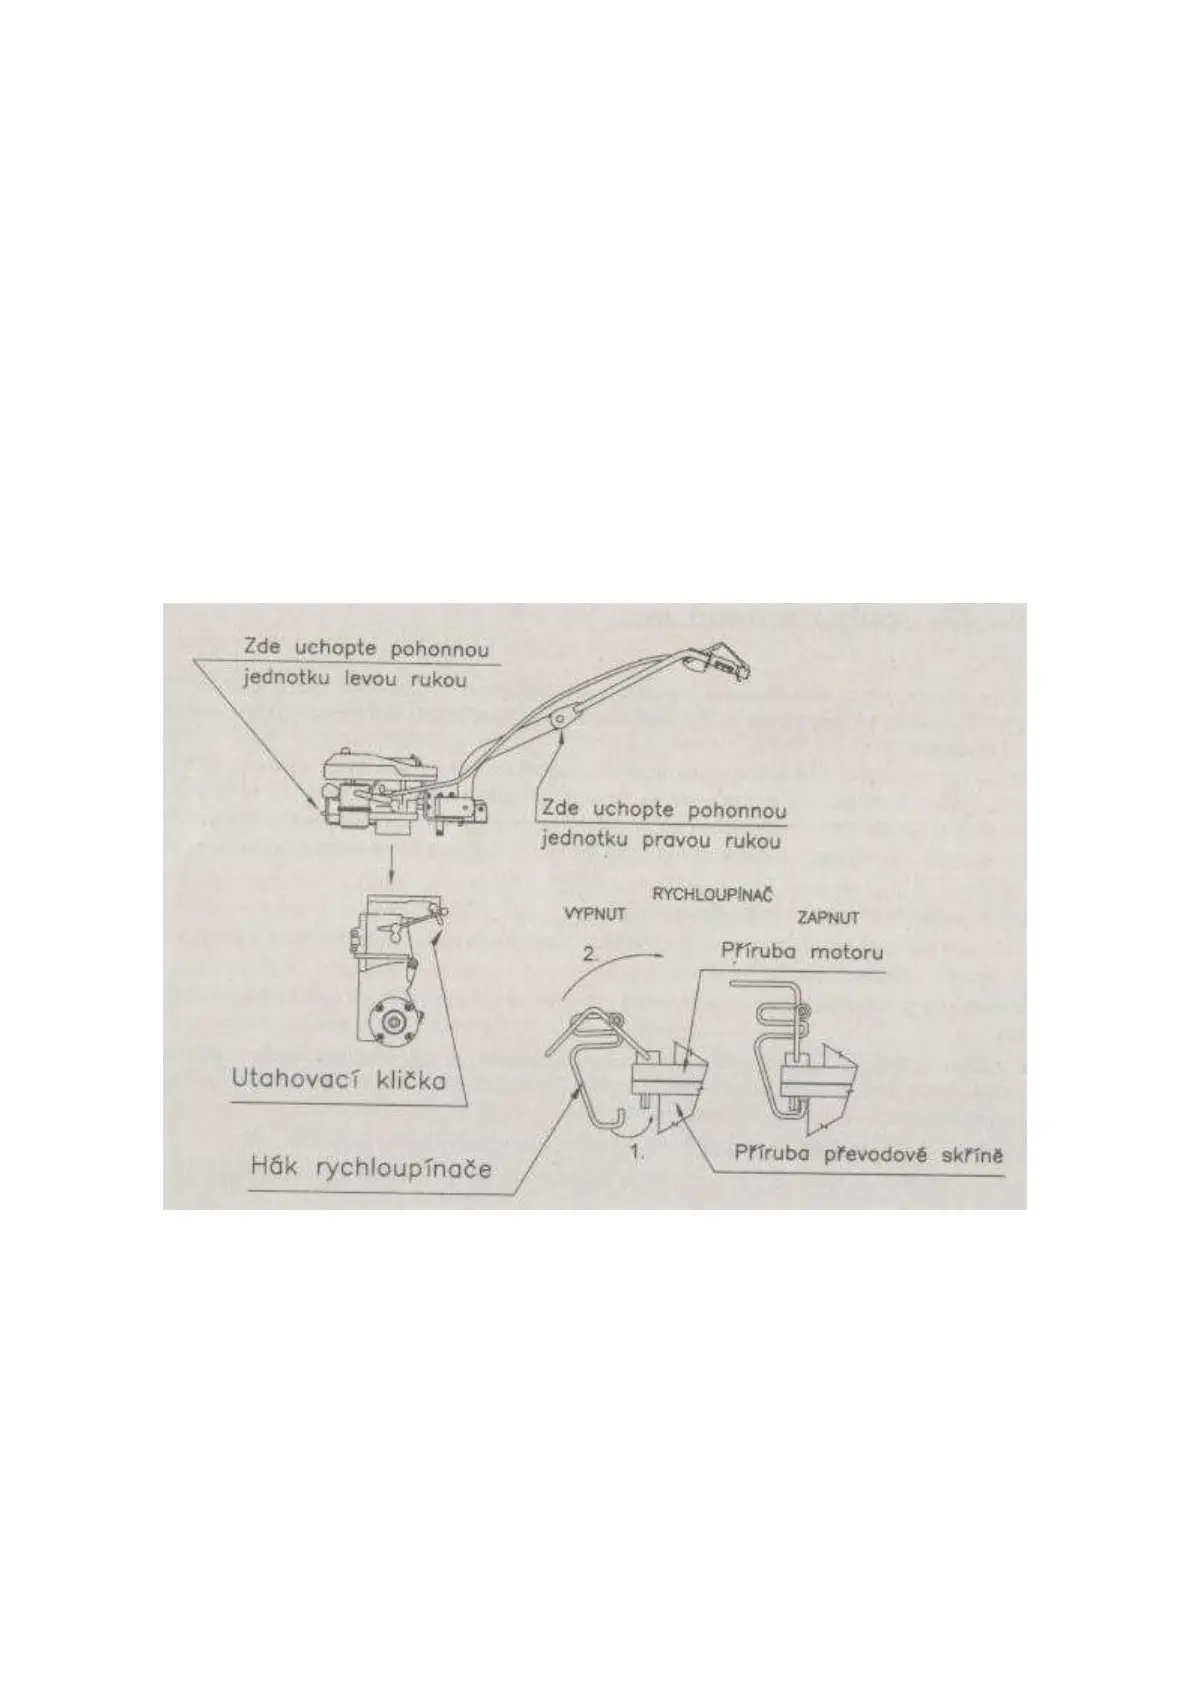
6. Put the drive unit on the gearbox so that the cylindrical part of engine flange falls into the gearbox flange and the
pivot on the holder of handlebar rails falls into the hole in the console on the gearbox.
7. Move the drive unit slightly to and fro until it fully sits on the gearbox.
8. Then secure the drive unit by means of two clips of quick-operating clamps. Pawls on the clips of quick-operating
clamps are to be hooked on pins in lugs on the gearbox flange. Lock the quick-operating clamps by pulling on the
eye of the clip towards the engine case surface.
9. Finally, tight the tightening crank which secures the pivot on the holder of guide handlebars in the gearbox.
Removal of the drive unit is made as a reverse procedure. Loosen the clips of quick-operating clamps by disengaging
the quick-operating clamp so that you take a hold of the clip eye from below and pull it upwards. Pawl of the clip is to
be taken out from the pin and the quick-operating clamp should be pushed aside so that it does not stand in the way to
the removal of the drive unit from the gearbox.
Be careful when engaging the quick-operating clamps. Your fingers might be injured. Clips have a high tension
and engagement of them requires force.
Be careful at removing the drive unit and its displacement onto another machine since the exhaust silencer is hot
while in operation.
During the removal or installation the machine should be approached from the left side, i.e. from the side of air
cleaner and carburetter on the drive unit engine.
Figure 4: Procedure of drive unit installation
Hold the drive unit at this place with your left hand Zde uchopte pohonnou jednotku levou rukou
Tightening crank Utahovací klička
Hook of the quick-operating clamp Hák rychloupínače
Hold the drive unit at this place with your right hand Zde uchopte pohonnou jednotku pravou rukou
Quick-operating clamp – disengaged – engaged Rychloupínač – vypnut – zapnut
Engine flange Příruba motoru
Gearbox flange Příruba převodové skříně