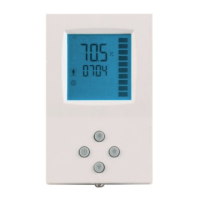
TLC-BCR-T Engineering Manual
Doc: 70-00-0083, Date: 20081219 © 2008 Vector Controls Ltd. Page 2
Technical Specification
Power Supply Operating Voltage 190 – 250 V AC 50/60 Hz
Power Consumption Max 1W, 1.5 VA
Electrical Connection Terminal Connectors
Fuse 3A, 250VAC (Warranty void if replaced)
Deluxe type only:
Power backup for real time clock
Min 48h if charged for 24h
Signal Inputs Temperature Inputs
Range
Resolution
Accuracy
RT Internal, external
-40°C…70°C (-40°F to 158°F)
0.1°C (0.1°F)
0.5°C (1°F)
Signal Outputs Digital Switching Outputs
Switching type
AC Switching power
DO1…DO2
Relays
2(1.2) A, 250VAC (max fan power 300W)
Environment Operation
Climatic Conditions
Temperature
Humidity
To IEC 721-3-3
class 3 K5
0°C …50°C (32°F…122°F)
<95% R.H. non-condensing
Transport & Storage
Climatic Conditions
Temperature
Humidity
Mechanical Conditions
To IEC 721-3-2 and IEC 721-3-1
class 3 K3 and class 1 K3
-25°C…0°C (-13°F…158°F)
<95% R.H. non-condensing
class 2M2
Standards
conform according to
EMC Standard 89/336/EEC
EMEI Standard 73/23/EEC
EN 61 000-6-1/ EN 61 000-6-3
Product standards
Automatic electrical controls for
household and similar use
Special requirement on
temperature dependent controls
EN 60 730 –1
EN 60 730 – 2 - 9
Degree of Protection IP30 to EN 60 529
Safety Class II (IEC 60536)
General Dimensions (H x W x D) Front part: 21 x 88 x 88mm (0.8 x 3.5 x 3.5 in.)
Power case: 60 x 50 x 30mm (2.4 x 2.0 x 1.2 in.)
Weight (including package) 260g
Mechanical Design and Installation
The unit consists of three parts:
1. The mounting plate made of galvanized steel.
2. The power case made of fire proof ABS plastic.
3. The front part made of white fire proof ABS plastic.
Installation
1. Arrange the wires to be connected and cut them to equal length.
2. Connect them to the terminals of the power case according to wiring diagram
3. Clip the power case to the mounting plate, pull the connection cable through the large central opening of the
mounting plate. Insert the power case into the flush mounting box. Carefully arrange power wires.
4. Install the mounting plate to the flush mounting box. Make sure that the nipple with the front holding screw is
facing to the ground. Make sure the screw heads do not stand out more than 5 mm of the surface of the
mounting plate.
5. Connect the connection cable to the plug located on the back of the front part.
6. Slide the two latches located on the top of the front part into the hooks of the mounting plate.
7. Lower the front part until located flat on the wall and the mounting plate is not visible anymore. Make sure
the connection cable does not get into the way.
8. Tighten the front holding screw to secure the front part to the mounting plate.
Mounting location
• On an easy accessible interior wall, approx. 1.5 m above the floor in an area of average temperature.
• Avoid direct sunlight or other heat sources, e.g. the area above radiators and heat emitting electrical
equipment.
• Avoid locations behind doors, outside walls and below or above air discharge grills and diffusers.
• Location of mounting is less critical if external temperature sensors are used.