Installation Guide Probe Troubleshooting
32
Probe Troubleshooting
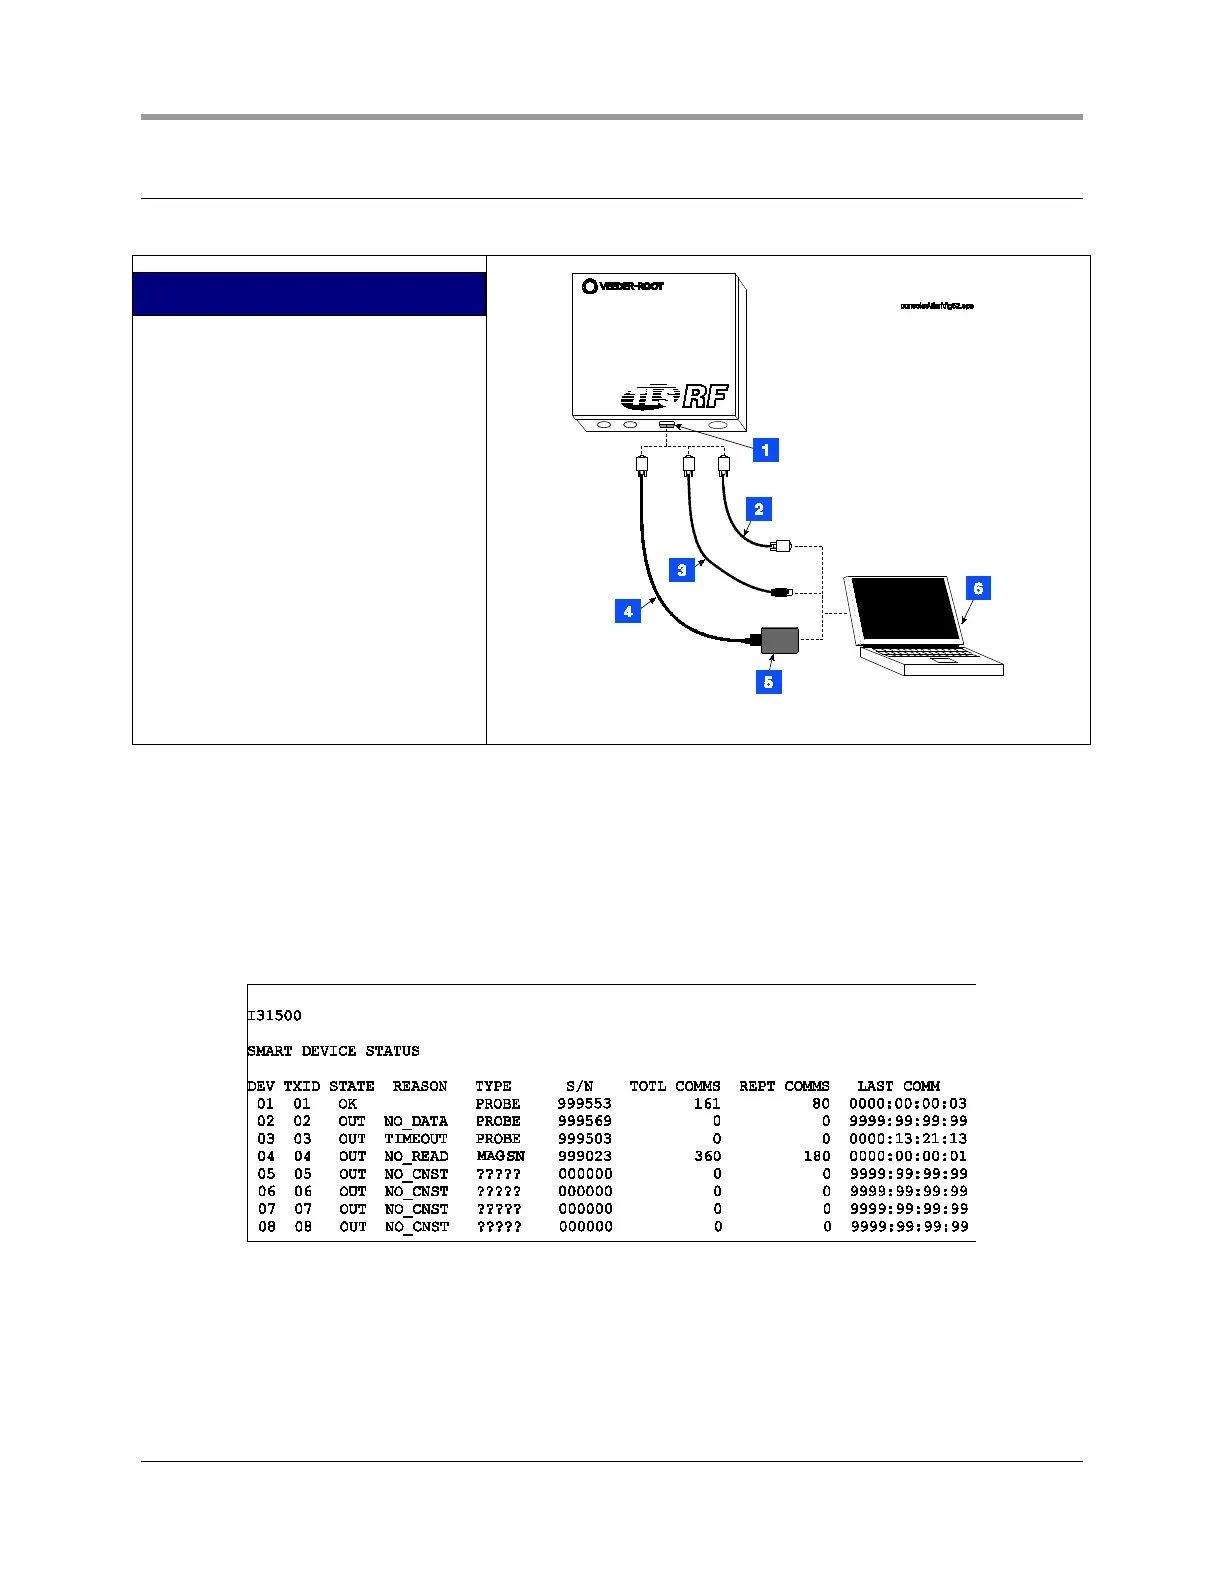
1. Attach your laptop to the TLS RF’s RS-232 serial port (see Figure 27).
LEGEND FOR NUMBERED BOXES IN
FIGURE 27
1. RS-232 (DB9 female)
2. Standard RS-232 cable (customer
supplied)
3. USB to DB9 serial cable (customer
supplied)
4. PCMCIA to serial cable (customer
supplied)
5. PCMCIA card (customer supplied)
6. Laptop with a serial communications
program, such as HyperTerminal
(customer supplied).
Figure 27. Laptop to TLS RF Wireless Interface Unit example connections
Open a serial communications program, such as HyperTerminal (available in Windows under
Start\Programs\Accessories\Communications). Set the comm port settings to: 9600 Baud, 8 data bits, no
parity, 1 stop bit.
2. Perform the following steps on a PC with the HyperTerminal application program running. TLS
commands are case sensitive and use a Control-A to identify the start of a command. Enter a Control-A
by holding the Ctrl key down while pressing the A key, then release the Ctrl key. Next, type in the
command, I31500 and click on the SEND button. An example of the 315 command response in a site
with 8 transmitters is shown below.
NOTE: MAG SN = Mag Sump Sensor
DEV column
The TLS RF supports 8 devices (Mag probes or Mag Sump sensors), numbered 01 thru 08. The device
number corresponds to its I.S. data-out terminal wiring position on the TLS RF unit.
 Loading...