EasyManua.ls Logo

Veethree 70888 R3 - User Manual

Default Icon
2 pages
Print Icon
To Next Page IconTo Next Page
Loading...
70888 R3Page 1 of 2
FRONT PROGRAMMABLE
ELECTRONIC SPEEDOMETER
The following are instructions for installing, wiring and programming the Veethree Front Programmable Electronic Speed-
ometer.
CAUTION
READ THESE INSTRUCTIONS THOROUGHLY BEFORE PROCEEDING, DO NOT DEVIATE FROM WIRING IN-
STRUCTIONS. INCORRECT WIRING COULD CAUSE ELECTRICAL SHORT AND POSSIBLE FIRE. ALWAYS DIS-
CONNECT BATTERY BEFORE MAKING ANY ELECTRICAL CONNECTIONS.
PREPARATION FOR INSTALLATION
1) Select a mounting location for gauge which providers easy readability from the operating position. Check behind
mounting panel for su󰀩cient installation clearance.
2) Cut 3 13/32 inch (87mm) hole for the gauge.
3) Insert gauge into mounting hole and check for proper t.
4) Use “U” bracket over the mounting studs on back of gauge. Trim bracket length as necessary for proper mounting.
5) Temporarily remove gauge and bracket from panel.
IMPORTANT
BEFORE PROCEEDING WITH FINAL INSTALLATION AND WIRING, SPEEDOMETER MUST BE PROGRAMMED TO
OPERATE WITH YOUR EQUIPMENT. REFER TO THE CALIBRATION SECTION OF THESE INSTRUCTIONS.
Available Calibration Procedures -
Three alternatives can be used to calibrate the speedometer, AUTOCAL, PULSES and ADJUST.
(1) Auto Calibration (AUTOCAL) - Automatic calibration by driving a measured distance of 1 Mile or 1 Kilometer de-
pending on model of speedometer.
(2) Manual Calibration With a Known Value (PULSE) - By inputting a known Pulses Per Mile (or Kilometer) Ratio.
(3) Manual Calibration (Fine Tuning) (ADJUST) - For calibration using a reference speed indication.
VIEW OF BACK OF INSTRUMENT
(+) SWITCHED
BATTERY
(POWER)
(-) BATTERY
(GROUND)
SIGNAL
(+) POWER
FOR LAMP AND
LCD BACK LIGHT
Question and Answer IconNeed help?

Do you have a question about the Veethree 70888 R3 and is the answer not in the manual?

Summary

Electronic Speedometer Installation and Calibration

Installation Preparation Steps

Steps for selecting a location, cutting a hole, fitting, and temporarily mounting the gauge.

Pre-Installation Programming Requirement

Speedometer needs programming before final installation; refer to calibration section.

Calibration Method Overview

Introduces AUTOCAL, PULSE, and ADJUST methods for speedometer calibration.

Detailed Calibration Procedures

Choosing the Calibration Mode

How to select a calibration mode by pressing and holding the button on the front lens.

AUTOCAL Calibration

Automatic calibration procedure by driving a measured distance.

PULSE Calibration

Manual calibration by inputting a known Pulses Per Mile (or Kilometer) Ratio.

ADJUST Calibration

Fine-tuning calibration using a reference speed indication for pointer adjustment.

Overview

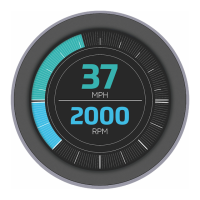
The Veethree Front Programmable Electronic Speedometer is a sophisticated instrument designed for accurate speed measurement and display in various equipment. This device offers a range of features for installation, wiring, and user-friendly calibration, ensuring optimal performance and adaptability to different operational requirements.

Function Description:

The primary function of this device is to measure and display speed electronically. It is a "front programmable" speedometer, meaning its calibration and settings can be adjusted from the front of the unit, simplifying setup and fine-tuning. The speedometer integrates an LCD display for various readouts, including calibration modes and settings, and likely features a pointer for analog speed indication. It is designed to be highly adaptable, supporting multiple calibration methods to suit different sensor inputs and measurement needs.

Important Technical Specifications:

  • Mounting Hole Size: The required mounting hole for the gauge is 3 13/32 inches (87mm). This standard size ensures compatibility with a wide range of dashboards and mounting panels.
  • Power Input: The device requires a switched battery power source for its main operation, indicated as "(+) SWITCHED BATTERY (POWER)". Additionally, it has a separate power input for the lamp and LCD backlight, labeled "(+) POWER FOR LAMP AND LCD BACK LIGHT", suggesting independent control or circuitry for illumination.
  • Ground Connection: A dedicated ground connection, "(-) BATTERY (GROUND)", is essential for proper electrical operation and safety.
  • Signal Input: The speedometer receives its speed signal via a dedicated "SIGNAL" terminal, which connects to the speed sensor of the equipment.
  • Programming Interface: The device features a push button on the front lens, which serves as the primary interface for selecting calibration modes and adjusting settings. This single-button interface simplifies user interaction.

Usage Features:

  • Easy Installation: The installation process involves cutting a standard 87mm hole, inserting the gauge, and securing it with a "U" bracket. The instructions emphasize checking for sufficient clearance behind the mounting panel.
  • Front Programmability: A key feature is its front programmability, allowing users to calibrate the speedometer without needing to access the rear of the unit after initial installation. This is particularly useful for in-situ adjustments.
  • Multiple Calibration Procedures: The speedometer offers three distinct calibration methods to accommodate various user preferences and system configurations:
    • Auto Calibration (AUTOCAL): This method provides automatic calibration by driving a measured distance (1 Mile or 1 Kilometer, depending on the model). The user initiates the process at the start of the track and confirms at the end, and the speedometer automatically calculates the pulse per mile/kilometer ratio. This is ideal for quick and accurate setup when a known distance can be driven.
    • Manual Calibration With a Known Value (PULSE): This procedure allows for manual input of a known Pulses Per Mile (or Kilometer) Ratio. Users can enter a six-digit pulse ratio directly using the front button, making it suitable for systems where the sensor's pulse output is precisely known.
    • Manual Calibration (Fine Tuning) (ADJUST): This method is designed for fine-tuning the speedometer using a reference speed indication. Users can incrementally adjust the pointer's position (UP or DN) to match an external speed reference, providing precise calibration for specific operational needs.
  • User-Friendly Interface: The calibration process is guided by clear LCD readouts (e.g., "AUTOCL", "PULSE", "Adjust", "button", "SEArt", "UP", "dn") and a simple push-button interaction, making it accessible even for users without extensive technical expertise.
  • Error Indication: The device provides feedback during calibration, such as "F 00" if no speed signal is detected during AUTOCAL, helping users troubleshoot wiring issues.

Maintenance Features:

  • Pre-Installation Programming: The manual strongly recommends programming the speedometer before final installation and wiring. This allows for initial setup and testing in a more accessible environment, reducing potential complications during final assembly.
  • Safety Precautions: The instructions highlight critical safety measures, including disconnecting the battery before making any electrical connections and avoiding deviations from wiring instructions to prevent electrical shorts or fire.
  • Troubleshooting Guidance: The manual offers basic troubleshooting advice, such as checking speed sensor wiring if calibration fails, which aids in diagnosing common issues.
  • Data Saving: Once settings are accurate, the device automatically saves the calibration data, ensuring that the settings persist across power cycles. If adjustments are needed, the procedure can be repeated.

Veethree 70888 R3 Specifications

General IconGeneral
BrandVeethree
Model70888 R3
CategoryMarine Equipment
LanguageEnglish

Related product manuals