INSTALLATION
This heater should be installed by a competent person. i.e. a qualified electrician.
Always disconnect the heater from the electricity supply and allow it to cool before
installation.
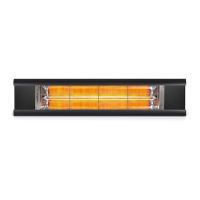
This heater can be mounted in a horizontal or vertical manner.
For both wall and ceiling mounting, the lowest part of the heater must be located at or
above a minimum height of 1.8m from ground level, so that the heater can not be
touched when in operation.
When mounting horizontally or to a ceiling, do not position the heater at an angle more
than 90° and less than 45° as shown in Fig. A and B.
The supply cable must be at the lower end of the heater if the heater is installed at an
angle or vertically.
Keep the supply cord away from the body of the heater which will get hot during use.
Do not install the heater on an inflammable surface.
Observe the minimum safe distance between the heater body and inflammable surfaces
when mounting.
The heater should always have a minimum clearance of 0.5m from a ceiling and adjacent
walls.
If the heater is to be used outside, a weatherproof outlet is recommended.
Before drilling ensure that there are no wires or water pipes in the area where the heater
is to be installed.
The heater must be installed on the mounting brackets provided.
Fasten the brackets securely to the mounting surface and the backside of the heater
using the nuts and screws supplied.
Fasten the heater securely on the brackets using the nuts and bolts supplied.
The brackets can be used to adjust the direction of the heater. Adjust the heater angle
by loosening the two bolts on the wall mounting bracket. Tighten the bolts again when
the desired angle is reached.
9