Installation the radio
Mounting the unit
Important! If any modification to the vessel is required, such as drilling holes, Velex
recommends that you consult with your boat dealer or manufacturer beforehand.
1.Create mounting hole for product and drill screw pilot holes. Refer to mounting
template included.
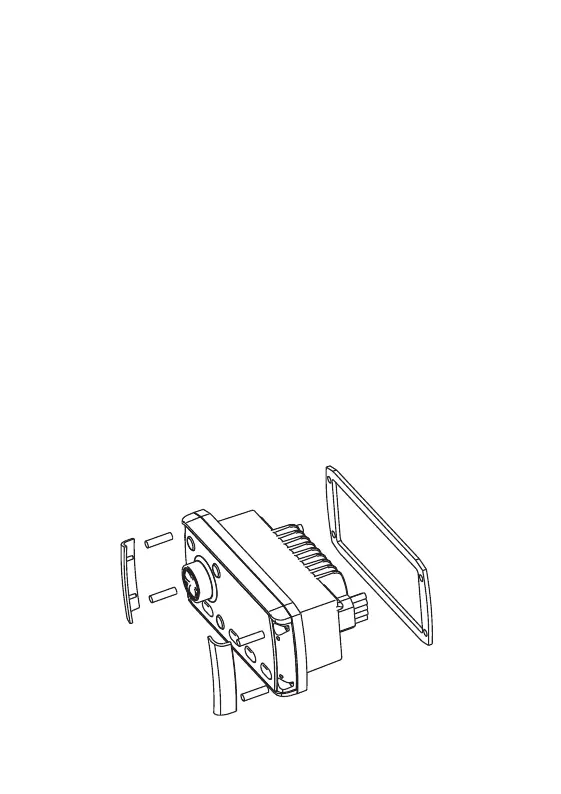
2.Fit mounting gasket.
3.Insert the unit into the mounting hole.
4.Use the supplied 4 x self tapping screws, to fix the unit into position.
5.Attach screw covers.
Note: Appropriate mounting is very important to ensure correct operation. Select a
location that allows both free/ open airflow around rear of chassis, whilst minimizing
exposure to moisture. Allow adequate room at the rear of the unit for the cable
looms (approx. 50mm or 2”)
The heatsink must not be mounted on more than a 45 degree angle from the
horizontal plain. Failure to following restrictions could void your warranty.
Figure 1 – Locating the VX565D unit into the mounting panel