DVM890L GB 6
Note :
1) The overrange indication ("1") will be displayed if the resistance value being measured exceeds
the maximum value of the selected range. Consequently, you should select a higher range. It may
take the meter a few seconds to become stable when measuring a resistance of approximately 1
MΩ and more. This is normal for high resistance readings.
2) When the input is not connected, i.e. when the circuit is open, the figure " 1 " will be displayed
for the overrange condition.
3) When checking in-circuit resistance, verify whether the circuit being tested is not connected and
whether all capacitors are fully discharged.
4) The open circuit voltage for the 200MΩ range is 3V. Upon shorting the test leads, the display
will show 10 digits. This is normal when encountering a 10MΩ resistance value (for the 200MΩ
range). When measuring 100MΩ (for the 200M range), the display reading will be 110. The 10
digits are a constant and should be subtracted from the readings.
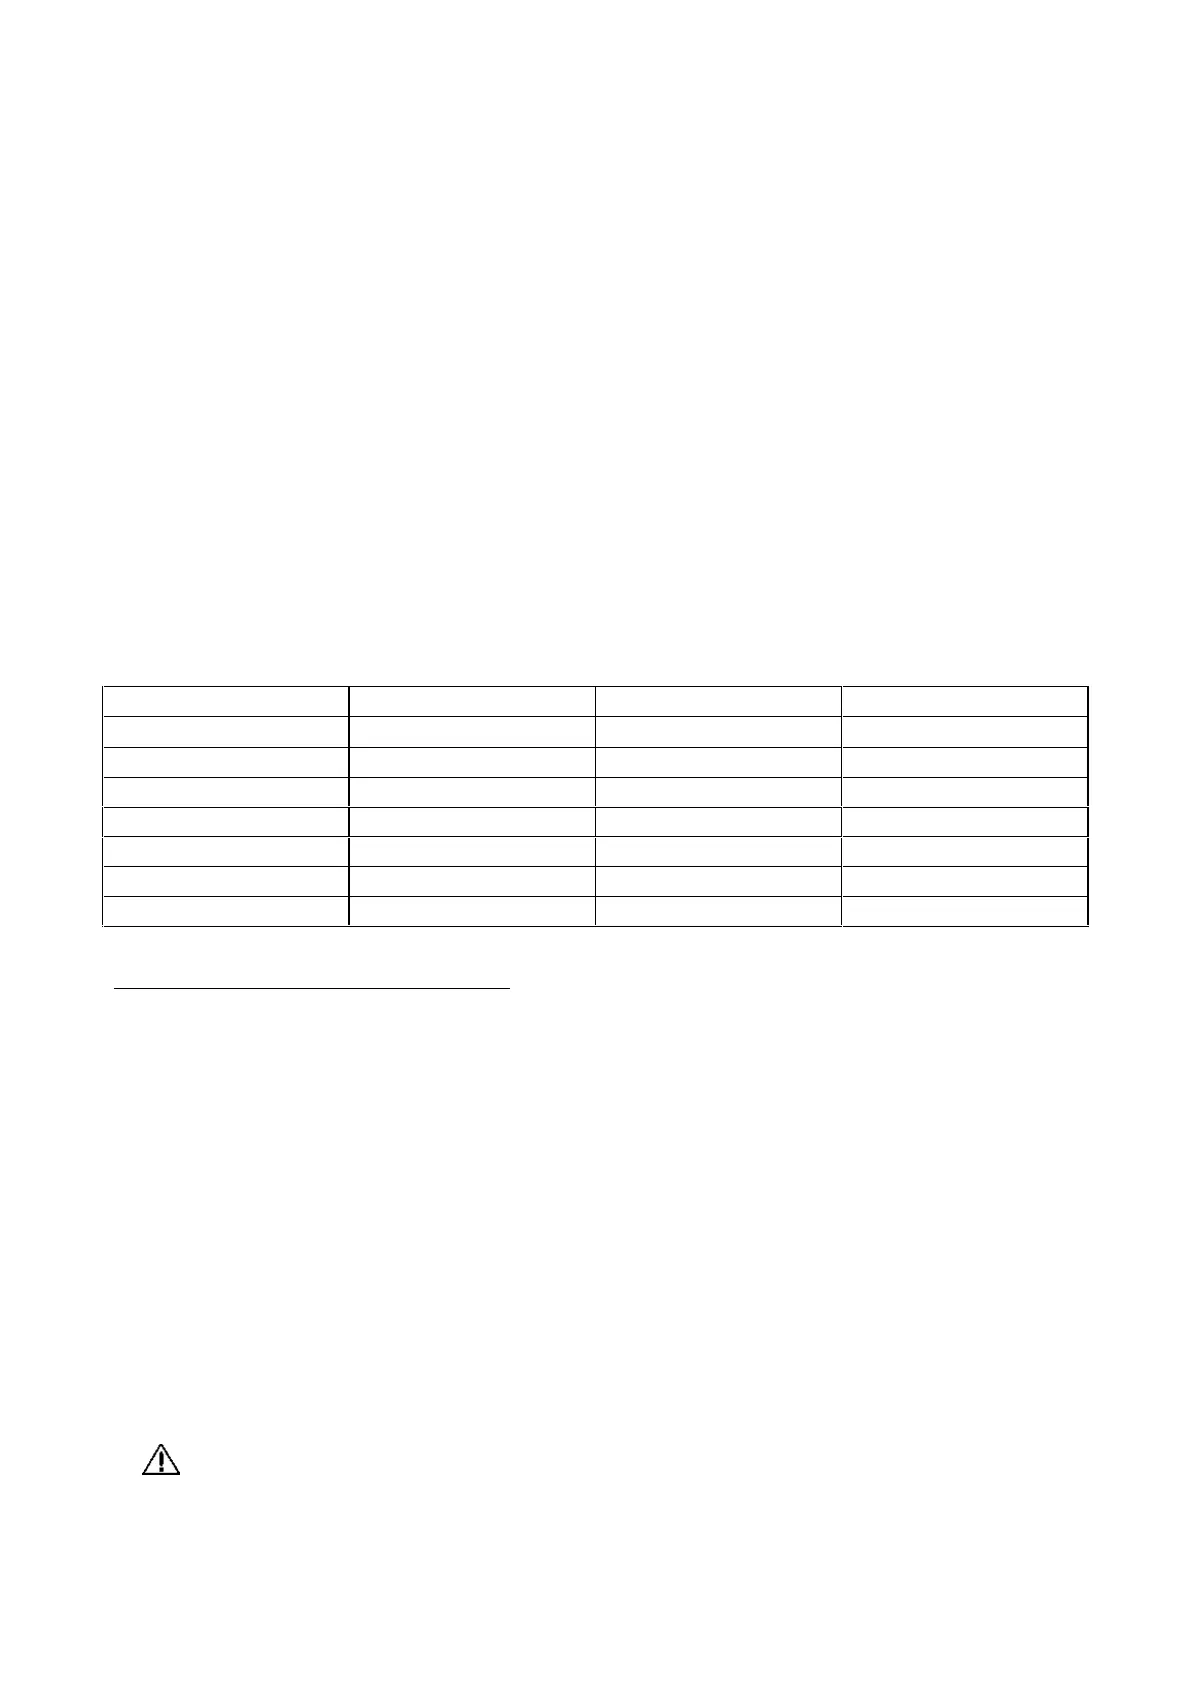
5) Some devices may be damaged by the current applied during resistance measurements. The
following table lists the voltage and current available for each range.
A: open circuit voltage at the jack
B: voltage for a resistance equal to full scale value.
C: current in milliampères through a short circuit at the input jacks. All values are typical.
RANGE A B C
200Ω
0.65 0.08 0.44
2K 0.65 0.3 0.27
20K 0.65 0.42 0.06
200K 0.65 0.43 0.007
2M 0.65 0.43 0.001
20M 0.65 0.43 0.0001
200M 3 2.98 0.3-3µA
3.6 Capacitance measurements
1) Before connecting the test capacitor, note that the display may show readings other than zero
each time the range is changed. This reading will not affect the accuracy of the device for it will
be overridden by the actual value upon measurement.
2) Connect the test capacitor to the input sockets (not test leads). Check the polarity connections
wherever necessary and set the FUNCTION switch to the CX range.
Note :
1) When testing individual capacitors, insert the leads of the capacitor into the "+" socket (upper
socket) and "-" socket (lower socket), to the left of the panel. (Capacitors should be discharged
before being inserted into the test jack).
2) When testing polarised capacitors (e.g. a tantalum type), particular attention must be paid to the
polarity connections in order to prevent possible damage to the capacitor.
When testing large capacitors, note that there will be a certain time lag before the final reading is
displayed.
Units : 1pF = 10
-6
µF 1nF = 10
-3
µF.
Do not connect an external voltage or a charged capacitor (especially larger capacitors) to
the measuring terminals.

 Loading...