EasyManuals Logo

Velux INTEGRA KLI 310 User Manual

Velux INTEGRA KLI 310
15 pages
To Next Page IconTo Next Page
To Previous Page IconTo Previous Page
Page #7 background imageLoading...
Page #7 background image
12 VELUX
®
VELUX
®
13
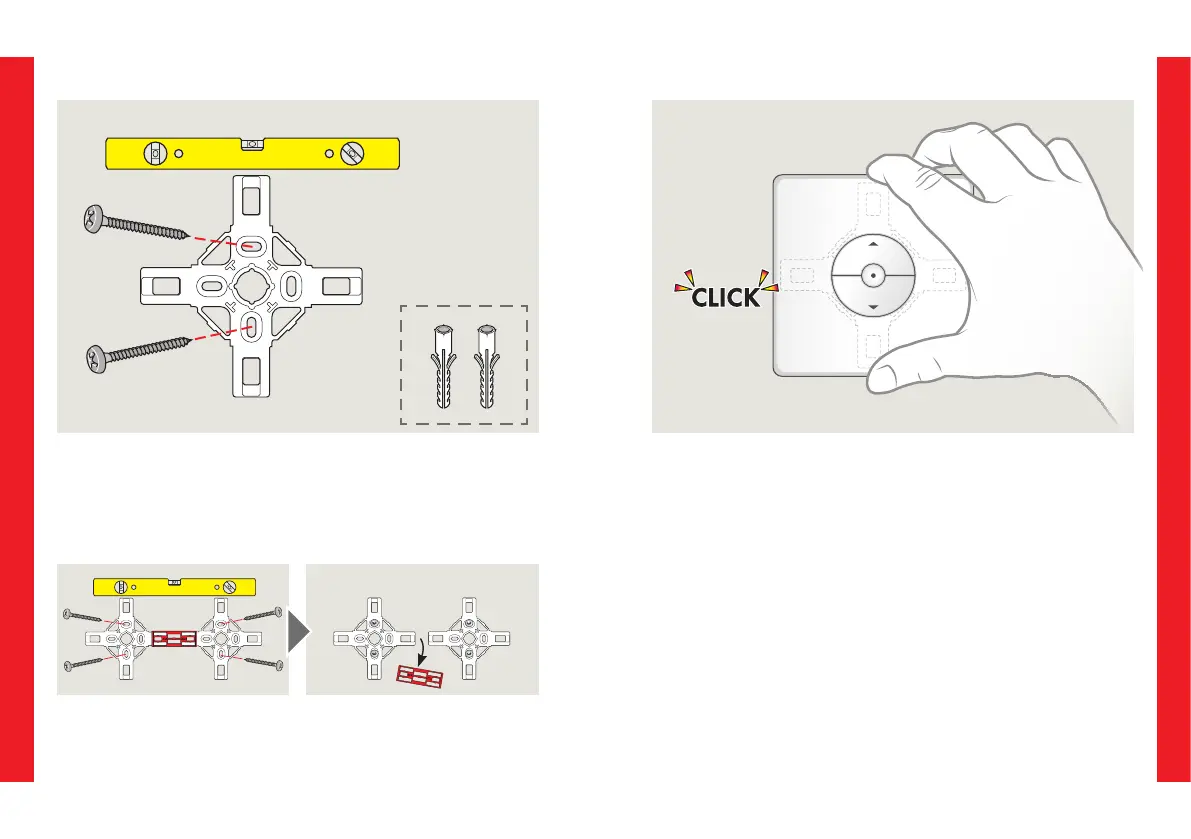
Do not fix the wall switch until it has been verified that the products can
be operated from the proposed position.
Fix wall bracket to wall with screws as shown.
Attach the wall switch to the bracket as shown.
If needed, detach the wall switch as shownFor installation of more wall switches in a group, temporarily use the red
spacer bar as shown.
QUICK START QUICK START

Other manuals for Velux INTEGRA KLI 310

Questions and Answers:

Question and Answer IconNeed help?

Do you have a question about the Velux INTEGRA KLI 310 and is the answer not in the manual?

Velux INTEGRA KLI 310 Specifications

General IconGeneral
Radio frequency868 MHz
ModelKLI 310
CompatibilityVelux INTEGRA roof windows
Power sourceBattery
FunctionControl of roof windows

Related product manuals