English
VELUX
®
5
Important information 6-7
Getting started
Initial set-up 8-9
Basic operation 10-12
If the initial set-up fails 13
Adding products
Adding more products to the control pad 14-15
Adding control pad 16-18
All the rest
Resetting control pad 19
Operation in case of power failure, discharged battery
or if the control pad has been mislaid 20
Getting more information 21
Contents
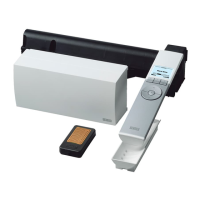
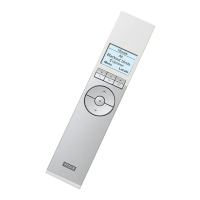
Congratulations on your new VELUX INTEGRA
®
product!
Thank you for buying this VELUX INTEGRA
®
product.
The control pad has been produced and tested in accordance with the
newest methods and strictest requirements and will help you to get the
most out of your VELUX INTEGRA
®
products.
This short guide will help you get started with your new control pad.
When you see a
?
in the control pad display, you can, by tapping on it,
find short instructions about the current screen. If you want more
information, you can get the full instructions from your VELUX sales
company, see telephone list or www.velux.com (see the section Getting
more information to determine the version number of your control pad).

 Loading...