Do you have a question about the Venmar HRV 2500 and is the answer not in the manual?
| Brand | Venmar |
|---|---|
| Model | HRV 2500 |
| Category | Air Cleaner |
| Language | English |
Consolidated safety instructions including warnings and cautions for unit operation and installation.
Details installation methods like Stand Alone and Central Draw Point for various unit models.
Details geographical location considerations for the HEPA 4000 model.
Describes the Return-to-Return installation method for forced air systems.
Details the attic installation method for the HEPA 4000 unit.
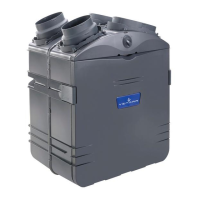
Front and top view dimensions for HRV 2500 and HR 2.5 models.
Front and top view dimensions for HEPA 3000, HF 3.0, and HEPA 4000 models.
Provides minimum clearance and joist opening requirements for installation and servicing.
Guidance on checking the unit and its components for damage or missing parts.
Lists necessary tools, materials, and specific installation kit numbers.
Recommendations for choosing an appropriate location for the unit.
Steps for selecting a convenient location and preparing the wall for control installation.
Detailed instructions on splicing wires and connecting them to the wall control and unit.
Instructions for routing the control cable and connecting it to the unit's PCB terminals.
Procedure for attaching the 8" oval ports and 5" to 6" oval ports to the unit.
Guidance on hanging the unit vertically or horizontally using chains and springs.
Tips for simple ductwork planning, minimizing bends, and avoiding ventilation of crawl spaces.
Instructions for installing stale air exhaust and fresh/filtered air distribution ductwork.
Specific steps for connecting flexible ducts to unit ports for Stand Alone systems.
Procedure for connecting fresh/filtered air ductwork to the forced air unit return duct.
Procedure for connecting stale air ductwork to the forced air unit return duct.
Steps for connecting fresh/filtered air ductwork for Return-to-Return systems.
Steps for connecting stale air ductwork for Return-to-Return systems.
Procedure for connecting insulated flexible ducts to the Tandem® transition and unit ports.
Procedure for connecting insulated flexible ducts to the Tandem® transition.
Procedure for connecting insulated flexible ducts to the unit's oval ports.
Instructions for assembling and locating the dual exterior hood.
Procedure for connecting the Tandem® transition to the dual exterior hood.
Step-by-step guide for connecting the drain fittings and creating a water trap loop.
Description of the 3-position main switch located on the unit's front panel.
Information about the included C34 and CMR wall controls.
Explains the C34/CMR control description, indicators, and operating modes.
Procedure for biannual maintenance, including filter cleaning and replacement.
Procedure for annual maintenance, focusing on HEPA filter replacement for specific models.
Instructions for performing a master reset for the filter maintenance indicator.