EasyManua.ls Logo

Ventair DC 3 Series - User Manual

Ventair DC 3 Series
14 pages
Print Icon
To Next Page IconTo Next Page
Loading...
DC 3 Blade Ceiling Fan
INSTRUCTION MANUAL
Images are for reference only and may vary slightly from actual product.
Ceiling Fan Installation Manual
MODELS:
DC31203WH, DC31203WH-L, DC31203WHWC, DC31203WH-LWC
DC31203BL, DC31203BL-L, DC31203BLWC, DC31203BL-LWC
Thank you for purchasing this quality Ventair DC ceiling fan. To ensure correct function and safety,
please read all instructions before using the product and keep all instructions for future reference.
MUST BE
INSTALLED BY
A LICENSED
ELECTRICIAN
CAUTION
Read Instructions Carefully
For Safe Installation and Fan
Operation
DIY
With LED (-L) model
Question and Answer IconNeed help?

Do you have a question about the Ventair DC 3 Series and is the answer not in the manual?

Summary

Safety Precautions

Before Installation

Mounting Bracket

Details on securing the mounting bracket to the ceiling joist or structure.

Quick Click Blade Installation

Instructions for attaching the fan blades using the quick-click mechanism.

Hanging the Fan

Angled Ceiling Installation

Instructions for installing the fan on angled ceilings up to 15 degrees.

Finishing the Installation

Electrical Wiring Diagram

Remote Control Operation

Fan Models Without Light

Details on operating fan models without an integrated light.

Fan Models With Light

Details on operating fan models with an integrated light.

Using 1 Remote Handset to Control Multiple Fans

Instructions for pairing multiple fans with a single remote control.

Troubleshooting Remote Control Issues

Steps for resolving loss of control between handset and receiver.

Replacing Handset

Procedure for replacing a damaged remote control handset.

Wall Control Operation

Fan Models Without Light

Operation details for wall controls on fan models without light.

Fan Models With Light

Operation details for wall controls on fan models with light.

Single Fan Wall Controller Setup

Wiring and pairing instructions for a single fan with a wall controller.

Multi-Fan Wall Controller Setup

Wiring and pairing for multiple fans using one wall controller.

Pairing Master Fan

Procedure to pair the primary fan in a multi-fan setup.

Pairing Secondary Fan

Procedure to pair secondary fans in a multi-fan setup.

Important Notes for Multi-Fan Operation

Key considerations for operating multiple fans with one controller.

Important Facts

Fan Operation Explained

Explanation of DC fan operation and airflow principles.

Normal Wear and Tear

Information on typical wear and tear and warranty coverage.

Night Noise Characteristics

Discussion on the noise levels of DC fans.

Maintenance

Care and Cleaning

Instructions for safely cleaning and maintaining the ceiling fan.

Technical Information

Warranty Information

Overview

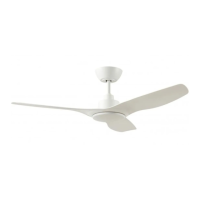
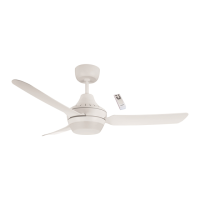
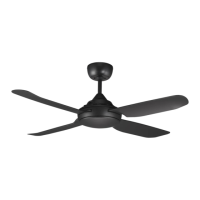
This document provides the installation and operation instructions for the Ventair DC 3 Blade Ceiling Fan, designed for air movement in various settings. The manual covers both models with and without an integrated LED light, offering comprehensive guidance for safe and effective use.

Function Description

The Ventair DC 3 Blade Ceiling Fan is designed to optimize airflow with minimal energy consumption. Unlike traditional wall, pedestal, or desk fans, ceiling fans cool people effectively by introducing slow air movement and high airflow into otherwise still, hot air, creating a natural evaporative cooling effect. Ceiling fans do not actually cool the air, like air conditioning equipment, but they use significantly less power to achieve a comfortable environment. The DC 3 fan motor is engineered to be quiet, making it suitable for all areas of the home, especially bedrooms where noise is a crucial consideration.

Usage Features

The fan offers versatile control options, including both remote control and wall control, depending on the model purchased.

Remote Control Operation:

The remote control consists of a handset (transmitter) and a receiver, with the receiver located in the fan's upper canopy. The DC 3 remote control comes pre-paired from the factory, ready for immediate use. Pairing is only required in specific situations, such as when using one remote to control multiple fans or when replacing a damaged handset.

  • Turning On/Off: The fan can be turned on and off using the designated button on the remote. When the wall switch is turned "ON," the fan enters standby mode, and a "beep" will be heard. If the fan has a light, it will illuminate at a default setting of 100% brightness in Natural White (NW).
  • Fan Speed Adjustment: The remote allows users to increase fan speed up to Max (speed 5) and decrease it to Min (speed 1).
  • Forward/Reverse Function (F/R): This feature allows users to switch between downdraft (forward) for cooling in summer mode and updraft (reverse) for heat circulation in winter mode.
  • Timer Function: The fan can be set to run on a timer with three options: 1 hour, 2 hours, or 4 hours.
  • Light Control (for models with LED):
    • On/Off: The light can be switched on and off.
    • Color Temperature Change: Pressing and holding the light button for a minimum of 3 seconds allows users to cycle through different color temperatures: Warm White (WW), Natural White (NW), and Cool White (CW).
    • Brightness Adjustment: The remote provides buttons to increase and decrease light brightness.
    • Light Memory: The light will reactivate at its previous brightness and color temperature settings when using the handset only. However, if the wall (isolation) switch is turned "OFF" and then "ON" again, the light will default back to 100% brightness in Natural White.

Wall Control Operation:

The wall control offers similar functionalities to the remote control, providing a fixed control point for the fan.

  • Turning On/Off: The wall control includes an isolation switch for powering the fan on and off.
  • Fan On/Off: A dedicated button controls the fan's operation.
  • Forward/Reverse Function: For models with light, pressing and holding the F/R button for a minimum of 3 seconds changes between forward and reverse modes, with "F" or "R" visible on the display screen.
  • Fan Speed Adjustment: Buttons are available to increase fan speed up to Max (speed 5) and decrease it to Min (speed 1).
  • Light Control (for models with LED):
    • On/Off: The light can be switched on and off.
    • Color Temperature Change: Pressing and holding the light button for a minimum of 3 seconds allows cycling through Warm White (WW), Natural White (NW), and Cool White (CW) color temperatures.
    • Brightness Adjustment: Buttons are provided to increase and decrease light brightness.

Multi-Fan Operation with Wall Control:

The wall control can be used to control multiple DC 3 Blade Ceiling Fans. This requires pairing a "Master fan" and then "Secondary fans."

  • Pairing the Master Fan: After turning the isolation switch "ON," a "beep" will be heard. Within 20 seconds, pressing and holding the fan button on the wall controller for 3 seconds will activate the pairing process, indicated by another "beep beep" sound.
  • Pairing Secondary Fans: Once the Master fan is paired, secondary fans can be paired. Turn the secondary fan isolation switch "ON" (a "beep" will be heard). Within 20 seconds, press and hold the fan button on the master wall controller for 3 seconds. The fan will emit a "beep beep" sound, indicating successful pairing. This process is repeated for each secondary fan.
  • Important Notes for Multi-Fan Operation: All secondary fans should be within a 12m radius of the Master Wall controller for reliable connectivity. The wiring format for multi-fan operation differs from single-fan setups, allowing the isolation switch to cut power to the Master fan while still operating other secondary fans. Multiple secondary fans can be paired at once, provided all fans are within the 20-second pairing time restriction. Each secondary fan should have its own isolating switch (not supplied).

Loss of Function or Control:

If control is lost between the handset and receiver, users are advised to try the re-pairing process. If the problem persists, Ventair technical support can be contacted for assistance. When replacing an old or damaged handset only (not the receiver), the re-pairing process must be performed before the fan can operate.

Maintenance Features

Proper care and maintenance are essential for the longevity and optimal performance of the Ventair DC 3 Blade Ceiling Fan.

  • Safety First: Always turn off the power at the mains switch before performing any maintenance or attempting to clean the fan.
  • Periodic Cleaning: Every 6 months, periodic cleaning is the only maintenance required. Use a soft brush or a lint-free damp cloth to avoid scratching or marking the surface. Ensure electricity is turned off before cleaning.
  • Avoid Immersion: Do not soak or immerse the ceiling fan in water or other liquids, as this can damage the motor or blades and create a risk of electrical shock.
  • Chemical Avoidance: Ensure the fan does not come into contact with any organic solvents or cleaners. To clean the fan blades, wipe them with only a damp clean cloth, without any organic solvents or cleaners.
  • Lubrication: The motor has a permanently lubricated ball bearing, eliminating the need for oiling.

Normal Wear and Tear:

Over time, moving parts may become slightly loose or worn, potentially leading to small increases in noise or movement. Fan operation can also be affected by accidental contact. These conditions are typically not covered under warranty, but regular care and maintenance can help prevent or reduce these issues.

Ventair DC 3 Series Specifications

General IconGeneral
TypeCeiling Fan
ModelDC 3 Series
Motor TypeDC Motor
Number of Blades3
Speed Settings6
Remote ControlYes
Warranty2 years In-Home + 3 years Motor
Power Consumption30W
Blade Span1200 mm
Airflow230 CMM
Blade MaterialABS
ReversibleYes
Air DeliveryHigh

Related product manuals