7
Quick Reference Guide Ventana BenchMark GX
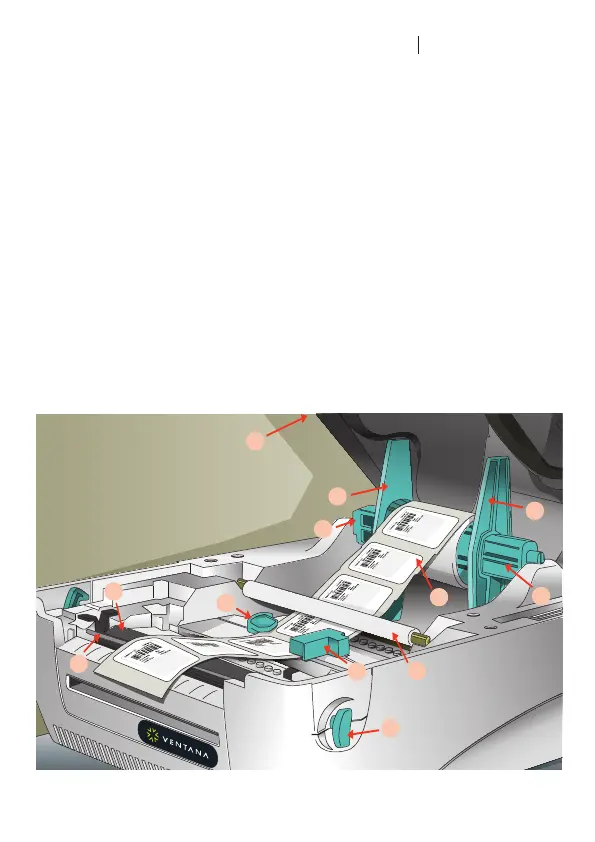
VIII. Load labels
67. Pull the release levers (85) toward the
front of the printer and lift the top cover.
68. Remove the label spindle (79).
69. Pull off one of the spindle tabs (78).
70. Slide a roll of VMSI labels onto the
spindle and center the roll.
71. Push the spindle tab back onto the
spindle, making sure the labels can
move freely between the tabs.
72. Place the label spindle in the spindle
mounts, with the labels positioned to
unroll from the top and forward.
73. Thread the roll, label side up, under the
plastic roller (81), between the paper
guides (82), and over the rubber roller
(83) and metal bar (84).
74. Adjust the paper guides so that they just
touch the edges of the label roll, making
sure the labels can move freely.
75. Lift the printer top cover all the way up
to release the catch, and then close it.
76. Update the Ventana Slide Labeling
System for the new label.
78.
79.
77.
78.
79.
80.
81.
82.
82.
83.
84.
85.
IX. E-bar II Printer
77. Top cover
78. Label spindle tab
79. Label spindle
80. Labels
81. Plastic roller
82. Paper guides
83. Rubber roller
84. Metal bar
85. Top release lever
 Loading...