ASSEMBLY INSTRUCTIONS
NOTE: Tool Required for Assembly: phillips screw driver ( NOT included)
Hardware Used:
EE Bolt (1/4” x 25mm) 4
GG Flat Washer (φ6.5) x
x
4
HH LockWasher (φ6.5) x 4
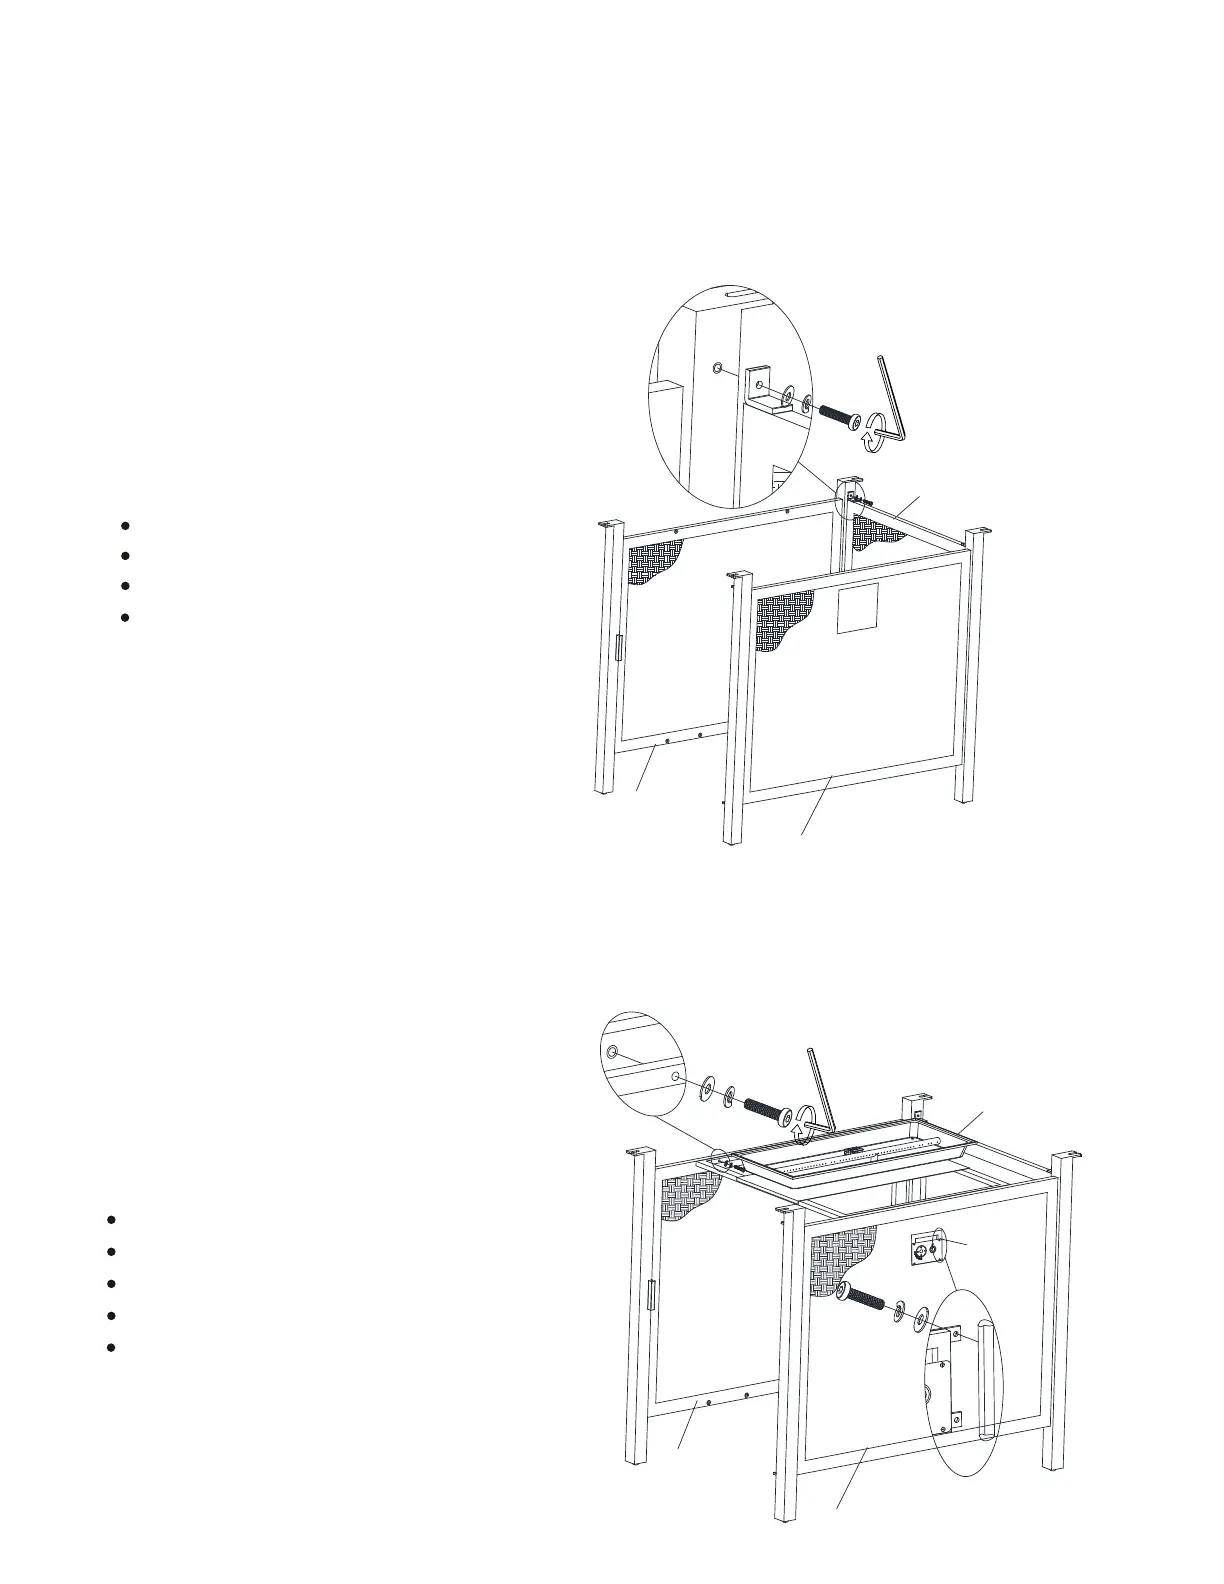
Figure 2
Remove all protective material carefully. Avoid cutting the surface of the furniture while removing the packaging material
on all components.
Loosely attach Back Panel (F) to the Left Side Panel (D) and the Right Side Panel (E) by bolts (EE) through lock
washers (HH), flat washers (GG), using Allen wrench (JJ). See figure 2.
DO NOT TIGHTEN BOLTS AT THIS POINTS.
JJ Allen Wrench x 1
1.
EE
JJ
HH
GG
Loosely attach Burner Pan (C) to the Left Side Panel (D) and Right Side Panel (E) by bolts (FF) through lock washers
(HH), flat washers (GG), using Allen wrench (JJ).
4. Loosely attach control panel from Burner Pan (C) to the Right Side Panel (E) by bolts (EE) through lock washers (HH),
flat washers (GG), using Allen wrench (JJ). See figure 3.
DO NOT TIGHTEN BOLTS AT THIS POINTS.
3.
HH
GG
C
GG
Control
Panel
D
EE
E
FF
HH
D
E
F
Figure 3
Hardware Used:
EE Bolt (1/4” x 25mm) x 4
GG Flat Washer (φ6.5)
x 8
HH Lock Washer (φ6.5) x 8
JJ Allen Wrench x 1
FF Bolt (1/4” x 30mm) x 4
2.
7
JJ