EasyManua.ls Logo

Versa Desk POWER PRO User Manual

Versa Desk POWER PRO
2 pages
To Next Page IconTo Next Page
Page #1 background imageLoading...
Page #1 background image
With your Desktop Riser on a desk or table, locate the cable underneath the unit’s top surface.
Connect that cable to the power supply included, and then plug the unit into a power outlet.
Push the button to raise the top surface of your desk riser to the maximum height. Secure the
power cord with clip on base as illustrated.
1
2
3
Locate the 4 thumb screws in plastic bag (the shape of the thumb screws may be different from
the diagram. Insert the 4 thumb screws half way leaving a 1/4” gap between the thumb screw
and the bottom of the top surface.
NOTE: Power cord damage caused by failure to
properly secure cord away from scissor arm
mechanism and is not covered under warranty.
Assembly InstructionsAssembly Instructions
Elite Switch
UP DOWN
1 (888) 506-2931
engineering@versaproducts.com
American Manufacturing Lifetime Warranty
Protected by US Patent No. 10,485,336 & 10,849,424
VDPP / VDPPD
REV. 02072022
UP
DOWN
Pre-2021 Switch
Pro Switch
UPDOWN
Press once to activate child safety lock.
POWER PRO
®
MADE IN
AMERICA
This product is for
adult use only. Children
should not operate
this device.
Question and Answer IconNeed help?

Do you have a question about the Versa Desk POWER PRO and is the answer not in the manual?

Versa Desk POWER PRO Specifications

General IconGeneral
Desk TypeStanding Desk
Frame MaterialSteel
Height AdjustmentElectric
Height Range25.5" to 51"
Motor TypeDual Motor
Noise LevelLess than 50 dB
Desktop MaterialLaminate, Solid Wood
Warranty5 years
Desktop Size48" x 30"

Summary

Assembly Instructions

Connect Power Supply

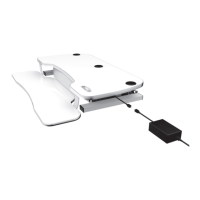
Connect the power cable to the unit and plug into a power outlet. Product is for adult use only.

Height Adjustment and Cord Security

Raise the desk, secure the power cord, and activate the child safety lock. Avoid cord damage.

Install Thumb Screws

Insert thumb screws halfway into the designated points, leaving a 1/4" gap.

Attach Keyboard Tray

Align keyboard tray slots with thumb screws and slide into place, minding pinch points.

Final Securing and Checks

Fully tighten thumb screws and ensure all cords are secured away from moving parts.