Installation
1. Clean the control arm and coat the I.D. with a suitable lubricant.
2. Insert the replacement ball joint as straight as possible into the vehicle
control arm.
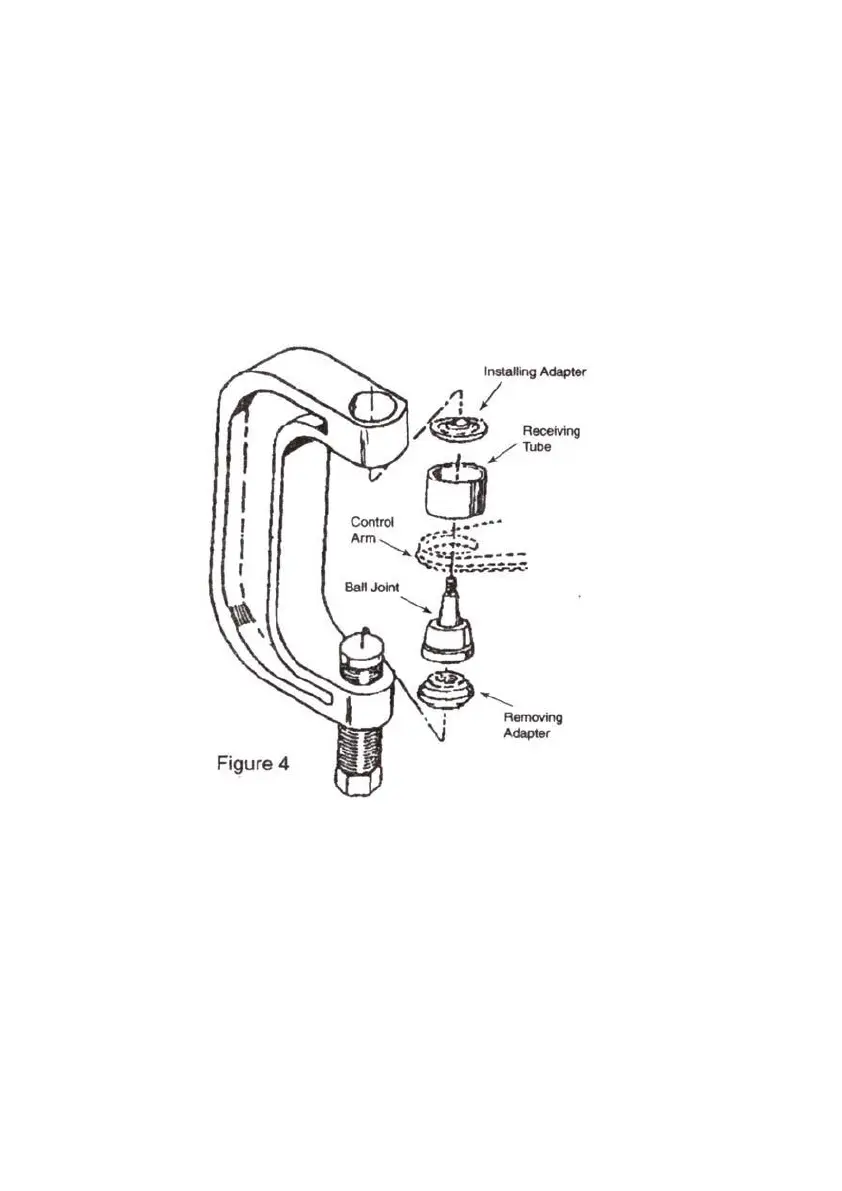
3. Assemble the ball joint press component as shown in Figure 4. Position the
receiving tube, and tighten the forcing screw. Check the alignment of all
tooling and components, and continue tightening the forcing screw until the
ball joint is firmly seated.
 Loading...