Do you have a question about the VEVOR RA250200 and is the answer not in the manual?
Warning about removing safety casing that holds arms down.
Assemble the roller by connecting parts and securing with screws.
Assemble the front pole by connecting parts and securing with screws.
Unfold fabric and valance, insert strips into fabric ends.
Insert fabric ends into roller groove and front bar cuts for attachment.
Connect blocker, arm-bar connector, plastic covers, and rotator to the roller.
Assemble gearbox components using screws.
Insert square shaft into gearbox, connect to round shaft; loosen nuts for adjustment.
Firmly grip arm bar while unlocking security straps to prevent injury.
Retract awning using handle; attach square covers to rod ends.
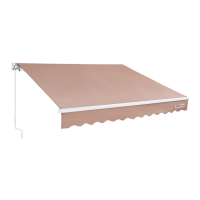
Measure wall, drill holes for brackets matching expansion bolt size.
Hammer expansion bolts into holes, ensuring they are secure and protrude.
Use bolts to fix wall brackets, leaving them slightly loose.
Determine wall bracket spacing based on awning size and desired coverage.
Set awning angle to approx. 80 degrees using formula C = A + 0.17*L.
Install awning on wall brackets, tighten original bolts, then expansion bolts.
Adjust arm using jack bolt to ensure front side is horizontal.
Illustrates correct and wrong operation of awning arms and front bar.
Check arm stability and adjust front handlebar wrist for even fabric wrapping.
Use hand crank clockwise/anticlockwise to extend/retract awning.
Lists addresses for import/export representatives in Germany, UK, and USA.
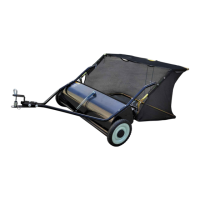
| Model | RA250200 |
|---|---|
| Category | Lawn and Garden Equipment |
| Material | Steel |
| Engine Displacement | 196 cc |
| Starting System | Recoil Start |
| Engine Type | Single Cylinder, 4-Stroke, Air-cooled |
| Max Power | 6.5 HP |
| Empty Weight | 80 kg |
| Fuel Tank Capacity | 3.5 L |