P.5
☆ Transmitter Setup For The XG8
JR-CCPM plays a critical role in coordinating the simultaneous activating of multiple servos to control
the swashplate. Activation of just a single servo would not lead to control of the swashplate - the three
swashplate servos must be controlled in a coordinated fashion. The setup of these servos diers from that for
other control functions which control just one servo (for example, the Rudder).
The initial settings given here must be conrmed on the bench, and then ne tuned after test ying the
helicopter. Prior to commencing this process, conrm all the trim levers and trim knobs on the transmitter are in
their neutral (zero) positions. Also shift all switches to position”0” (switches moved away from the operator).
Please also be familiar with the instructions for the transmitter. The initial settings can be entered into the
transmitter without turning power on to the receiver. Please note that ne adjustment will be needed after test
ying the helicopter.
1. Initial Radio Setup
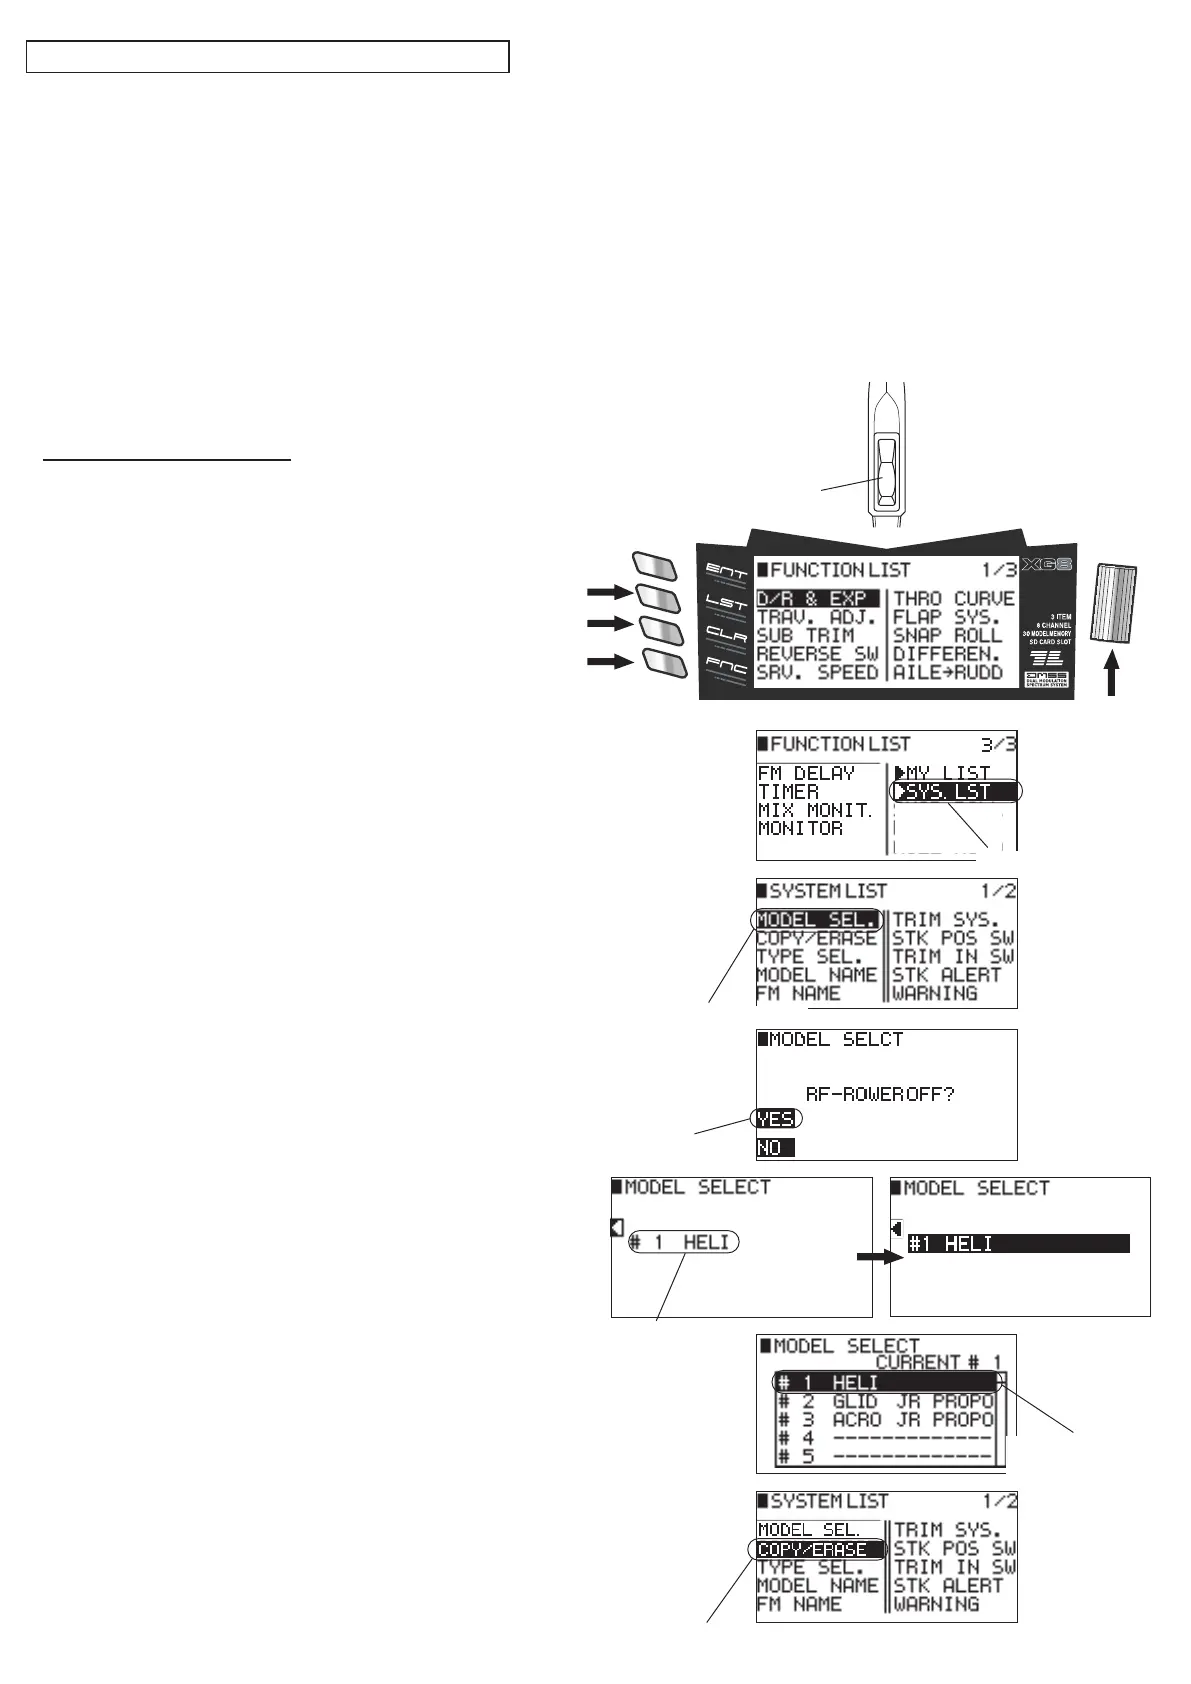
① Turn on the power switch and press the 【LST】 key
located on the lower of the transmitter.
「FUNCTION LIST 1/3」 screen displayed.
② Press the 「FNC」 key twice to display 「FUNCTION
LIST 3/3」 and then turn the dial to select 「 ▶ SYS.
LIST」and press.
③「SYSTEM LIST 1/2」 screen displayed.
Turn the dial to select 「MODEL SEL.」 and press.
④「RF-POWER OFF?」 is displayed.
Press the 【CLR】 key to select 「YES」.
⑤ Current model No. is displayed.
Turn the dial to select this area and press.
⑥ Turn the dial to select the model No. which can be
reset and press.
⑦ Use the 【LST】 key to return to 「■ SYSTEM LIST」.
Turn the dial to select 「COPY/ERASE」 and press.
② Select 「SYS. LIST」
③ Select 「MODEL SEL.」
⑤ Turn the dial to
select.
⑦ Select 「COPY/ERASE」
④ Select 「YES」
⑥ Select the
model to be reset.
④
②,③
⑤〜⑦
①
①
②②
 Loading...