EasyManua.ls Logo

Victory KINGPIN 2006 User Manual

Victory KINGPIN 2006
5 pages
To Next Page IconTo Next Page
Page #1 background imageLoading...
Page #1 background image
VICTORY KINGPIN (06-up)
Place bike on center stand support
Remove side covers, chrome fender strut covers
Remove rear seat and front seat
Remove mufflers, rear headpipe, and muffler bracket. Unplug o2 sensor if equipped.
Unplug and remove fender. Cut plug from fender; be sure to leave enough wire to splice
in our pigtail adapter. (Fender will be trimmed and re-installed)
Remove plastic cover at back of frame near engine (remove control box from plastic
cover and secure to PCM
Remove caliper from rear wheel (do NOT disconnect brake line at this time to prevent
fluid loss)
Loosen belt adjusters and remove rear axle. Remove rear wheel, caliper brackets, etc.
Unfasten fuse box from the mounting bracket to access the rear shock mount just behind
the rear brake reservoir. Remove upper shock mounting bolt
Remove “dog bones” from the swing arm and motorcycle frame.
Remove front swing arm retaining nut and pull swing arm from left side of the bike.
Remove swing arm and shock as one unit.
Remove 2 upper engine mounting bolts at back of motor. Drill the rearmost frame horns
to 5/16”. Cut the exhaust mounting stud from swing arm shaft. The exhaust bracket
attached to frame will remain in place. Trim fender so that it will clear our trike frame.
Cut the back side just forward of the tag bracket. You will have to notch the rearmost
mounting holes for our trike frame. (The front side of the fender does not have to be cut.
BUILD PROCEDURE
Remove swing arm, 3
rd
, and 4
th
link from rear end. Remove wheels from rear end. Stand
rear end on its “end” and remove the 5/16” bolts and spacers from around pulley and
disconnect brake line at pulley. Install new bearings into swing arm. Use 2 bearings on
each side, install bearing sleeve. Apply grease to inside edge of swing arm to prevent any
noise as swing arm travels and rubs against frame. Install swing arm and tighten. Set
Question and Answer IconNeed help?

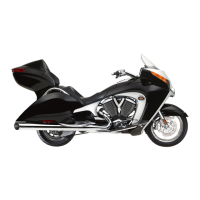
Do you have a question about the Victory KINGPIN 2006 and is the answer not in the manual?

Victory KINGPIN 2006 Specifications

General IconGeneral
Fuel SystemElectronic Fuel Injection
Transmission6-speed constant mesh
Final DriveBelt
Front Tire130/70 R18
Rear Tire180/55 R18
Engine TypeV-Twin
Displacement1634 cc
Front SuspensionTelescopic Fork
Rear SuspensionSingle Shock
Front BrakesDual 300 mm Floating Rotor with 4-piston calipers
Rear BrakesSingle Disc
Wheelbase1, 669 mm
Seat Height26.5 inches (673 mm)
Fuel Capacity17 liters
Dry Weight305 kg
Power92 hp
Torque109 lb-ft

Summary

Build Procedure

Prepare for Swing Arm Removal

Remove side covers, seats, mufflers, fender, plastic cover, caliper, axle, and shock mounting bolt.

Prepare Fender and Frame

Drill frame horns, cut exhaust stud, trim fender for trike frame clearance, and notch mounting holes.

Install Trike Frame and Rear End

Mount trike frame to engine, route belt, attach rear end, links, and shocks. Tighten all bolts.

Install Exhaust System

Install rear head pipe, plug in O2 sensor, route and mount mufflers to the trike frame.

Rear Brake System Setup

Attach caliper to block, connect brake line, adjust drag, and bleed brakes.

Wiring Instructions

Tail and Brake Light Wiring

Tap into the motorcycle's brake light switch and route wire to the universal pigtail.

Universal Harness Installation

Connect and Route Wiring

Connect the sub harness, route the main harness to the rear, and secure it to the frame.

Adjust Belt and Secure Links

Set belt tension, install the 4th link, tighten all mounting points, and lock heim joints.

Install Body and Fender Brackets

Attach the body, extend trunk light wires, drill for license plate wire, and mount fender brackets.

Bumper and Lighting Installation

Mount Fiberglass Covers

Mark and drill holes for fiberglass covers, then attach them to brackets and the body.

Install Tail Lights

Mark and drill tail light locations on fender, connect wiring for running and brake functions.

Light Wiring Guide

Provides wiring details for incandescent and LED lights with corresponding color codes.

Assemble LED Lights

Assemble Peterson lights with LED inserts and 3-prong sub connectors.

Install Bumper and Lights

Mark, drill, and attach the bumper; wire license plate and trunk lights.

Final Assembly and Checks

Reinstall seats, torque lug nuts, set tire/air bag pressures, and perform a test drive.

Related product manuals