After SW update, go to Design Menu by
Pressing MENU => AUDIO MENU => 8 5 3 2
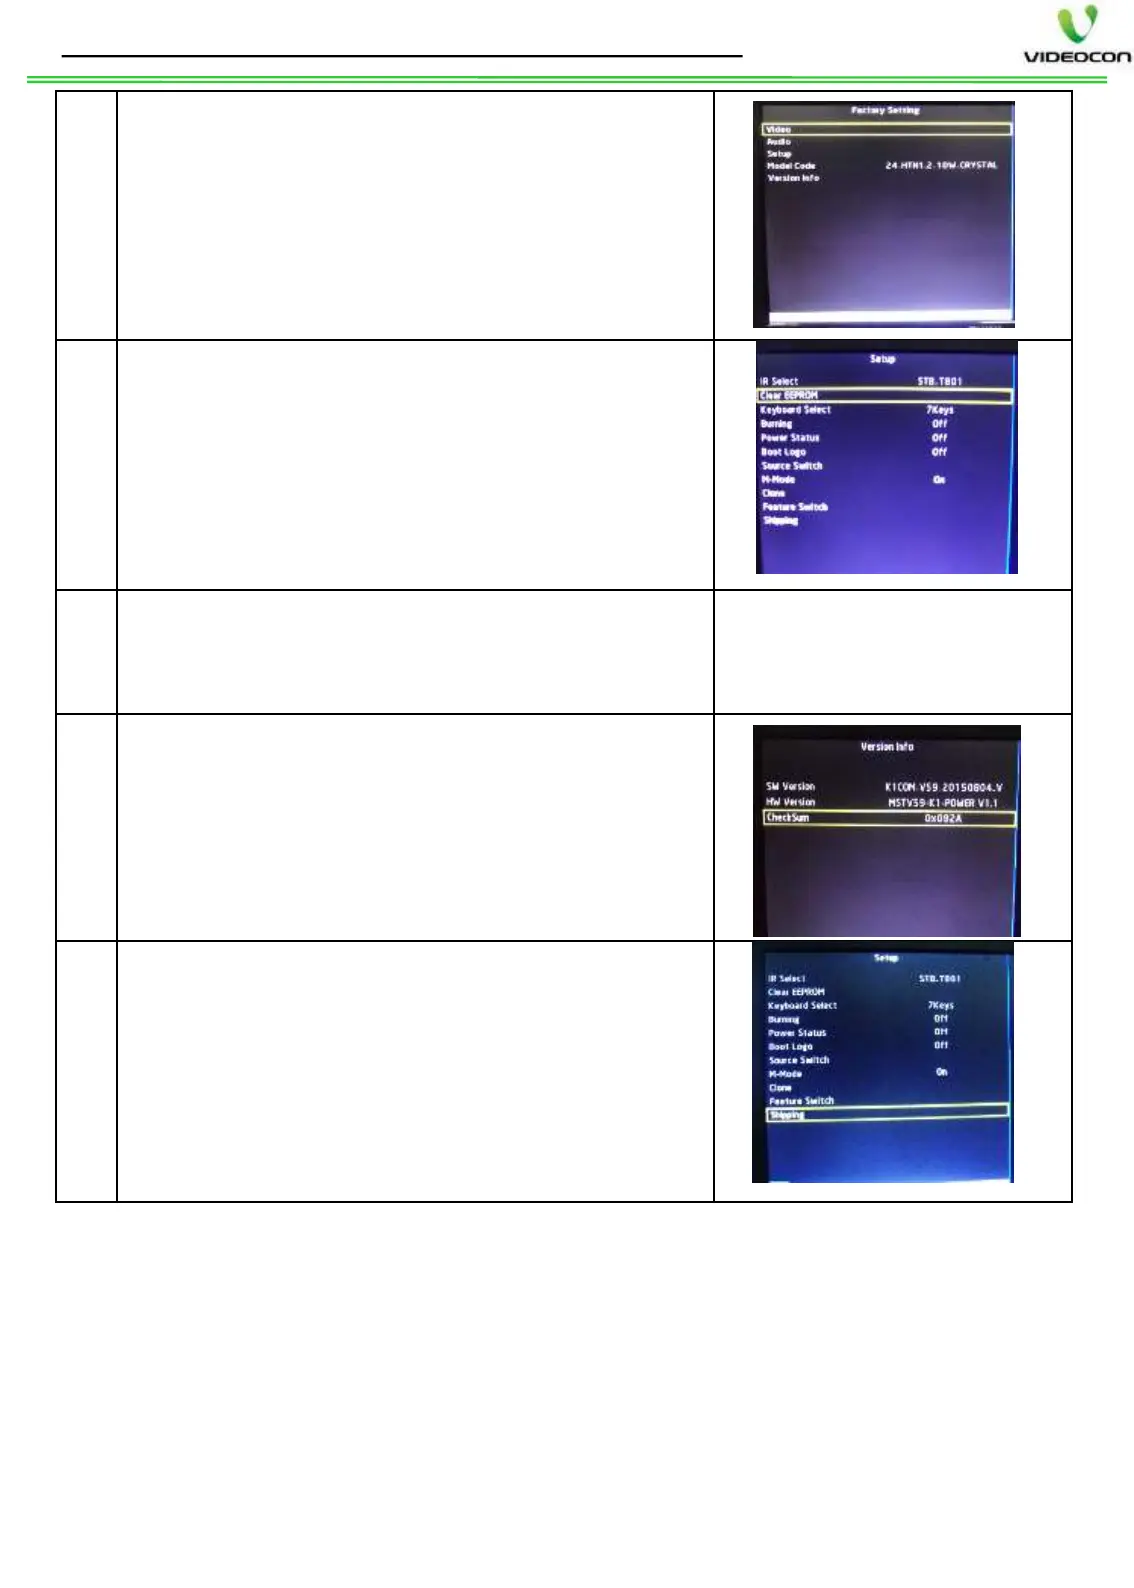
Go to Setup design menu and Select Clear
EEPROM option and press OK key of remote.
After Clear EEPROM, the set will go to stand
by and will again restart automatically in RF
source.
Then verify the modelwise Audio/ Video
settings as per Design
the SW date and version in Version info
Then press Shipping in Setup design menu by
pressing OK key of remote, after shipping set
displays “SHIPPING FINISH
OFF the set from main power and
ON. The SW loading process Is
STEPS TO FOLLOW AFTER SW INSTALLATION: -
Note: -
1. DO NOT SWITCH OFF THE TV SET, While SW upgrade is in process.
2. In M-Mode, if press stand by key of remote, to make M-MODE OFF.
3. Can not update SW through USB if set is permanently in Stand by. In
this case, use MST jig to load SW.
4. If required to load Videocon SW in SANSUI brand chassis with
SANSUI SW, then rename the SW file as “sansui.bin”.
5. If required to load SANSUI SW in Videocon brand chassis with
Videocon SW, then rename the SW as “videocon.bin”.
 Loading...