21
Programming the Water Softener
Cycle times
Special features
Troubleshooting
Advanced settings
FIG. 78
5. Press the DOWN q button to scroll through the
menu options until Troubleshooting is highlighted.
6. Press the OK / MENU button to display the
Troubleshooting menu (See Figure 79).
DIAGNOSTICS
This feature allows a service technician to check the
operating state of individual components in the softener
(e.g. valve position) to troubleshoot problems. If an
error code is displayed in place of the rolling status
screens, contact a service technician.
To view the Diagnostics screen:
1. If an error code is displayed, skip Steps 2-7 and go
directly to Step 8.
2. To display the Diagnostics screen from any of the
rolling status screens (when an error code is not dis-
played), press the OK / MENU button to display the
Main menu.
3. Press the DOWN q button to scroll through the
menu options until Advanced settings is highlighted
(See Figure 77).
Diagnostics
Setup changes
Troubleshooting
FIG. 79
7. Make sure Diagnostics is highlighted.
8. Press the OK / MENU button to display the
Diagnostics screen (See Figure 80).
Diagnostics
Time:
18:45
Position time:
0:00
FIG. 80
9. Press the DOWN q or UP p buttons to scroll
through the list. The following items are displayed:
=T
ime (current)
=P
osition time (counts down the time remaining in
the current valve position)
=Current position (of the valve: service, fill, brine,
backwash, fast rinse or moving)
=Requested position (of the valve)
=Motor state (on or off)
=Valve position switch (open or closed)
=Turbine count (if changing, indicates water flow)
=Tank light switch (open or closed)
=Error code (call for service if a number is dis-
played)
10. When finished viewing the Diagnostics screen,
press the OK / MENU button. The display will go
back to the Troubleshooting menu (Figure 79).
11. Press the LEFT t button three times to return to
the rolling status screens (or error code screen if an
error condition exists).
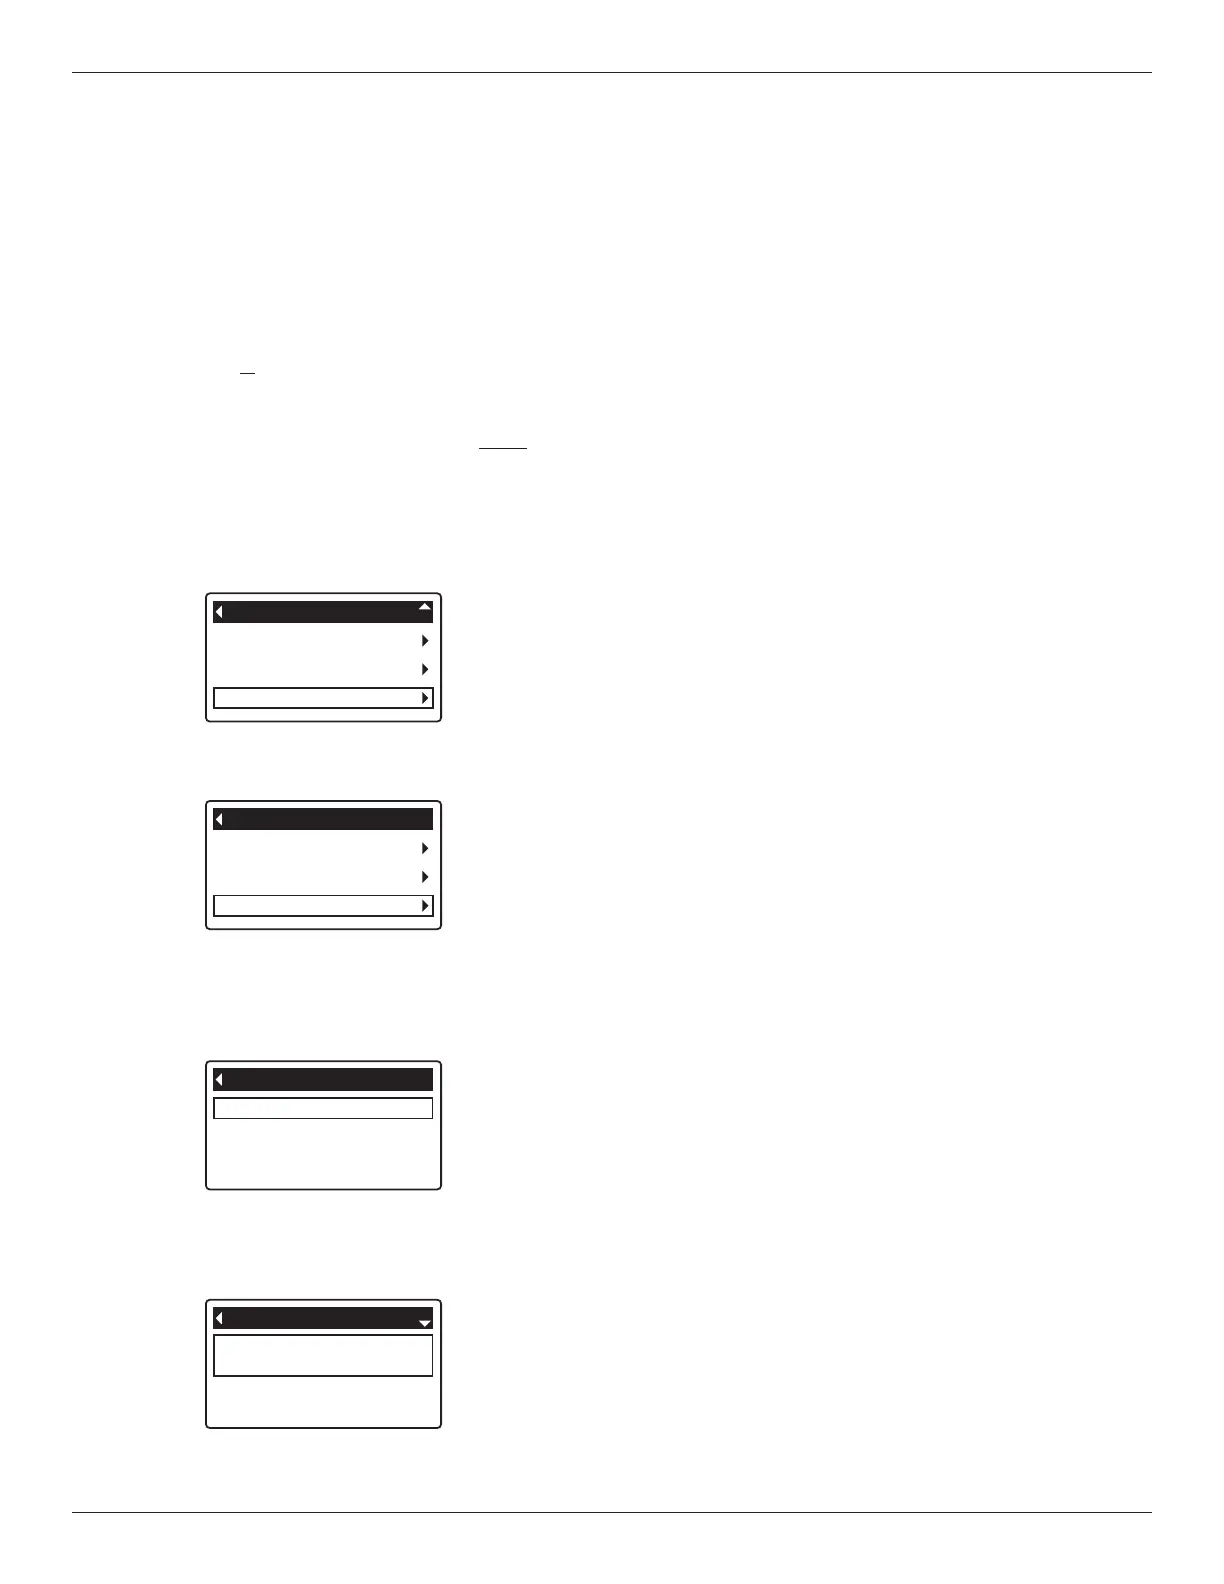
User preferences
System information
Advanced settings
Main menu
FIG. 77
4. Press the OK / MENU button to display the Advanced
settings menu (See Figure 78).