19
You can select:
• The time for the display to turn on and turn off.
• The days in a week for the display to activate.
• Which input source the display will use for each
scheduled activation period.
NOTE: You should set up current date and time in
{DATE AND TIME} menu before using this
function.
1. Press [SET] button to enter the submenu.
EXIT MENU
+-:SEL :RETURN :EXIT MENU
SCHEDULE
TODAY
1
2
3
4
5
7
6
2011 . 08 . 04 THU 20 : 19 : 55
ON
_
:
_
_
:
_
_
EVERY DAY
OFF INPUT
WED
SAT
MON
THU
SUN
TUE
FRI
EVERY WEEK
2. Press [ ] or [ ] button to select a schedule
item (item number 1 ~ 7), and then press [SET]
button to mark it the item number.
EXIT MENU
+-:SEL :RETURN :EXIT MENU
SCHEDULE
TODAY
1
2
3
4
5
7
6
2011 . 08 . 04 THU 20 : 19 : 55
ON
_
:
_
_
:
_
_
EVERY DAY
OFF INPUT
WED
SAT
MON
THU
SUN
TUE
FRI
EVERY WEEK
4
1 2 3
3. Press [ ] or [ ] button to select the schedule:
1
POWER-ON schedule: Press [ ] or [ ]
button to set the hour and minute for the
display to turn on.
2
POWER-OFF schedule: Press [ ] or [ ]
button to set the hour and minute for the
display to turn off.
Select or leave an empty “__” for both the hour
and minute slot if you do not want to use this
power-on or power-off schedule.
3
INPUT-SOURCE selection: Press [ ] or
[
] button to select an input source. If no
input source is selected, the input source
will remain the same as last selected.
4
DATE schedule: Press [ ] button to select
which day in a week this schedule item will
be take effect, and then press the [SET]
button.
4. For more schedule settings, press [EXIT] button
and then repeat the steps above. A check mark
in the box next to the number of the schedule
item indicates that the selected schedule is in
effect.
NOTES:
• The {EVERY DAY} selection in a schedule item
takes priority over the other weekly schedules.
• If the schedule overlap, the scheduled power-
on time takes priority over scheduled power-off
time.
• If there are two schedule items programmed for
the same time, the highest numbered schedule
takes priority. For example, if schedule items #1
and #2 both set the display to power on at 7:00
AM and off at 5:00 PM, then only schedule item
# 1 will take effect.
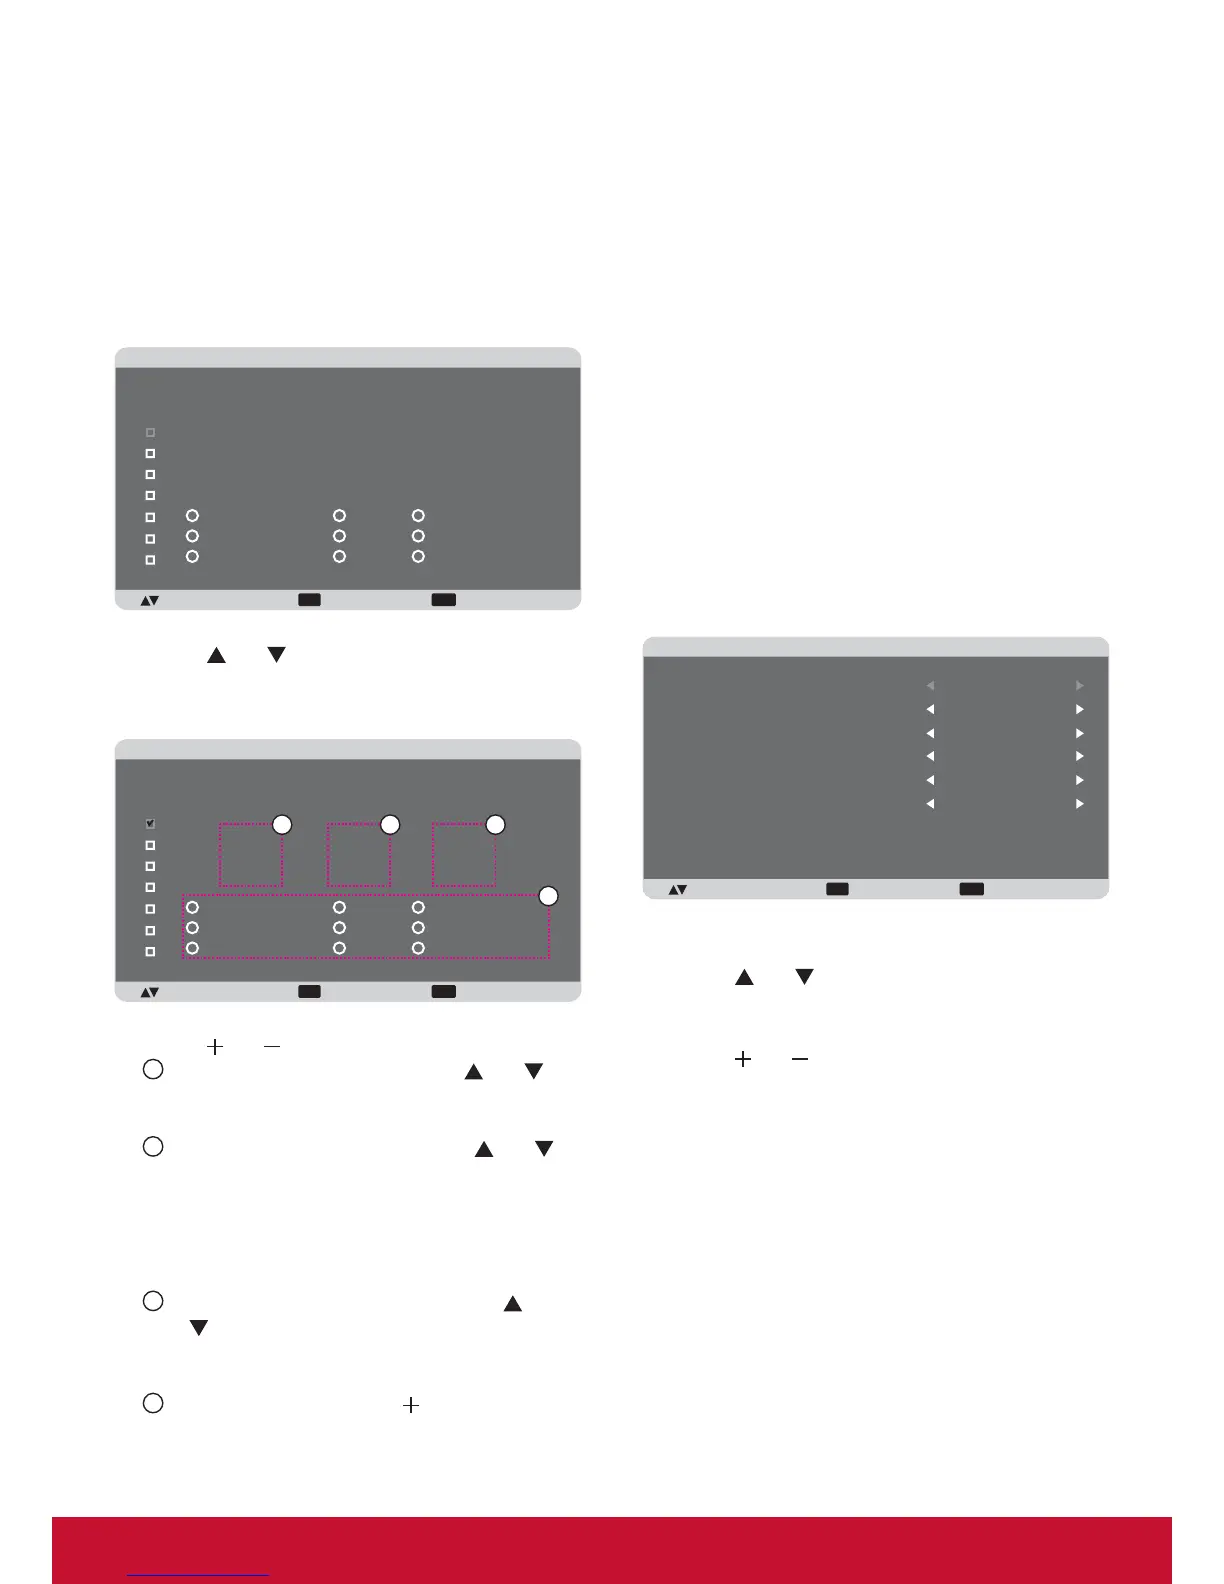
DATE AND TIME
Adjust the current date and time for the display’s
internal clock.
EXIT MENU
:SEL +-:ADJ :RETURN :EXIT MENU
DATE AND TIME
YEAR
MONTH
DAY
HOUR
MINUTE
DAYLIGHT SAVING TIME
2011
08
04
20
20
OFF
CURRENT DATE TIME
2011 . 08 . 04 00 : 18 : 10
1. Press [SET] button to enter the submenu.
2. Press [
] or [ ] button to toggle among the
{YEAR}, {MONTH}, {DAY}, {HOUR}, {MINUTE},
and {DAYLIGHT SAVING TIME} settings.
3. Press [
] or [ ] button to adjust all settings
except {DAYLIGHT SAVING TIME}.
CONFIGURATION1 RESET
Reset all settings in the CONFIGURATION1 menu
to factory preset values.