38
Wall Mounng
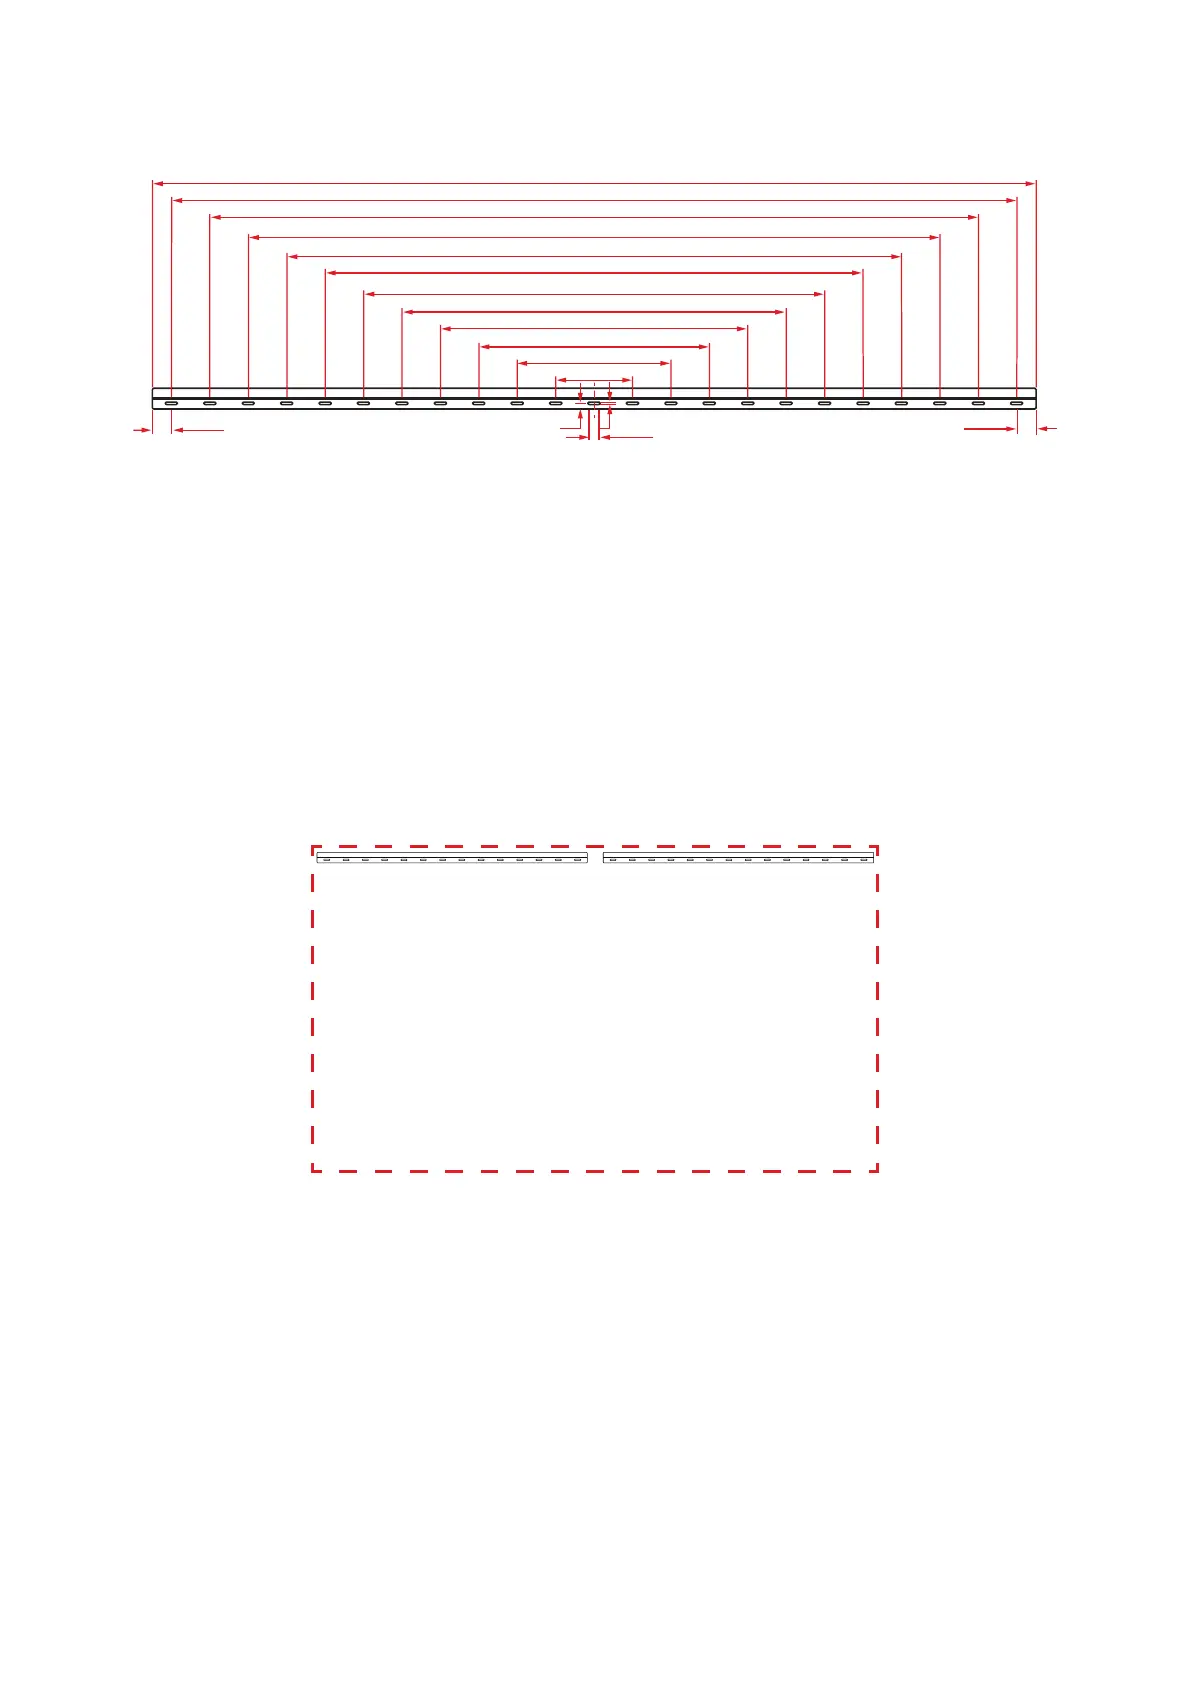
Installing the Upper and Lower Wall Mount Brackets
50.8 mm
50.8 mm
25.4 mm
7 mm
15 mm
203.2 mm
406.4 mm
609.6 mm
812.8 mm
1016
mm
1219.2
mm
1422.4 mm
1625.6 mm
1828.8 mm
2032 mm
2235.2 mm
mm
1. Ensure the wall area and size is an appropriate installaon site.
NOTE:
The height of the Upper
Wall Mount Brackets
must not be less than 129
⁵⁹/₆₄" (3300 mm) from the ground.
2. Using the Wall Mount Bracket (pictured above) as a guide, mark at least 12 holes
and pre-drill them.
3. Install the rst Upper Wall Mount Bracket with the provided screws (M6x50mm
Expansion for masonry; TA6x30mm for load bearing wood).
4. Repeat Step 2, ensuring the second Upper Wall Mount Bracket is level with the
rst upper bracket.
5. Install the Lower Wall Mount Brackets in the same manner as the Upper Wall
Mount Brackets. The distance between the Upper and Lower Wall Mount
Brackets is 93 ¹/₆₄" (2362.5 mm).