ViewSonic Corporation Confidential - Do Not Copy VA1930wm-1
31
5. Auto Color (Automatically calibrate chip ADC parameter by using chip internal DAC)
If it is a new-built set and it is first time to do the “auto color”, please confirm the following steps:
-Connect the VGA cable with the standard video pattern generator and display 16-gray pattern on the monitor.
- Press “Power” to power off the monitor.
- Press” [▼] +[▲] +[
] “simultaneously to enter factory mode.
- Press ‘’Menu[1]’’, then press ‘’Auto[2]’’ to execute Auto color item.
- After the “Auto Color” process finished, please press “Power” to restart monitor.
6. EDID (Rewrite EDID data to EEPROM)
If we need to rewrite the EEPROM data, please confirm the following steps.
1. Plug in VGA Cable; we can rewrite the EDID data to EEPROM by using “EDID Rewrite” program.
2. If the “EDID Rewrite” process finished, please pull out VGA cable and press ‘’2’’+’’▲’’ at the same time.
3. Pull out AC power cable or press power key to restart.
7. Upload firmware to MCU via VGA Cable
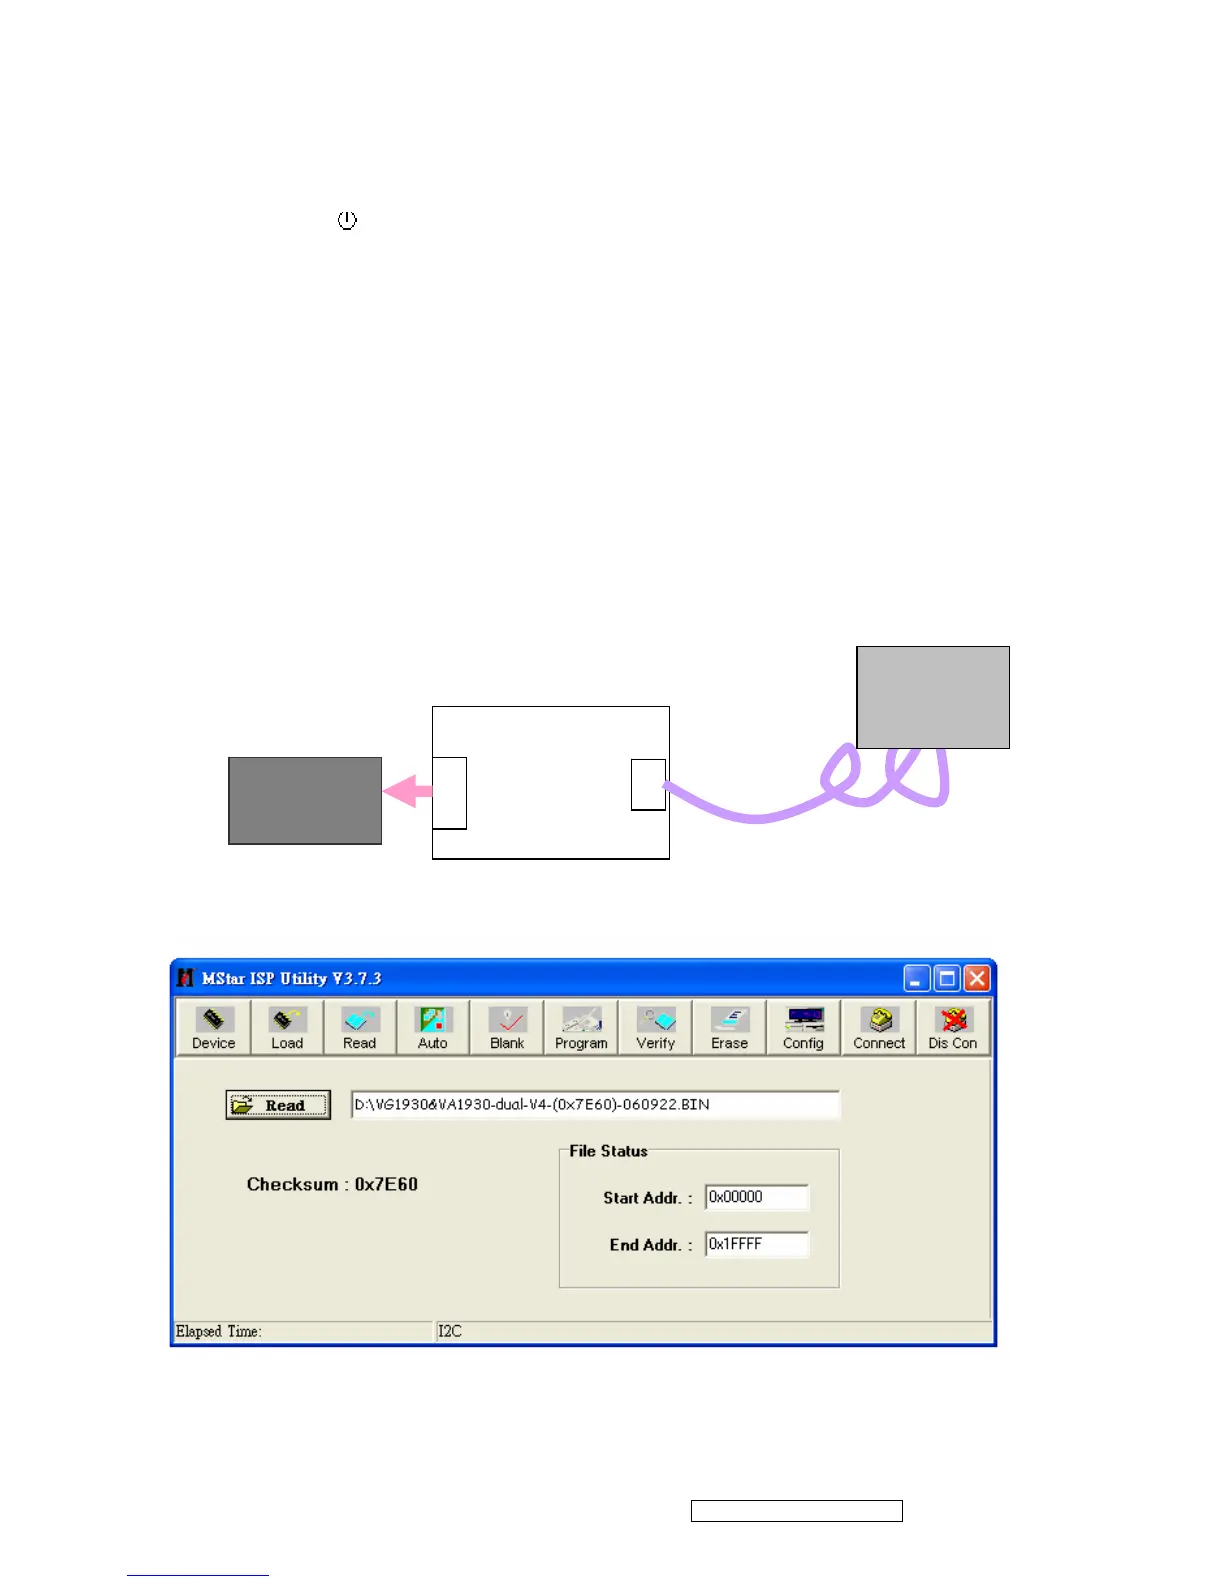
7.1 Connect ISP board between monitor and PC as below configure
7.2 Using mStar ISP Tool Update FW:
(1). Seletct “Read”, Choose the corresponding firmware, load to MCU.
ISP Board
Print Port
D-SUB
LCD Monitor
D-Sub
Insert to Print
Port 25pin
Service
cable
 Loading...