ViewSonic VX2255wmb/VX2255wmh 7
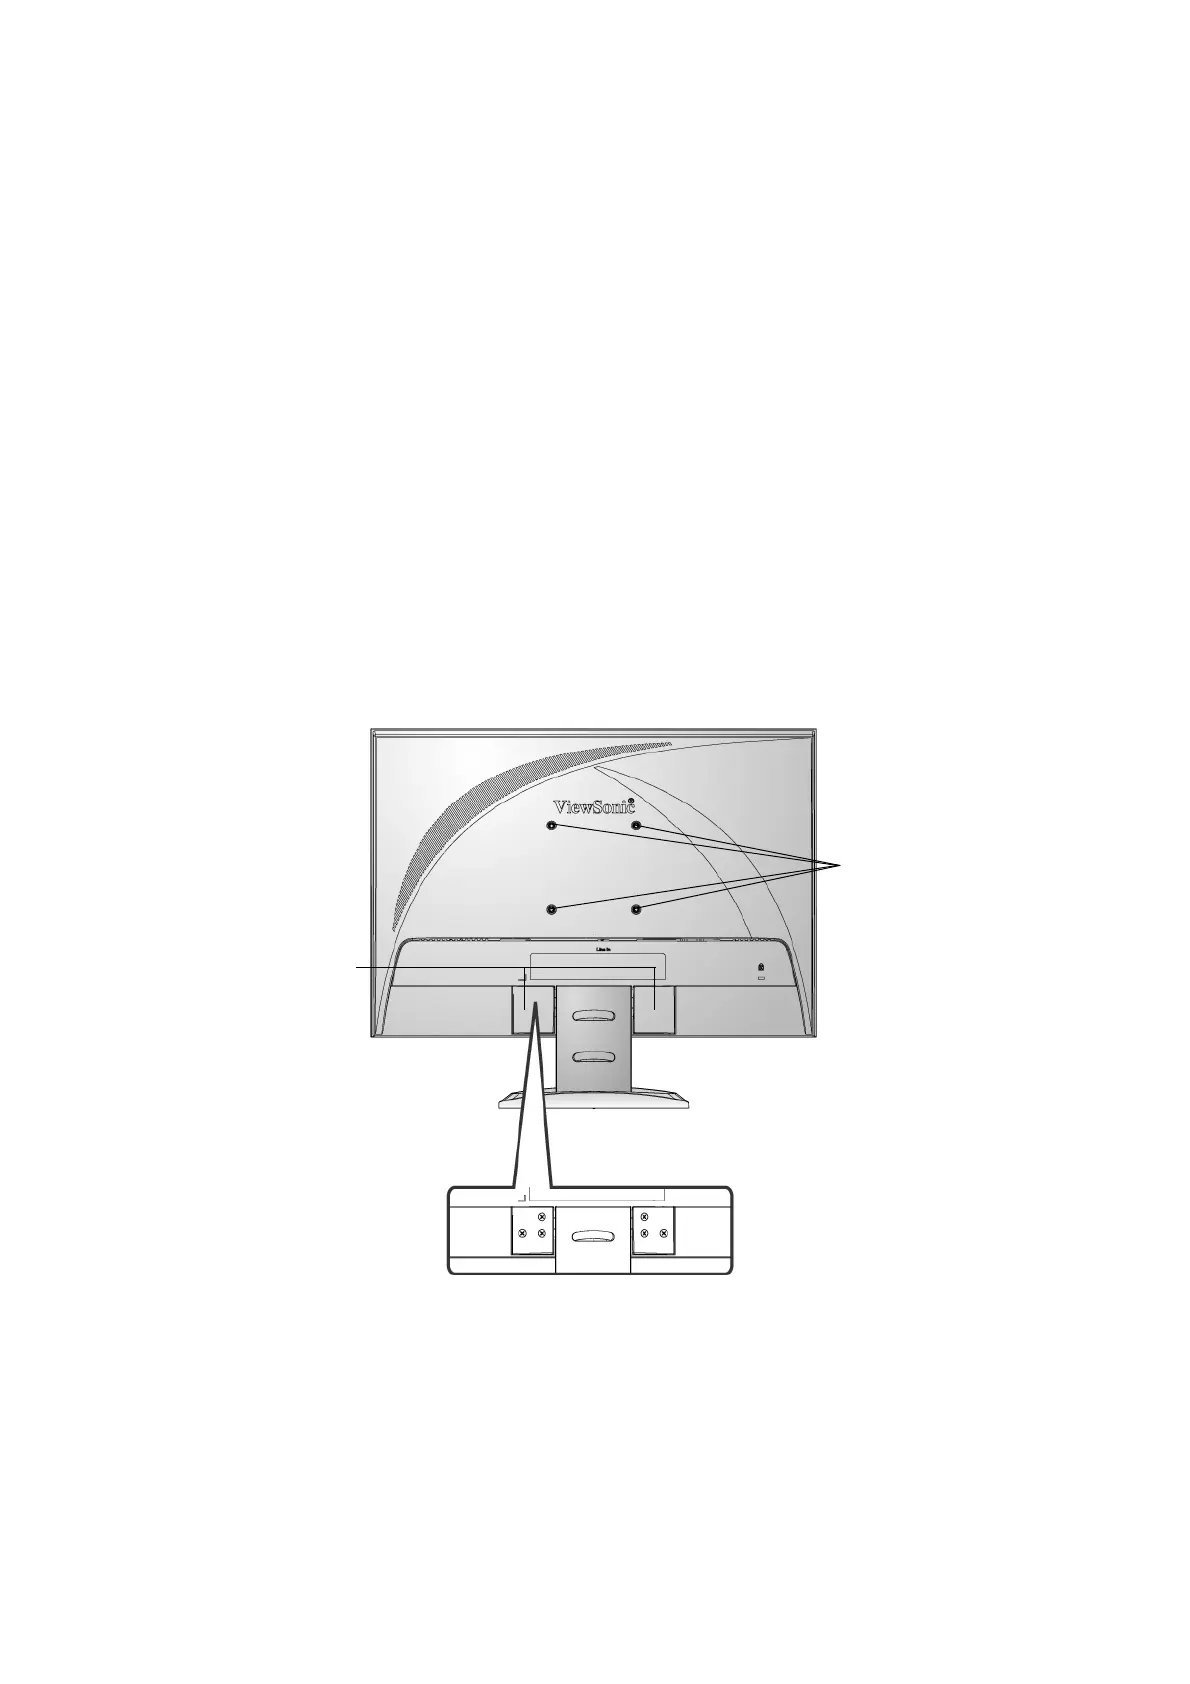
Wall Mounting (Optional) For use only with UL Listed Wall Mount Bracket
To obtain a wall-mounting kit, contact ViewSonic
®
or your local dealer. Refer to the
instructions that come with the base mounting kit. To convert your LCD display from a desk-
mounted to a wall-mounted display, do the following:
Step 1. Verify that the power button is turned Off, then disconnect the power cord.
Step 2. Lay the LCD display face down on a towel or blanket.
Step 3. Remove the plastic cover from the back of the LCD display.
Step 4. Remove the 6 screws attaching the base.
Step 5. Remove the rubber plugs from inside the four VESA screw holes.
Step 6. Attach the mounting bracket from the VESA compatible wall mounting kit (100 mm
x 100 mm distance), using screws of correct length.
Step 7. Attach the LCD display to the wall, following the instructions in the wall-mounting
kit.
Step 5-6. Four
VESA screw holes
Step 3. Plastic cover
Step 4. 6 screws
attaching the base