30
WATER CONNECTION
•Refer to water supply requirement section for preliminary installation and site preparation (see page 4).
••DDoo nnoott uussee ppllaassttiicc wwaatteerr lliinneess bbeettwweeeenn rreeffrriiggeerraattoorr aanndd ssuuppppllyy.. PPllaassttiicc wwaatteerr lliinneess ccaann ffaaiill dduuee ttoo ffaattiigguuee oovveerr ttiimmee
aanndd ccaauussee eexxtteennssiivvee ddaammaaggee ttoo pprroodduucctt aanndd tthhee hhoommee..
••UUssee oonnllyy 11//44"" ccooppppeerr ttuubbiinngg ffoorr wwaatteerr lliinnee..
••DDoo nnoott ccoonnnneecctt ttoo rreevveerrssee oossmmoossiiss wwaatteerr ffiillttrraattiioonn ssyysstteemm..
The 1/4" brass compression union is located in the literature packet.
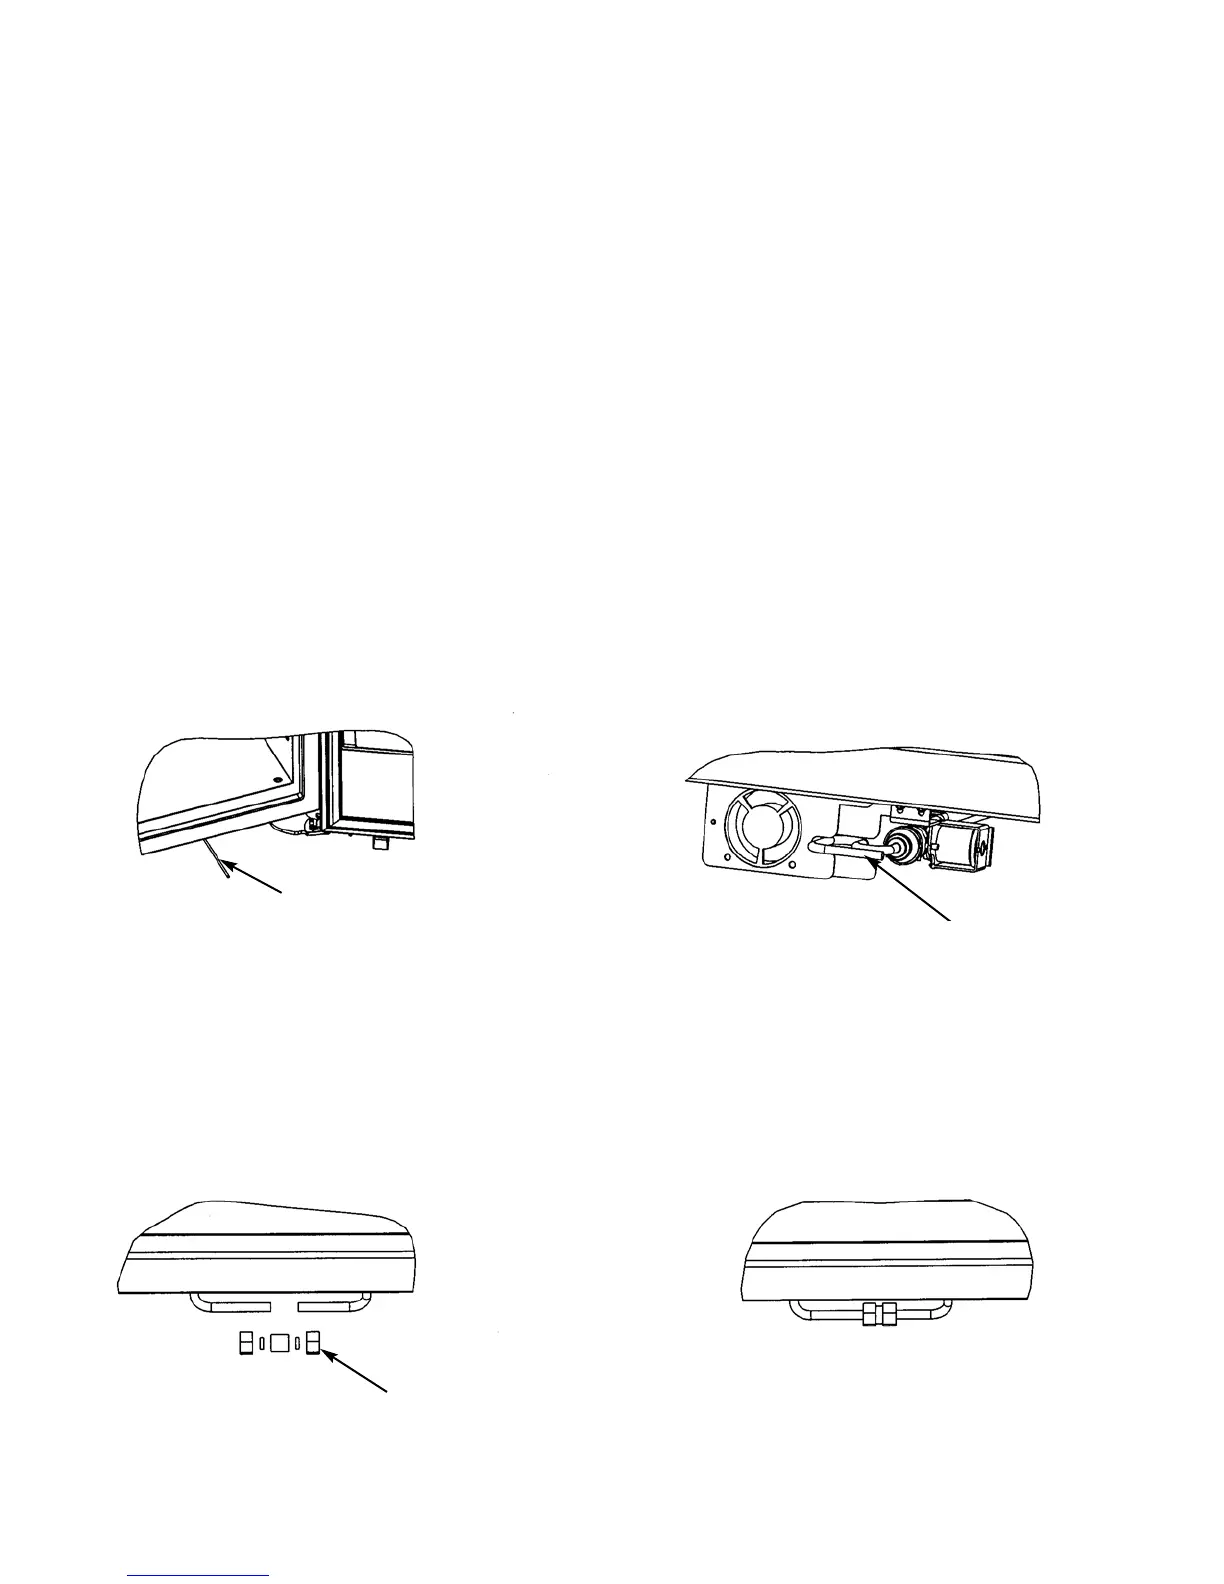
1. Pull copper supply tubing from plumbing forward from underneath refrigerator (see Figure A).
2. Flush air and impurities from water line by turning on water supply and running two (2) quarts of water into a bucket.
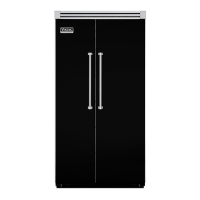
3. Bend the open end of the supply tube to point toward the open end of the Water Valve Tube (see Figure B). Note:
The Water Valve Tube is designed to flex or bend as necessary to line up with the supply tube, so union can be
connected easily.
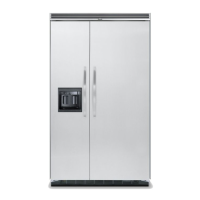
4. Remove brass nuts and ferrules from union and slide onto open ends of Water Valve Tube and supply tubing (see
Figure C).
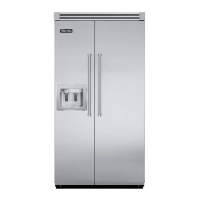
5. Connect nuts on copper tubing to union (see Figure D). Be sure both nuts are fully seated in union before tightening
nuts. Do Not over tighten.
6. Turn on water supply to refrigerator and check for leaks.
7. Turn off water supply to refrigerator and correct any leaks. Repeat this process until no leaks exist.
8. Completely turn on water supply to refrigerator.
9. Verify drain pan is installed and aligned. Drain pan must be pushed past and over initial stopping point.
Figure A
Figure B
Copper tubing
Water valve tube
Figure D
Figure C
Brass nuts and
ferrules