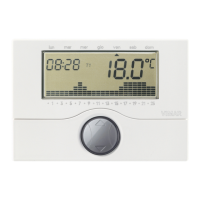
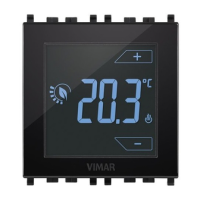
01910
MAIN SETTINGS.
Setting date and time
Before starting to program the timer-thermostat, it is advisable to set the current date and time.
- Press the
button; the device’s display will show only the arrow at the top indicating the
date and time to set.
- Using the
button, move the arrow onto the current date.
- Press the
button to confirm and pass on to set the time; the two digits indicating the
hour will start blinking.
- Set the current hour with the
button.
- Press the
button to confirm and pass on to set the minutes; the two digits indicating the
minutes will start blinking.
- Set the current minutes with the
button.
- Press the
button to confirm and quit.
Setting manual operation
- If the timer-thermostat is working in automatic mode, press the button to pass onto
manual mode; the display will show the
.
- Using the
button, select the desired temperature then press the button to confirm.
If necessary, wait approximately 5 seconds for the operation to be confirmed.
Setting automatic operation
- If the timer-thermostat is working in manual mode, press the button to pass onto
automatic mode; the display will show the histogram for the program’s day selection.
In this case it is possible to pass onto manual mode temporarily, for example when the desired
temperature is not the programmed temperature, by selecting the setting with the
button and
waiting approximately 5 seconds for the operation to be confirmed. The new setting will remain
active until the next programmed temperature level change, after which the saved program will
be restored. To go back onto automatic operating mode immediately, press the
button.
Switch-off
- Press the button; the display will show the OFF symbol blinking alongside the temperature.
- Press the
button to confirm. To switch the timer-thermostat back on, press the button.
Timed switch-off
- Press the button; the display will show the OFF symbol blinking alongside the temperature.
- Press the
button again; the display will show two blinking digits indicating the number
of hours (h) to set.
- Using the
button, select the desired number of hours (from 1 to 99) and then press the
button to confirm.
The timer-thermostat will then stay off for the set period of time after which it will switch on
going into the prior operating mode (manual or automatic).
Antifreeze
- Press the button; the display will show the OFF symbol blinking alongside the temperature.
- Press the
button again; the display will show two blinking digits to set if you want timed
switch-off for the device.
- Press the
button a third time; the display will show 3 blinking digits indicating the anti-
freeze temperature to set (from 04.0 °C to 15 °C).
- Using the
button, select the desired temperature and then press the button to confirm.
With the heating system off, the display will show the antifreeze symbol next to the measured temperature.
Summer/winter selection
This type of function is only used when, besides the heating system, it is also necessary to
control the air-conditioning system with the timer-thermostat.
- Press and hold down the
button; the display will show the symbol or the symbol .
- Using the
button, select the symbol for the winter season and the symbol for the
summer and press the
button to confirm.
In air-conditioning operation (summer), the steps performed on the timer-thermostat are the
opposite to the ones in heating operation (winter).
FOR THE INSTALLER.
For further information and for details on all the other timer-thermostat 01910 menus plea-
se refer to the installer manual that can be downloaded from the website www. vimar.com.
For all the details about the products dedicated to thermoregulation see the website
http://gestione-energia.vimar.it/en/
INSTALLATION RULES.
Installation should be carried out in compliance with the current regulations regarding the instal-
lation of electrical systems in the country where the products are installed.
REGULATORY COMPLIANCE.
LV Directive. EMC Directive. Standards EN 60730-1, EN 60730-2-7, EN 60730-2-9.
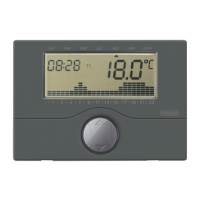
GUIDE RAPIDE INSTALLATEUR/UTILISATEUR
Chronothermostat électronique de contrôle ON/OFF de la température ambiante (chauffage
et climatisation), programmation quotidienne/hebdomadaire, dispositif de contrôle de la
température classe I (contribution 1%), sortie à relais avec contact inverseur 5(2) A 250 V~,
alimentation par piles stylo AA LR6 1,5 V (non livrées), installation en saillie.
CARACTÉRISTIQUES
• Alimentation : 3 V c.c. avec 2 piles alcalines AA LR6 1,5 V (non fournies)
• Autonimie des batteries : au-dessus d’un an
• Sortie : relais inverseur 5(2) A 250 V~
• Type de réglage : ON/OFF
• Possibilité de connexion en radiofréquence avec actuateurs 01923 et 01924 après remplace-
ment du module à relais par le module émetteur 01921.1
• Mise à jour température affichée : chaque 20 s
• Affichage température ambiante : de 0 °C à +40 °C
• Hystérésis : réglable de 0,1 °C à 1 °C
• Plage de réglage :
- +4 °C - +15 °C en horsgel
- +5 °C - +35 °C en chauffage ou climatisation
• Fonctions principales :
- réglage horaire de la température par tranches de 15 minutes
- 3 niveaux de température programmables pour chauffage + 3 niveaux de température pour
climatisation + 1 niveau hors gel
- programmation hebdomadaire
- 1 programme automatique réglable par l’utilisateur (pour le chauffage comme pour la climatisation)
- possibilité de forcer le programme en modifiant la température
- réglage pour chauffage et climatisation
- fonction horsgel
- possibilité d’extinction avec temporisation
- possibilité d’activation grâce au composeur téléphonique
- sélection entre visualisation en degrés Celsius et Fahrenheit
- réinitialisation du dispositif
• Degré de protection : IP30
• Appareil de classe II :
• Température de fonctionnement : T40 (0 °C +40 °C)
• Classification ErP (Règ. UE 811/2013): classe I, contribution 1%
Réglage date et heure
Avant de commencer la programmation du chronothermostat, réglez jour et heure courante.
- Appuyer la touche
; l’afficheur du dispositif visualisera uniquement la flèche située en haut
qui indique le jour et l’heure à régler.
- La touche
permet de déplacer la flèche au niveau du jour courant.
- Appuyer la touche
pour confirmer et passer au réglage de l’heure; les 2 chiffres qui
indiquent l’heure commencent à clignoter.
- La touche
permet de régler l’heure courante.
- Appuyer la touche
pour confirmer et passer à la programmation des minutes; les 2 chiffres
qui indiquent les minutes commencent à clignoter.
- La touche
permet de régler les minutes courantes.
- Appuyer la touche
pour confirmer la programmation et sortir.
Programmation fonctionnement manuel
- Si le chronothermostat fonctionne en automatique appuyer la touche pour passer en
manuel; l’afficheur visualise le symbole
.
- Par la touche
sélectionner la valeur de température voulue et appuyer la touche pour confirmer.
Attendre environ 5 secondes pour que l’opération soit confirmée.
Programmation fonctionnement automatique
- Si le chronothermostat fonctionne manuellement appuyer la touche pour passer en automa-
tique; l’afficheur visualisera l’histogramme graphique relatif à la courbe journalière du programme.
Dans ce cas il est possible de passer simultanément en mode manuel, par exemple au cas où
la température voulue est différente de la température programmée, en sélectionnant la valeur à
programmer par la touche
et en attendant environ 5 secondes que l’opération soit confirmée.
La nouvelle programmation restera active jusqu’au changement suivant de niveau de tempéra-
ture programmée, après quoi le programme mémorisé sera rétabli.
Pour revenir immédiatement en mode fonctionnement automatique, appuyer la touche
.
Extinction
- Appuyer la touche ; l’afficheur visualisera à côté de la valeur de température le symbole
OFF clignotant.
- Appuyer la touche
pour confirmer.
Pour rallumer le chronothermostat appuyer la touche
.
Extinction temporisée
- Appuyer la touche ; l’afficheur visualisera à côté de la valeur de température le symbole
OFF clignotant.
 Loading...