EasyManua.ls Logo

Vinotemp VT-WINEDISP2 - User Manual

Vinotemp VT-WINEDISP2
22 pages
Print Icon
To Next Page IconTo Next Page
Loading...

Questions and Answers

  • L
    laura41Sep 23, 2025
    What causes wine to divide in my Vinotemp VT-WINEDISP2?
    • J
      Jonathan WhiteSep 23, 2025
      If the wine is divided in your Vinotemp Beverage Dispenser, clean out any debris in the spout.
  • Y
    ymendozaAug 23, 2025
    What to do if my Vinotemp VT-WINEDISP2 Beverage Dispenser is not dispensing?
    • L
      Leonard WilkinsAug 23, 2025
      If the Vinotemp Beverage Dispenser is not dispensing, and none of the spouts dispense wine, check the canister pressure gauge or turn the canister slightly counterclockwise to see if any gas escapes. Turn clockwise to re-tighten. Then, check for gas leaking. If the canister has pressurized gas, check the regulator. Press the dispense button to check if gas is escaping from the plug or fixer and to see if gas is escaping out of the gas tube. Switch the questionable valve to a working spout to check to see if problem still exists. Check all wirings and connections.
  • J
    Julie RoweAug 25, 2025
    Why is my Vinotemp Beverage Dispenser running at a high temperature?
    • D
      David KelleyAug 25, 2025
      If your Vinotemp Beverage Dispenser is running at a high temperature or continually, check the door opening and gasket. Also, check the installation location, the fan and its clearance.
  • J
    jerrycarsonAug 26, 2025
    Why is my Vinotemp VT-WINEDISP2 Beverage Dispenser making noise?
    • J
      Juan WongAug 27, 2025
      To address noisy operation in your Vinotemp Beverage Dispenser, ensure the unit is level and on a flat, solid surface. Check if the noise comes from the fan mount, compressor mount, or loose tubing. Inspect the blade clearance. Determine if the fan blade is broken or if the motor is making noise.
  • T
    tvalenzuelaAug 27, 2025
    How to lower the temperature on my Vinotemp Beverage Dispenser?
    • J
      Joseph WagnerAug 27, 2025
      If the temperature of your Vinotemp Beverage Dispenser is too high, lower the temperature setting. Also, make sure the temperature sensor is not touching the cold panel.
  • J
    John YorkSep 18, 2025
    Why are there too many bubbles in my Vinotemp Beverage Dispenser?
    • F
      Fernando JonesSep 18, 2025
      If there are too many bubbles in your Vinotemp Beverage Dispenser, reduce the gas pressure to 3 psig, as the Argon/Nitrogen pressure may be too high.
  • J
    John MooreSep 15, 2025
    Why is my Vinotemp VT-WINEDISP2 Beverage Dispenser dripping wine?
    • K
      Kelsey HoganSep 15, 2025
      If your Vinotemp Beverage Dispenser is dripping wine: * If the dripping is constant, check the solenoid valve seat for leaks and debris. * If there is intermittent dripping, push to tighten the spout at the solenoid valve fitting to address a spout leak.
  • P
    Patrick ChristianSep 16, 2025
    What causes spout drop in my Vinotemp Beverage Dispenser?
    • P
      Phillip JacobsSep 16, 2025
      If there is a spout drop on your Vinotemp Beverage Dispenser: * Check the wine tube for leaks. * Change out the bottles if they are empty.
  • M
    Matthew AndersonSep 6, 2025
    What to do if my Vinotemp Beverage Dispenser compressor is running but not cooling?
    • R
      ross59Sep 6, 2025
      If the compressor in your Vinotemp Beverage Dispenser is running but not cooling, there could be several reasons: * Refrigerant leakage: Call service for checking loss of refrigerant and proper charge. * Low voltage to unit: Make sure the unit is receiving proper voltage. * Fans do not turn: The fans must be replaced.
  • Z
    zparkerSep 3, 2025
    Why is the temperature too high in my Vinotemp VT-WINEDISP2 Beverage Dispenser?
    • D
      Dr. Joshua ManningSep 3, 2025
      If the temperature in your Vinotemp Beverage Dispenser is too high, consider the following: * Improper cabinet seals: Check the gasket and door opening. * Setting too high: Lower the temperature setting. * Ambient temperature too high: Ensure proper installation location. * Iced evaporator: Defrost and reset the temperature. * Low voltage: Check the power supply. * Sealed system problem: Call service for checking loss of refrigerant or restrictions. * Undercharge or overcharge: Call service to add or remove refrigerant.

Summary

Serving Wines

General Operating Instructions

Important Safety Instructions

Electrical Connection

Parts and Specifications

Installation Instructions

Before Using Your Unit

Prepare the wine dispenser by removing packaging and cleaning the exterior.

Locating Your Unit

Place the unit on a solid, level surface with adequate clearance for proper circulation.

Operating Your Wine Dispenser

Loading;Unloading Gas Bottle

Steps for installing and removing the argon/nitrogen gas cartridge for operation.

Attaching and Removing Wine Bottles

Dispensing Wine

Care and Maintenance

Cleaning the Dispenser

Procedure for cleaning the stopper dispenser and solenoid valve using warm water.

Circuit Diagram

Troubleshooting Wine Dispenser

Cancellation and Fees Terms

Limited Warranty

Specific Warranty for Non-New Units

Service and Important Notice

Overview

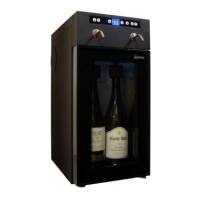
The Vinotemp VT-WINEDISP2 is a 2-bottle wine dispenser and preserver designed to store, display, and dispense opened wine bottles while keeping them fresh from oxidation for up to 45 days. This appliance maintains wines at a chosen storage and serving temperature, ranging from 45°F to 65°F (7°C to 18°C).

Function Description:

The primary function of the Vinotemp VT-WINEDISP2 is to preserve and dispense wine. It uses an inert gas system (Argon or Nitrogen, gas cartridge not included) to prevent oxidation, extending the shelf life of opened bottles. The unit features two dispensing spouts, each corresponding to a wine bottle, allowing for easy, touch-of-a-button dispensing. It also includes a cooling system to maintain optimal serving temperatures.

Important Technical Specifications:

  • Model Number: VT-WINEDISP2
  • Voltage: AC 120V
  • Frequency: 60 Hz
  • Cooling Power: 85W
  • Refrigerant: R134a
  • Protection Class: I
  • Adjustable Temperature Range: 45°-65°F (7°-18°C)
  • Ambient Temperature Range: 45°-90°F (7°-32°C)
  • Bottle Capacity: 2 bottles
  • Maximum Bottle Shelf Life: 45 days
  • Approx. Dimensions (W x D x H): 9.3" x 16.28" x 20.7"
  • Gas Cartridge Requirements: Standard non-refillable Argon or Nitrogen gas cartridges with a threaded neck size of ½"-20, minimum length of 0.5", diameter not exceeding 1.75", and length not exceeding 5.5".

Usage Features:

  • Temperature Control: The unit features a temperature display and buttons to set the desired temperature. Users can press and hold the temperature button until "H1" flashes, then use the up or down arrows to select the temperature.
  • Wine Dispensing: Two dispensing options are available for each bottle:
    • Continuous Dispensing: Press and hold the dispensing button above the desired spout to dispense wine continuously until released.
    • Portion Control: Press the portion button to dispense wine in 1oz increments. Press once for 1oz, twice for 2oz, and so forth.
  • Portion Control Reset: The 1oz preset portion control can be reset by pressing and holding the portion button until "H2" flashes. Use the up or down arrows to adjust the setting in 1oz increments.
  • Portion Calibration: To calibrate the dispensed portion, press and hold the portion button until "H3" flashes. Use the up or down arrows to adjust the settings. Dispense wine to verify the amount poured, repeating as needed.
  • LED Light: An LED light can be switched on or off by pressing its dedicated button.
  • Bottle Loading: To attach a wine bottle, unscrew the lower part of the bottle fix nut, slide the bottle upward with the gas and wine tube inside, fit the bottle mouth into the silicon plug (easing it in if the mouth is larger), and then tighten the lower part of the fix nut.
  • Gas Cartridge Loading: To load a gas cartridge, press and hold the wine dispensing button to empty any remaining gas, unplug the unit, rotate the cover upwards, pull out the old cartridge, and insert a new one, aligning it to the regulator's neck thread. Rotate clockwise to tighten, then close the cover. A slight gas escape during tightening is normal.
  • Power On: After positioning and plugging in the unit, turn the power on.

Maintenance Features:

  • General Cleaning: Always unplug the unit before cleaning. Use mild detergents or glass cleaning products; avoid harsh cleansers, scouring pads, or flammable fluids.
  • Stopper Dispenser and Solenoid Valve Cleaning:
    1. Fill a bottle with clean warm water and place the stopper-dispenser onto it.
    2. Press and hold the continuous dispense button to dispense the warm water.
    3. To initiate automatic cleaning, press the portion button 5 times, then hold it until "CL" flashes on the display.
    4. Continue dispensing and flushing until dry argon comes from the spout.
  • Troubleshooting: The manual provides a comprehensive troubleshooting guide for common issues related to the dispensing system (wine dripping, unit not dispensing, interrupted/slow dispensing, wine spurting/spitting) and the cooling system (unit not running, high temperature, low temperature, compressor running but not cooling, noisy operation). Solutions range from checking gaskets and connections to replacing parts or contacting customer service.

Important Safety Instructions:

  • Read all instructions before use.
  • Do not operate with a damaged cord.
  • Unplug before maintenance.
  • Exercise caution around children; do not allow them to operate or play inside the unit.
  • Do not clean with flammable fluids.
  • Do not operate with housing panels removed or damaged.
  • Dispose of refrigerated appliances according to federal and local regulations.
  • Do not attempt repairs unless specifically recommended in the manual.
  • Locate away from direct sunlight and heat sources.
  • Do not store food or other appliances on top of the unit.
  • For adult use only.
  • Do not lift or carry by the cord.
  • Do not plug in before setup is complete.
  • Ensure the unit is upright (not tilted more than 45° or upside down) when positioned or moved.
  • Place on a solid, level surface with 5-inch clearance on all sides for proper circulation.
  • Avoid operating with wet hands or on wet surfaces.
  • Allow the unit to stand upright for 24 hours before first plugging in.
  • Designed for indoor, household use only.
  • Child Entrapment Warning: Remove the door and leave shelves in place when discarding an old unit.
  • Gas Bottle Warning: Contents are under pressure. Do not puncture, incinerate, store near heat/direct sunlight, or in enclosed vehicles. Keep away from sharp objects and out of reach of children.
  • Electrical Connection: The power cord must be plugged into a 3-prong grounded wall receptacle. Do not remove the grounding prong. A dedicated 15 AMP circuit is recommended. Avoid using a Ground Fault Interrupter (GFI) or extension cords unless they are UL-listed, 3-wire grounding type with a 3-blade plug and 3-slot receptacle.

Warranty and Sales Terms:

The manual outlines detailed terms for cancellation, shipping, delivery, and warranty. Key points include:

  • Shipping/delivery fees are the purchaser's responsibility.
  • A 25% cancellation fee (plus freight both ways) applies if a free shipping/freight item is canceled in transit.
  • A 35% restocking fee (plus freight both ways) applies if cancellation is authorized by the seller.
  • No cancellation or refund on made-to-order products.
  • A 15% cancellation fee applies if an order is placed but production has not started.
  • A 3% fee is deducted from refunds for credit card cancellations.
  • Refurbished units are sold "as is" with purchaser assuming risks.
  • Limited Warranty:
    • Furniture style (wood) wine cabinets (made in U.S.): 1 year on cooling unit parts; 12 months on cabinetry and labor (uninstalled).
    • Metal cabinet units (appliances) (compressor) (made in China and Denmark): 12 months on parts and labor for cooling system and cabinetry.
    • Thermoelectric Units: 90 days (including Wine and Beverage Coolers, Beer Dispensers, Humidors, Portofino Wood Cellars, and Refrigerators).
    • WineMate and Cellar Tec (Wine Cooling Units) Split and Ducted Systems: 1 year on parts only (no labor).
    • Self Contained WineMate Cooling Systems: 1 year parts, 1 year labor.
    • Wine Accessories, Racking Systems, and other miscellaneous items: 30 days.
    • II Romanzo units: 90 days. Replacement parts: 12 months.
    • Brama: 1 year from date of purchase.
    • Non-New Units (Scratch & Dent/Refurbished/Floor Models): 90 days for compressor units, 30 days for thermoelectric units (parts for function only, not cosmetic defects).
    • Element Grills: 30-day limited parts warranty.
    • Other new items not listed: 90-day parts-only warranty.
  • Parts and Repairs: 90 days parts and labor for compressor, 30 days parts and labor for Thermoelectric for in-house repairs. Customer pays a labor deposit ($75-$195) if the unit is found to be in good working condition. Customer is responsible for freight costs.
  • Warranty on purchased parts: 30 days.
  • Warranty is voided by improper installation, repair, or placement.
  • Seller is not responsible for incidental or consequential damages.
  • Disputes are subject to California law and binding arbitration in Los Angeles County.

Vinotemp VT-WINEDISP2 Specifications

General IconGeneral
BrandVinotemp
ModelVT-WINEDISP2
CategoryBeverage Dispenser
LanguageEnglish