PlungerKitParts
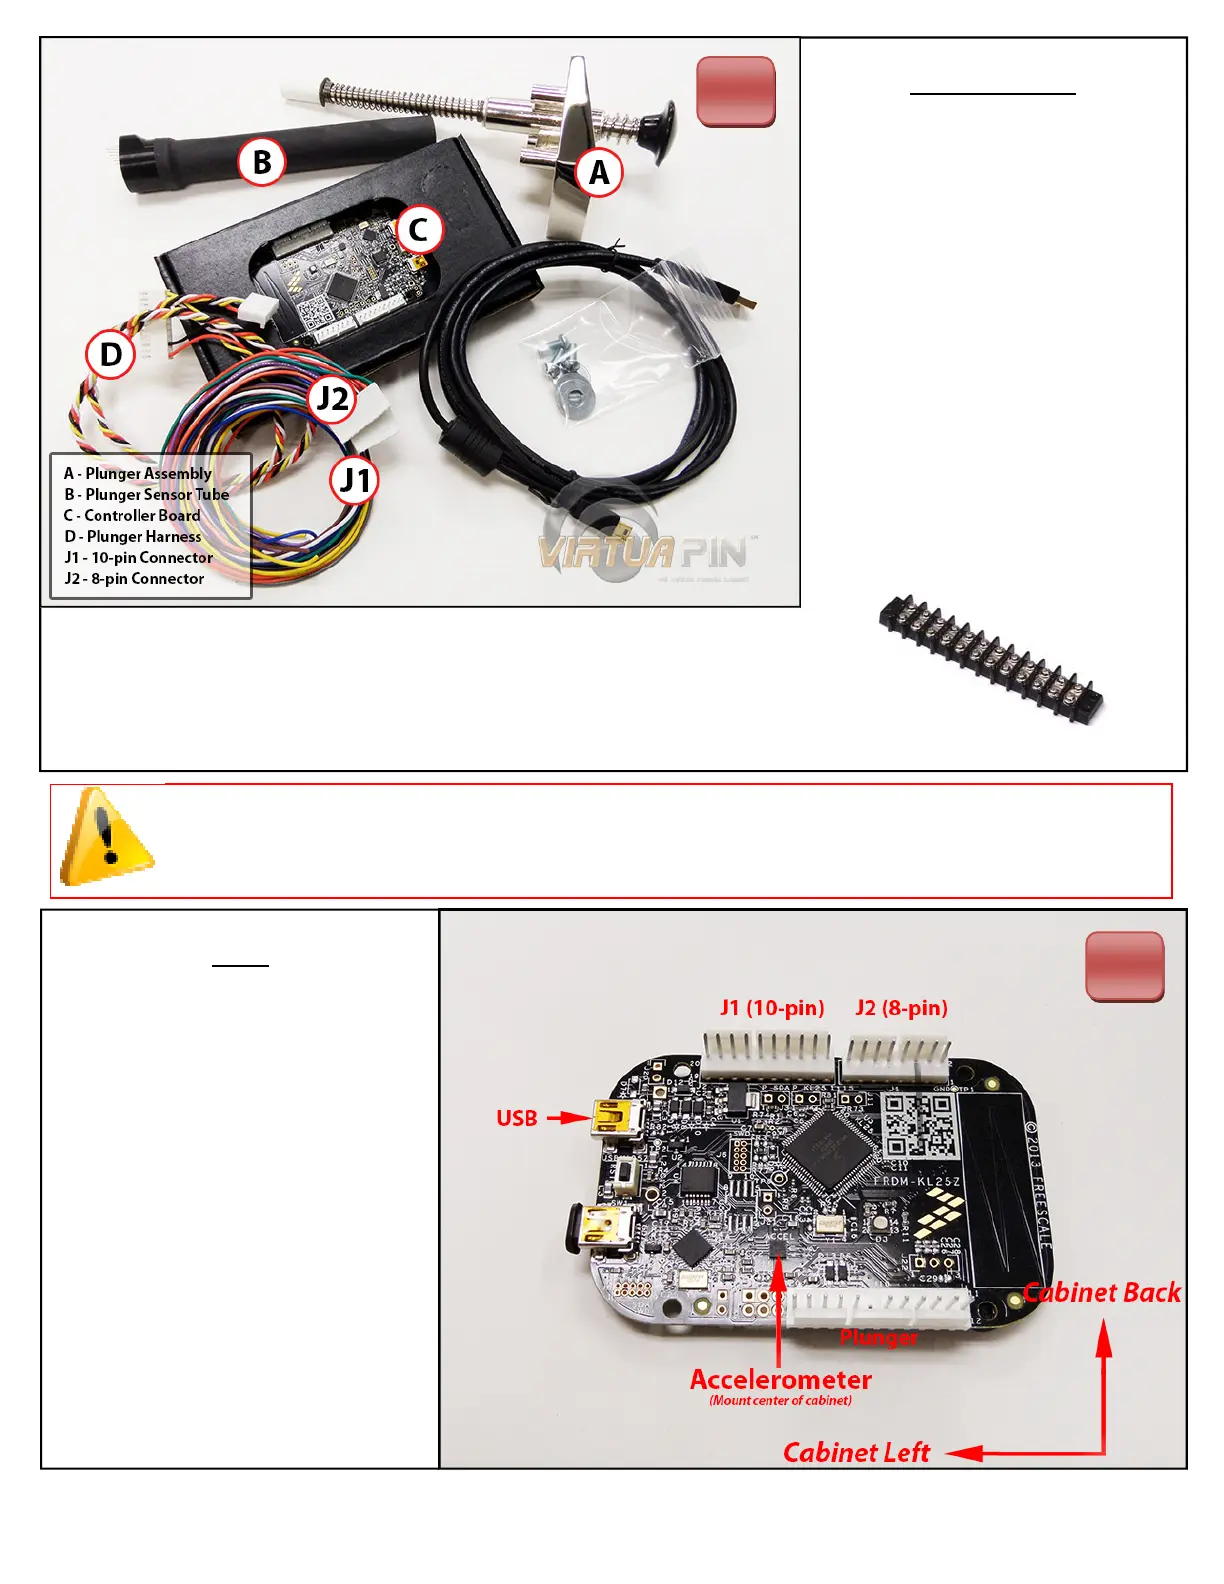
When you receive your kit,
please take a moment to ensure
you’ve received all of the
components found in the illustra‐
on on the le.
To wire the buons to your
kit, a terminal barrier strip, like
the one below, is strongly
suggested.
1
Setup
For opmal results, mount the
board on the boom of your cabi‐
net face‐up and oriented as pic‐
tured on the right. The J1 and J2
headers should be facing the cabi‐
net and the USB connectors on
the le side of the cabinet. Con‐
nect the plunger to the connector
indicated to the right.
IMPORTANT!
Plunger MUST be connected
before the board is powered on.
2
Note: If using screws to fasten the board to your cabinet’s boom, be sure to drill
pilot holes, DO NOT over ghten and damage the board!