10
of the job, so as to avoid having to adjust the cutting
depth each time a corner is reached.
After this operation, put the machine's
front guide back in place.
10. CUTTING BUILDING MATERIALS
To cut building materials, you must use the diamond
disk 7040193 (optional accessory).
Each separate cut must be no deeper than 12 mm.
When using this disk, take special care not to force the
machine forward, thus preventing it from overheating
and so extending its working life recommended.
Cutting building materials produces a large amount
of dust, therefore it is essential that the machine be
connected to an aspirator, as explained in section 12.
11. CHANGING THE SAW BLADE
Unplug the machine from the electrical
outlet before performing any mainte-
nance or adjustments.
In order to change the saw blade, proceed as follows:
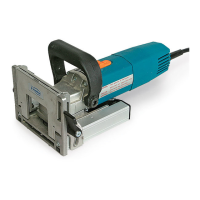
- Loosen the screws H and remove the machine's front
guide I (Fig. 1)
- remove the screws K and remove the front cover L (Fig. 6)
- slide the machine forward until reaching the depth
stop, and then use a screwdriver to apply a slight
amount of pressure on its flange in order to disengage
it, thereupon withdrawing the machine from the base
(see zoom in Fig. 6).
- turn the machine upside down, letting it rest on the
handgrip. With the protection of a leather glove, grasp
an end of the saw blade, holding it steady.
Do not perform this operation without
using the protection of a glove.
- loosen the screws M (Fig. 7) that hold down the blade
and replace the worn-out one with a new blade of the
same characteristics.
- for reassembly, perform the preceding operations in
inverse order.
Ensure that the saw disc bearing is com-
pletely free of glue, sawdust, dust, etc,
before mounting the new disc.
12. CONNECTING
In order to connect the machine to an AS182K or
AS282K aspirator or other external aspiration source,
fix the aspiration coupling included with the unit to the
machine's aspiration inlet N (Fig. 1).
The chosen external aspiration source may then be
hooked up to the other end of the aspiration coupling.
The brackets A2 (Fig. 1) that are attached to the dust
collection tube allow the mains cable to be inserted,
making it easier to manoeuvre.
13. MAINTENANCE OF THE BRUSHES
AND THE COLLECTOR
Disconnect the machine from the mains
before carrying out any maintenance work.
Change the brushes when they are a minimum of 9
mm long.
Changing the brushes.
Remove cover O by undoing the five screws P that hold
it in place (Fig. 8). Use small screwdriver R to remove
brush holder Q. Put the screwdriver into one of the
two slots and use it as a lever (Fig. 8). Move the end of
spring S back. Holding it in this position, remove used
brush T and replace it with a new original VIRUTEX
brush. Put the brush holder back in place, ensuring
that it fits snugly into the carcass and that each of
the brushes press gently on the collector. The position
of the connection terminal of the brush in the brush
holder is shown on the carcass of the machine with the
symbol V to facilitate replacement. Ensure that when
the cover is replaced, the clamps of the brush holder
do not pinch the cable.
Screw cover P back into place. We advise that you
leave the machine on but without using it for 15
minutes so that the brushes can self-adjust.
If you observe any burning or protruding
of the collector, take it to a VIRUTEX
technical service outlet to be repaired.
Never use emery paper for this operation.
14. LUBRICATION AND CLEANING
The machine comes fully lubricated from the factory
and does not require special care.
Always carefully clean the machine after use and
periodically oil the guides Z (Fig. 5), making sure they
are never left dry.
Keep the power cable in perfect condition.
Keep the machine's vent and cooling openings clean
and unobstructed.
15. NOISE AND VIBRATION LEVEL
The noise and vibration levels of this device have been
 Loading...