2. Select Picture mode to Standard mode and check the x, y data.
Input Injection Point:
HDMI cable
Alignment method:
Initial Set-up:
1. Before the adjustment, system should be in burn-in mode for 30 minutes.
2. Set picture mode to Standard
3. Set Brightness and Contrast to customer’s default spec, set Backlight to
Maximum and turn Off Auto Brightness control and Smart Dimming function.
4. Select source as “HDMI 1”, Change HDMI signal to white pattern.
5. Enter factory mode menu: press MENU + Numeric keys “3481” .
Alignment:
1. Press MENU key enter factory mode page.
2. Select Color Temperature item, press OK key.
Color temperature adjustment:
1. Apply 80 IRE pattern (for 12000K/9300K/6500K Mode) to start white balance
adjusting.
2. Read the native x.y data of panel before the adjustment.
3. One of R, G and B channels is kept to 128 based on the native x, y data .
4. Perform manual alignment to find R G B Gain and R G B Gain need under 512
5. Set proper color temp. setting (Cool/ Computer/ Normal) for each mode
(12000K/9300K/6500K)
6. Apply 100 IRE pattern to measure Y data of all modes then measure x, y data of
Custom Picture Mode.
7.Select Backup Data item with on to Backup the data of all modes.
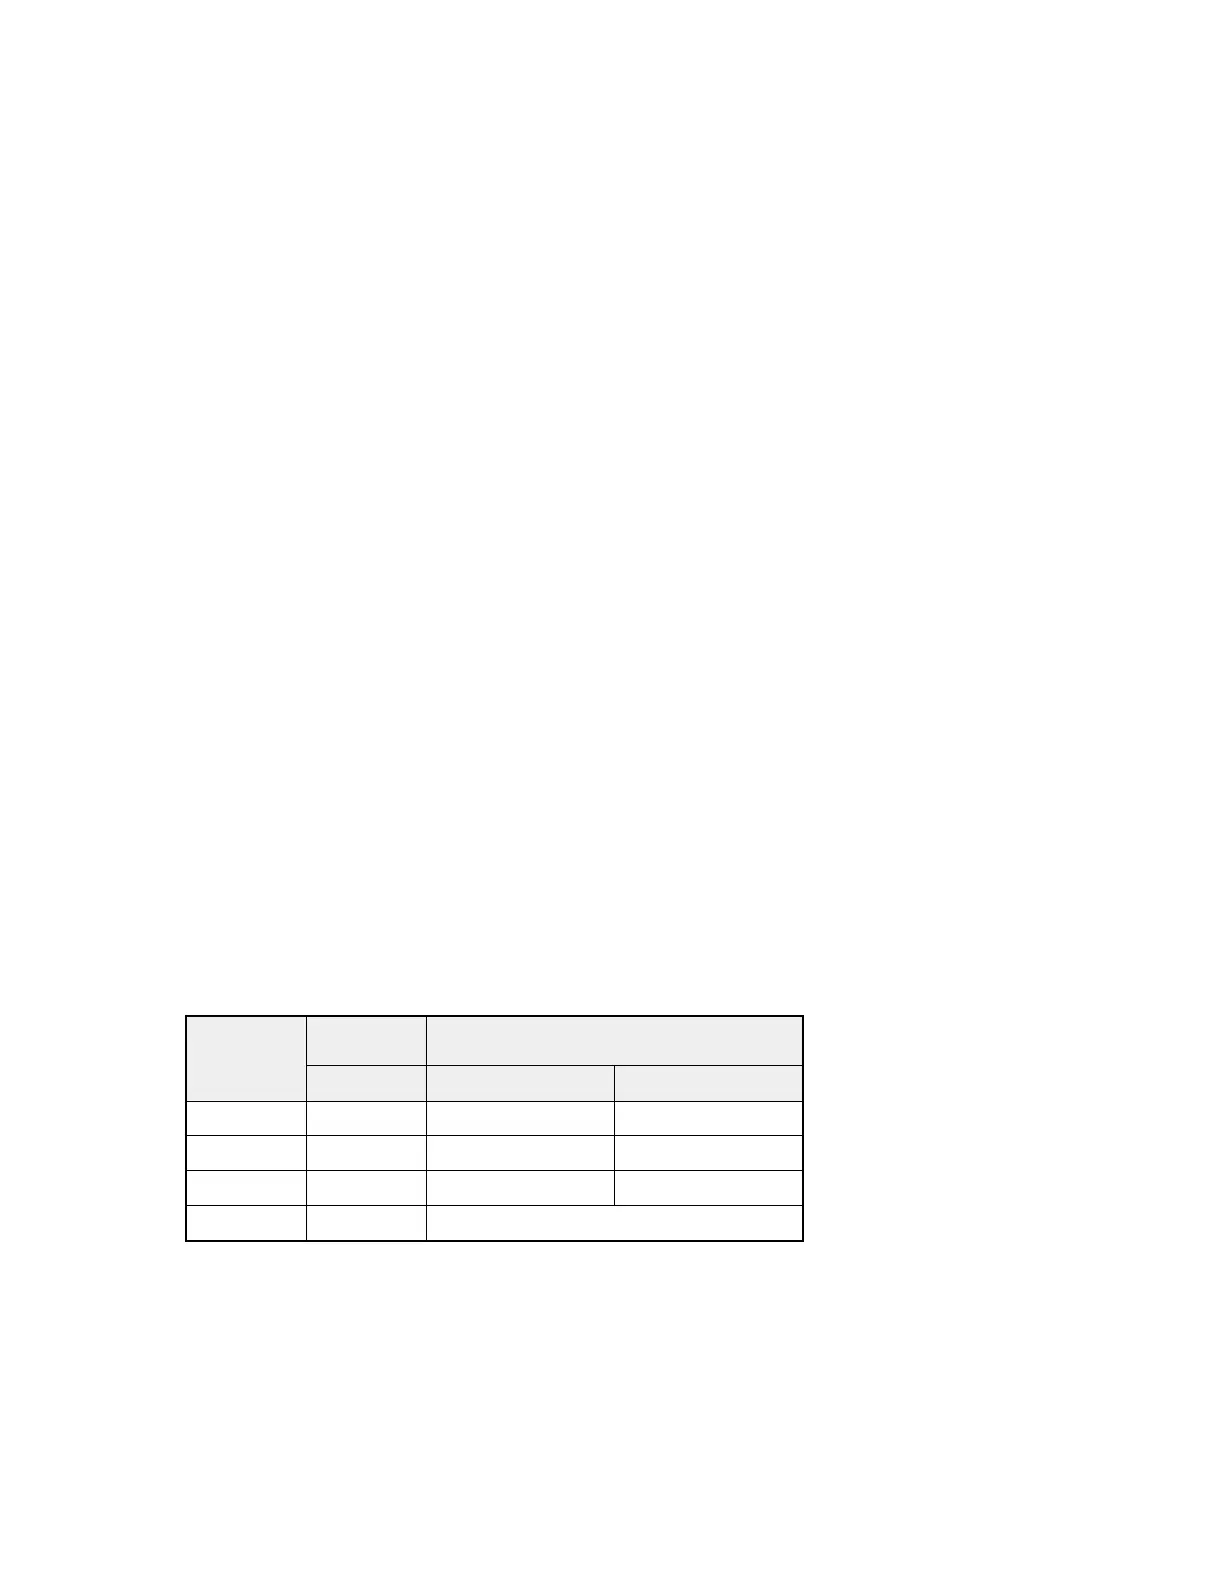
Mode
Color Chromaticity Coordinate
Temp. x y
12000K Cool 0.264 ± 0.008 0.267 ± 0.010
9300K Computer 0.290 ± 0.010 0.300 ± 0.010
6500K Normal 0.313 ± 0.010 0.329 ± 0.010
Custom NA NA
Check the 16 grayscale pattern should be distinguished and color bar is correct
Note:
1. Use Minolta CA-210 for color coordinates and luminance check.
2. Before adjusting, all color analyzers (CA-210) should be coordinates with a
same reference TV set.