EasyManua.ls Logo

Vision grills CADET Series - User Manual

Vision grills CADET Series
2 pages
Print Icon
To Next Page IconTo Next Page
Loading...
ENGLISH
Step 1: Assemble Top Lid
Vent
Parts for Assembly:
Tools Included:
Wrench:
For handle assembly
CADET
SERIES
A
C
D
E
F
G
H
1 pc. - Top Vent
1 pc. - Charcoal Grate
1 pc. - Cooking Grate
1 pc. - Ash Drawer
1 pc. - Fire Bowl
1 pc. - Kamado Grill
1 pc. - Stand
I
1 pc. - Wood Handle
Close lid and press Top Vent onto top of Kamado.
Be sure spring clips are fully engaged with
calibrations facing the front of the grill.
Step 3: Insert Grill into Stand
Take all parts out of the grill before lifting. With
the help of a second person, lower the grill into
the Stand by holding the back hinge and bottom of
grill. As grill is lowered into stand, carefully switch
out hands from bottom of grill to the ash drawer
opening before reaching the outer ring of stand.
Completely lower grill to bottom of stand.
Step 4: Add Components to
Grill
Lower re bowl into the grill with the ash drawer
opening facing the front of the grill. Place cast iron
Charcoal Grate inside re bowl. Place stainless
steel cooking grate on top of the re bowl.
Step 5: Grill Handle Assembly
Attach the Handle by placing handle bracket over
studs, opposite the hinge. On each stud use at
washers, then screw on acorn nuts and tighten
with provided wrench.
Step 6: Ash Drawer Usage
Slide Ash Drawer into ash drawer opening.
When grill is cool, it is safe to remove ash
from Ash Drawer. To remove Ash Drawer, use
bottom knob on Ash Drawer, lift slightly and
pull drawer out.
SET UP
WARNING: ALWAYS WAIT FOR ASHES TO COOL
BEFORE REMOVING ASH DRAWER. NEVER PULL
OUT ASH DRAWER WHILE GRILL IS HOT.
092816
B
2 pc. - Stand Handle
Step 2: Stand Handle Assembly
Attach Stand Handles to the left and
right of the Stand by placing handle
brackets over stand studs.
On each stud use at washers, then
screw on acorn nuts and tighten with
provided wrench.
Question and Answer IconNeed help?

Do you have a question about the Vision grills CADET Series and is the answer not in the manual?

Summary

Grill Assembly Instructions

Step 1: Assemble Top Lid Vent

Assemble the top lid vent by pressing it onto the Kamado top with spring clips engaged.

Step 2: Stand Handle Assembly

Attach stand handles to the stand using studs, washers, and acorn nuts.

Step 3: Insert Grill into Stand

Carefully lower the grill into the stand with assistance, managing grip on the bottom.

Step 4: Add Components to Grill

Place fire bowl, charcoal grate, and cooking grate into the grill assembly.

Step 5: Grill Handle Assembly

Attach the main grill handle to the body using studs, washers, and acorn nuts.

Step 6: Ash Drawer Usage

Slide the ash drawer into its opening and safely remove ashes when cool.

Parts Identification

Component List and Part Numbers

Detailed list of all grill components with their corresponding part numbers for reference.

Overview

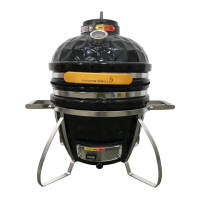
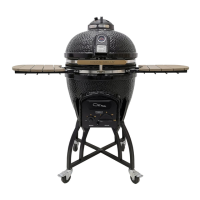
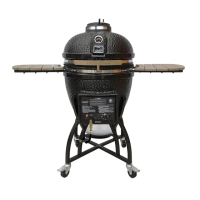
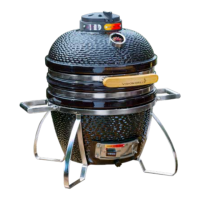
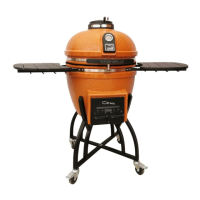
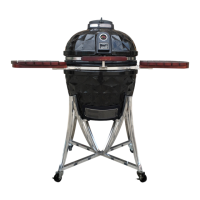
The Vision Grills Cadet Series is a ceramic kamado-style grill designed for versatile outdoor cooking, including smoking, grilling, and searing. This manual provides detailed instructions for assembly, usage, and maintenance, ensuring a long-lasting and enjoyable grilling experience.

Function Description

The Cadet Series grill operates on charcoal, utilizing the excellent heat retention properties of its ceramic construction to maintain consistent temperatures for extended periods. This allows for a wide range of cooking techniques, from low-and-slow smoking to high-heat searing. The grill's design incorporates a top vent and an ash drawer for precise temperature control and easy ash removal.

Important Technical Specifications

The grill consists of several key components, each with a specific part number for identification and replacement:

  • Cast Iron Top Vent (VGC TV-VC): This component, along with its Bakelite Tab (VGC TV-VC-K), is crucial for controlling airflow and thus the internal temperature of the grill. It features spring clips for secure engagement and calibrations for precise adjustments.
  • Ceramic Dome Lid (VGC CDL-VC): The main lid of the grill, made from ceramic for superior heat retention. It includes a built-in Thermometer (VGC TMT-VC) for monitoring internal temperatures without lifting the lid.
  • Top Ring Assembly (VGC RA1-VC): This assembly supports the Ceramic Dome Lid and forms the upper part of the grill body.
  • Stainless Steel Cooking Grate (VGC CGD-VC): The primary cooking surface where food is placed. Made from stainless steel for durability and easy cleaning.
  • Charcoal Grate (VGC CG-VC): Located at the bottom of the fire bowl, this grate supports the charcoal and allows ash to fall through into the ash drawer.
  • Handle (VGC HDL-VC): A wood handle with accompanying nuts and washers for lifting the grill lid.
  • Fire Bowl (VGC FB-VC): The ceramic bowl where charcoal is placed. Its design directs ash towards the ash drawer opening.
  • Bottom Ring Assembly (VGC RA2-VC): This assembly forms the lower part of the grill body and supports the fire bowl.
  • Felt Gasket (VGC FLT-VC): A high-temperature gasket that creates a seal between the ceramic dome lid and the grill body, preventing heat and smoke from escaping.
  • Ceramic Dome Bottom (VGC CDB-VC): The lower ceramic body of the grill, which sits within the stand.
  • Ash Drawer Body (VGC ADB-VC): A removable drawer for collecting and disposing of ash. It includes an Ash Drawer Knob (VGC ADB-VC-K) for easy removal.
  • Stainless Steel Stand (VGC SSS-VC): The sturdy base that supports the entire grill assembly. It features two Stand Handles (VGC SSS-H-VC) for portability and stability.

Usage Features

The Cadet Series grill is designed for ease of use from assembly to cooking:

  • Assembly: The manual provides a clear, step-by-step guide for assembling the grill.
    • Step 1: Assemble Top Lid Vent: The top vent is easily attached to the lid, with spring clips ensuring a secure fit and calibrations facing the front for intuitive control.
    • Step 2: Stand Handle Assembly: Stand handles are attached to the stand using flat washers and acorn nuts, tightened with the provided wrench.
    • Step 3: Insert Grill into Stand: Requires two people to safely lower the grill into the stand, holding the back hinge and bottom of the grill, then carefully switching hands to the ash drawer opening before reaching the outer ring of the stand. The grill should be fully lowered to the bottom of the stand.
    • Step 4: Add Components to Grill: The fire bowl is placed inside the grill with the ash drawer opening facing the front. The cast iron charcoal grate is then placed inside the fire bowl, followed by the stainless steel cooking grate on top.
    • Step 5: Grill Handle Assembly: The wood handle is attached to the grill lid using flat washers and acorn nuts, tightened with the provided wrench.
  • Temperature Control: The combination of the top lid vent and the ash drawer allows for precise control over airflow, which directly impacts the burning rate of charcoal and thus the internal temperature. Adjusting these components enables the user to achieve desired temperatures for various cooking methods.
  • Versatile Cooking: The kamado design excels at smoking, grilling, and searing. The ceramic construction ensures even heat distribution and retention, crucial for consistent results across different cooking styles.
  • Ash Drawer Usage: The integrated ash drawer simplifies ash management. It slides into an opening and can be easily removed by lifting slightly and pulling out using the bottom knob.

Maintenance Features

Proper maintenance ensures the longevity and optimal performance of the Cadet Series grill:

  • Ash Removal: The ash drawer is a key maintenance feature. It is designed for convenient removal and disposal of ash.
    • Important Safety Warning: Always wait for ashes to cool completely before removing the ash drawer. Never pull out the ash drawer while the grill is hot, as this poses a significant burn hazard and can damage the grill.
  • Cleaning: While not explicitly detailed in the provided excerpts, the stainless steel cooking grate is generally easy to clean. The ceramic interior typically requires minimal cleaning, often just brushing away residue. The felt gasket may require occasional inspection and replacement if it shows signs of wear or damage to maintain a proper seal.
  • Registration: Users are encouraged to register their grill at www.visiongrills.com/register. This likely provides access to warranty information, support, and product updates.

In summary, the Vision Grills Cadet Series is a robust and user-friendly ceramic kamado grill, offering excellent cooking versatility and ease of maintenance, making it a valuable addition to any outdoor cooking setup.

Vision grills CADET Series Specifications

General IconGeneral
BrandVision grills
ModelCADET Series
CategoryGrill
LanguageEnglish

Related product manuals