DE5110 7
(2)
Use the two sheet metal
screws to fasten the
switch. to bracket. Tighten
the screws well, but do not
overtighten because this
may break the switch
.
(3)
Verify that the switch
contacts close when the
front lid is closed.
(4)
Connect the tamper switch
wires to the zone terminals
of a zone dedicated to
24-hour tamper protection.
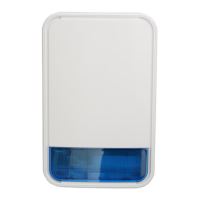
Figure 3.4 LK-1 Assembly
0RXQWLQJ WKH $ODUP &RQWURO &DELQHW
Choose a protected, easily accessible location, preferably where
uninterrupted AC power is available. To open the front lid, simply
swing it on its hinges to the left. The following steps must be taken
before actual mounting:
A. Be sure to assemble the power pack kit within the metal
cabinet (Para. 3.2).
B . If you have an LK-1 lock kit,
assemble it as shown in
Para. 3.3A. If you did not
order the optional lock kit,
insert the plastic plug
supplied with the system into
the hole in the front lid (align
the plug to fit the shape of
the hole before pushing it in).
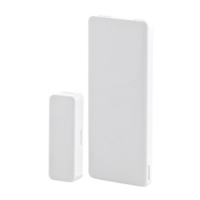
C. If you ordered tamper switch
kit TK-1, mount it as shown
in Para. 3.3B.
Figure 3.5 TK-1 Assembly
D. A ground strap is supplied with your system (Fig. 3.4). Mount it
in place and tighten it well. The required lock washers and nuts
are packed together with the ground strap.
Mounting and wiring holes are provided on the rear wall of the
cabinet. If necessary, punch out the wiring knockouts at the sides,
to suit your particular installation. Mount the cabinet complete with
the alarm control module and the power pack on the wall, using
the 4 mounting holes at the rear (Fig 1.1). The front lid may be
secured to the cabinet with 4 sheet metal screws, or with the
optional lock (LK-1).
:LULQJ WKH $ODUP &RQWURO 0RGXOH )LJ
Caution! Do not connect the AC power or the battery until all
other wiring is completed
.
Wiring instructions are given by order of terminals, from left to right.
Terminals Wiring Information
1 2 3 4
BUS
These are the keypad bus terminals for the various
keypads and for the expander module. Each terminal
should be wired to its identically numbered counterpart
in the keypad/display unit or expander module. Refer to
Sec. 8 - Keypad Bus Length Considerations.
Z1
Zone 1 terminal. A normally closed (N.C.) zone loop
will be formed if the alarm contacts of all detectors in
this zone are connected in series between this
terminal and the nearest (–) terminal. A 10 kΩ
End-of-Line (EOL) resistor must complete the series
connected loop at the point most distant from the
zone terminals.
Note: If a zone is defined as a keyswitch zone and
used for arming/disarming, a 10k
Ω
resistor must be
wired across the keyswitch terminals
.
(–)
A negative common terminal. Each zone loop is
connected between the respective zone terminal and
a (–) terminal.
Z2
The wiring instructions are the same as for zone 1,
with which zone 2 shares the
(–)
terminal.
Z3 - Z8
Three pairs of zones, with a
(–)
terminal between
each pair. Wiring instructions are the same as for the
first pair of zones
(Z1 and Z2).

 Loading...