EasyManuals Logo

Visonic POWERMAX PRO Installation Instructions

Visonic POWERMAX PRO
4 pages
To Next Page IconTo Next Page
To Previous Page IconTo Previous Page
Page #3 background imageLoading...
Page #3 background image
D-302182 PGM-5 Installation Instructions 3
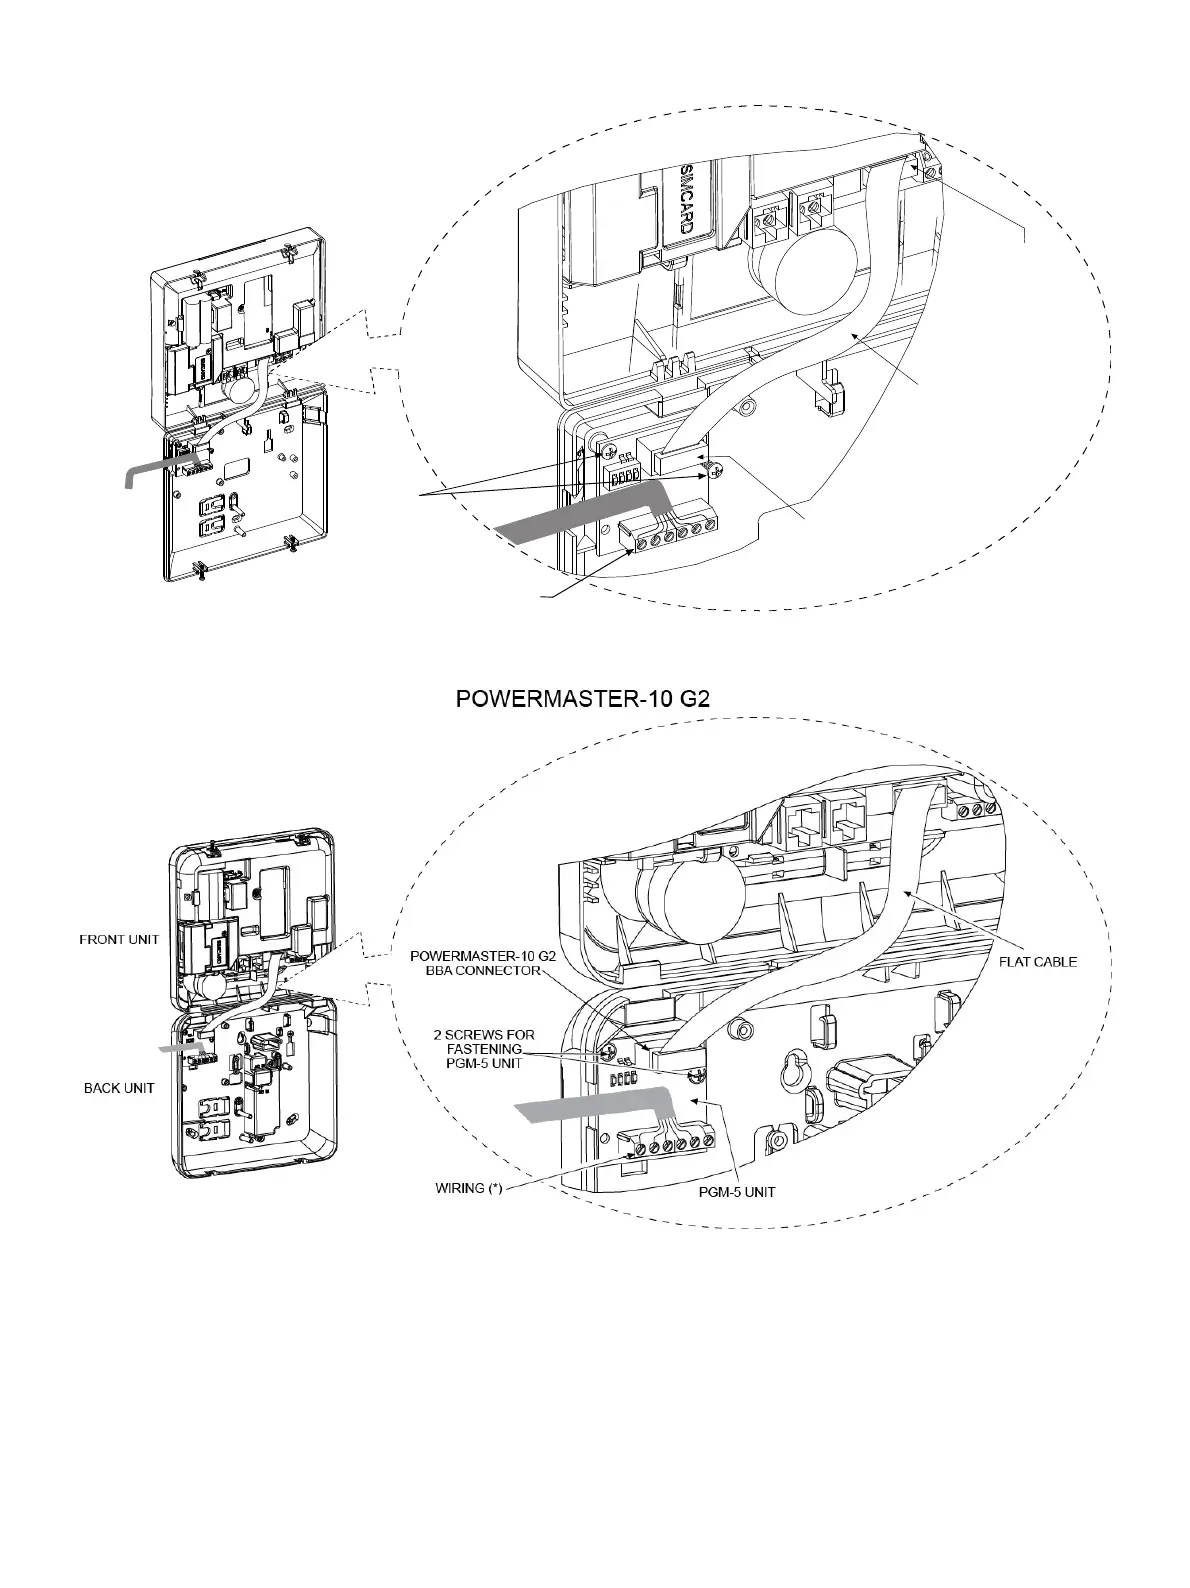
Front unit
Back unit
POWERMAXEXPRESS
Connect one side of the flat cable into the
PGM-5 connector and the other side into the
PowerMaxExpress BBA connector
PGM-5
PowerMaxExpress
BBA Connector
Flat cable
Wiring*
Screws for
fastening
PGM-5
module
Figure 4c – PGM-5 Mounting and Wiring in PowerMaxExpress Control Panel
* It is strongly recommended to route the cable as shown to prevent interference which may occur if routed too close to the control panel's antennas.
Figure 4d – PGM-5 Mounting and Wiring in PowerMaster-10 G2 Control Panel
* It is strongly recommended to route the cable as shown to prevent interference which may occur if routed too close to the control panel's antennas.

Other manuals for Visonic POWERMAX PRO

Questions and Answers:

Question and Answer IconNeed help?

Do you have a question about the Visonic POWERMAX PRO and is the answer not in the manual?

Visonic POWERMAX PRO Specifications

General IconGeneral
Wireless Frequency868 MHz
CommunicationPSTN
Siren Output12V DC, 500mA
Remote ControlYes
Wireless RangeUp to 200 meters in open space
Operating Temperature0°C to 49°C
Humidity85% non-condensing

Related product manuals