Installation Instructions
1. INTRODUCTION
SMD-426 PG2 (photoelectric smoke detector) and SMD-427 PG2 (heat and photoelectric smoke detector) are automatic fire detectors with
integral audible signal for open area protection, designed to sense heat or smoke (not flame) and fitted with a PowerG type transceiver.
SMD-426 PG2 / SMD-427 PG2 provides early warning of developing fire by sounding an alarm with its built-in alarm horn, and by transmitting a
coded alarm signal to a PowerG receiver or to a compatible wireless alarm control panel.
SMD-427 PG2 will activate a fire alarm upon either smoke or heat condition. With two fire sensors (heat and smoke), the SMD-427 PG2 detector may
shorten the time to fire alarm activation.
It must be borne in mind, though that effective pre-warning of fire accidents is only possible if the detector is located, installed and maintained as
described here.
In alarm condition, the buzzer sound can be stopped for 12 minutes by pressing the
TEST/MUTE switch. It will not restore the alarm condition, but will temporarily silence the
buzzer while you correct the condition. After 12 minutes, the detector restarts the alarm
buzzer sound.
Note: The TEST/MUTE switch functions as TEST switch (in normal operation) or as
MUTE switch (in alarm condition).
The detector can also operate as a siren to indicate a fire alarm in other areas covered by
the alarm system, or to indicate burglar alarm events, as configured through the control panel
(see the PowerMaster Installer Guide).
The tamper switch actuator (Figures 9a and 9b) is pressed against the bracket when the
unit is attached to the bracket. Removal of the unit from the bracket causes the switch
contacts to open, creating a tamper event, which is reported by the transceiver to the
alarm system control panel.
Note: When the tamper switch is opened the detector becomes not ready for operation.
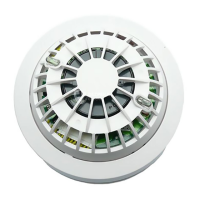
A. Buzzer hole B. Test / Mute button & LEDs
Figure 1. General View (SMD-427 PG2)
2.
INSTALLATION
2.1 Disassembly
Separate the unit from its mounting bracket as shown in Figure 2.
1. Hold the bracket with one hand
2. Rotate the detector anticlockwise and pull it from the bracket
A. BRACKET
B. DETECTOR
Figure 2. Separating the Detector from Its Bracket
2.2 Where to Install Smoke Detectors
WARNING! To comply with FCC and IC RF exposure compliance requirements, the smoke detector should be located at a distance of at least 20
cm from all persons during normal operation. The antennas used for this product must not be co-located or operated in conjunction with any other
antenna or transmitter.
Smoke detectors should be installed in accordance with the NFPA Standard 74 (National Fire Protection Association, Batterymarch Park, Quincy, MA
02169). For complete coverage in residential units, smoke detectors should be installed in all rooms, halls, storage areas, basements and attics in each
family living unit. Minimum coverage is one detector on each floor and one in each sleeping area and attics in each family living unit. For maximum
protection, a smoke detector should be located outside primary sleeping areas or on each level of your home. Here are a few useful tips for you:
Install a smoke detector in the hallway outside every separate bedroom area, as in Figure 3. Two detectors are required in homes with two bedroom
areas, as in Figure 4.
Install a smoke detector on every floor of a multi-floor home or apartment, as shown in Figure 5.
Install a minimum of two detectors in any household.
Install a smoke detector inside every bedroom.
Install smoke detectors at both ends of a bedroom hallway if the hallway is more than 12 meters (40 feet) long.
A. DINING ROOM
B. KITCHEN
C. BEDROOM
D. LIVING ROOM
E. SMOKE DETECTORS FOR MINIMUM PROTECTION
F. SMOKE DETECTORS FOR MORE PROTECTION
Figure 3. Locations for Placing Smoke Detectors in a Single Residence with only One Sleeping Area