Do you have a question about the Vitamix Rinse-o-matic and is the answer not in the manual?
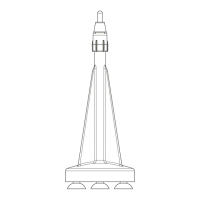
The primary structural component of the Rinse-o-matic.
Includes the sprayhead and valve assembly for rinsing action.
Provides stability by adhering the unit to the sink surface.
Connects the unit to the faucet water supply.
Attaches to the faucet for easy hose connection.
Allows connection to the faucet while retaining normal faucet use.
Includes various adapters to fit different faucet designs.
Guides on selecting and attaching adapters to fit various faucet designs.
Wet the sink bottom for suction and check Y-connector valve operation.
Attach the hose assembly to the faucet connection, ensuring a secure click.
Position the unit in the sink and press suction cups firmly to secure it.
Configure Y-connector valves for proper water flow to the Rinse-o-matic.
Warning against using hot water to prevent scalding hazards.
Properly place items over the plunger for optimal rinsing performance.
Press down on the item to depress the plunger and initiate water flow.
Hold plunger for 2-5 seconds or until the item is completely rinsed.
Lift the item to stop water flow and complete the rinsing process.
Follow local codes for subsequent cleaning and sanitizing of equipment.
Release the elbow collar and pull the hose to detach it from the rinser base.
Insert hose into key slot and connect to elbow; ensure it grips correctly.
Clean the unit in warm, soapy water, using a soft cloth and brush.
Inspect sprayhead weekly for wear; replace worn parts for optimal performance.
Explains coverage, exclusions, and how to obtain warranty service.
Troubleshoot leaks by checking adapter seating, washers, and tightness.
Verify faucet is on, Y-connector valves are set correctly, and no other equipment is drawing water.
Ensure spray head is tight; check for damage or debris if leaks persist.
Confirm the hose is fully inserted into the elbow collar for a secure connection.
Specifies minimum cold water pressure for proper operation.
Provides height, depth, and width measurements of the Rinse-o-matic.
| Category | Blender Accessory |
|---|---|
| Dimensions | 11 x 11 x 20 inches |
| Weight | 7 pounds |
| Material | Plastic |
| Compatibility | Fits most containers |
| Warranty | 1 year |