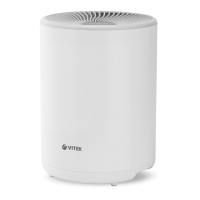
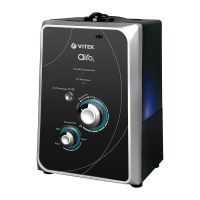
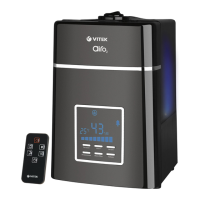
The VITEK VT-8557 is an air washer designed to improve indoor air quality by trapping fine dust particles, neutralizing smoke odor, killing harmful bacteria, and humidifying the air.
Technical Specifications
- Power supply: 220-240 V ~ 50/60 Hz
- Rated input power: 18 W
- Water tank capacity: 4 L
- Water discharge: 300 ml/h
- Area serviced: up to 30 m²
- Noise level: ≤ 33 dB
- Unit operating life: 3 years
Description of Parts
- Air outlet grid
- Vaporizing filter lid
- Vaporizing filter
- Water tank
- Power cord
- Air pipe
- Air inlet grid
- Drain opening
- Maximal water level mark (MAX)
Control Panel
- Timer control button «⊕»
- Sleep mode button «☾»
- On/off button «Ⓞ»
- Water level indicator «----»
- Display
- Humidity level control button «Ⓞ»
- Humidity indicator «%RH»
- Humidity level indicator «ⓄⓄ»
- Auto mode indicator «A»
Usage Features
The air washer is designed for household use and is not intended for commercial or industrial applications. It is particularly useful in enclosed air volumes like pantries, kitchens, offices, corridors, and toilets, where bacteria growth and unpleasant odors can be an issue. It also addresses insufficient room humidity, which can negatively affect human and pet health, as well as plants and furniture. The antibacterial silver ion filter helps destroy bacteria and trap small dust particles, pollen, and fungal spores. The recommended comfortable room humidity level is between 40% and 60%.
Important Safety Information:
- Always read the instructions carefully before use.
- Ensure the unit's voltage and current match your mains supply.
- Do not use the unit if the power cord or plug is damaged, if it operates intermittently, or after it has been dropped.
- Repairs should only be performed by the manufacturer, authorized service centers, or qualified personnel. User repairs void the warranty.
- Do not disassemble the unit yourself.
- Disconnect from the mains for any malfunctions or after dropping.
- Do not leave the unit unattended when switched on.
- Keep the power cord away from sharp edges and heating appliances.
- Dooid placing the unit near electric or gas stoves.
- Use distilled or filtered water, especially in areas with hard water, to minimize contamination and scale formation.
- Keep the unit out of direct sunlight.
- Do not use the unit in environments where relative humidity exceeds 80%. If humidity is above 60%, use only when necessary and at the lowest humidification level.
- Do not use in high humidity rooms like bathrooms or in explosive/flammable atmospheres.
- Do not cover air grids or insert objects into them.
- Place the unit on a flat, steady surface.
- Do not touch with wet hands or place on damp floors.
- Prevent water from entering the lower part of the unit body.
- Disconnect from the mains when filling or cleaning the tank.
- Avoid liquid contact with electrical connectors.
- Do not empty, fill, or tilt the unit during operation.
- Do not lift the tank during operation.
- Never attempt to open the unit body.
- This unit is not intended for children's use. Keep it out of reach of children during operation and breaks.
- Children and persons with reduced physical, sensory, or mental capabilities should only use the unit under supervision or after receiving instructions from a responsible person.
- Do not allow children to play with packaging materials.
- Do not direct airflow from the outlet grid towards exhaust ventilation, people, walls, furniture, wooden floors, sockets, or other electrical devices.
- Do not place the unit on unprotected furniture or wooden floors; use a waterproof mat.
- Do not add aromatic oils, essential water-soluble chemicals, or medicines to the water, as this can cause malfunction and void the warranty.
- Drain the water tank after each use.
- If storing for an extended period, clean and dry the unit as described in the maintenance section, leaving the tank open.
- Switch off and unplug before disconnecting from the mains.
- Unplug by pulling the plug, not the cord.
- Never carry the unit by the power cord.
- Do not sit or step on the unit.
- The unit does not remove carbon monoxide or filter hazardous substances.
- Periodically check the power cord, plug, unit body, and tank.
- Transport in original packaging to avoid damage.
- Store in a dry, cool place, out of reach of children and disabled persons.
Before First Use:
- After transport or storage in cold conditions, keep at room temperature for at least three hours.
- Water spots inside the tank are normal due to quality control.
- Unpack completely and remove all advertising stickers.
- The unit operates with AC 50/60 Hz and requires no additional settings for nominal frequency.
- Check for damage; do not use if damaged.
Using the Air Washer:
- Place on a solid, flat, stable surface.
- Remove the air outlet grid (1).
- Fill the water tank (4) up to the MAX mark (9) with clean, cold tap water. Distilled or filtered water is recommended to minimize scale.
- Do not exceed the MAX mark (9).
- Plug into the mains; all symbols will light up, a sound signal will play, and the unit will enter standby mode. The on/off button (12) will be half-dimmed.
- Control panel buttons are sensory; simply touch to activate.
- In active mode, operation mode control buttons (10, 11, 15) are dimmed. Pressing them increases brightness to maximum.
Switching On and Off:
- To switch on, press and hold the on/off button (12) for more than 1 second. A sound signal will play, the current humidity level will appear on the display (14). The on/off button (12) brightness will be maximal, and other control buttons (10, 11, 15) will be active and dim.
- If no operation mode buttons are pressed within 10 seconds, the on/off button (12) will half-dim, and other control buttons will go out and lock.
- To unlock, touch the dimmed on/off button (12). Other buttons will unlock and dim. Pressing any button increases its brightness to maximum.
- To switch off, press and hold the on/off button (12) for more than 1 second. A sound signal will play, all symbols will go out, and the unit will enter standby mode. The on/off button (12) will be half-dimmed.
Water Level Indication (13):
- The indicator has four lines, each representing a water level.
- If water is low or empty, all four lines flash red.
- As the tank fills, the lines appear sequentially, and the color changes to white.
- When the tank is full, three beeps will sound, and the indicator will flash for 3 seconds.
Humidity Level Adjustment:
- When switched on from standby or sleep mode, the unit defaults to automatic humidification, and the auto mode indicator (18) «A» lights up. This mode maintains a comfortable relative humidity.
- Two humidification levels can be set using the humidity level control button (15) «Ⓞ».
- To change the level, first press the on/off button (12), then the humidity level control button (15) «Ⓞ» will become active and dimmed.
- Press button (17) «ⓄⓄ» to select the desired level. LED indicators (17, 18) will light up: «Ⓞ» - level 1, «ⓄⓄ» - level 2, «A» - automatic mode.
Sleep Mode:
- In sleep mode, the unit operates quietly with no light indication on the control panel, and automatic humidification is active.
- To activate sleep mode, first press the on/off button (12), then the sleep mode button (11) «☾» will become active and dimmed.
- Press button (11) «☾», and the unit will enter sleep mode. All indicators on the control panel will go out, and button (11) «☾» brightness will be maximal. After 10 seconds, it will half-dim.
- To exit sleep mode, press button (11) «☾» again. The unit will return to automatic humidification, and all indicators will light up.
Timer Control:
- To activate the timer, first press the on/off button (12), then the timer control button (10) «⊕» will become active and dimmed.
- Press button (10) «⊕» to set the desired timer operation time. LED indicators «1h, 2h, 4h, 8h, --» will light up on the display (14).
- 1h – 1-hour timer operation
- 2h – 2-hour timer operation
- 4h – 4-hour timer operation
- 8h – 8-hour timer operation
- -- – timer switched off
- To switch off the timer, press and hold button (10) for 3 seconds.
Maintenance Features
Regular cleaning is essential, especially in regions with hard water, to prevent scale buildup that can affect humidification efficiency.
Recommendations:
- Clean the water tank and vaporizing filter monthly.
- Drain any remaining water from the tank.
- If storing for a long time, do not leave water in the tank and allow the filter to air dry naturally.
- Warning: Do not place the upper unit part under a tap or submerge it partially in water. Leaving water in the tank for more than a few days can cause bacterial growth; replace water daily.
- Switch off and unplug the unit before cleaning.
- Do not use polish, gasoline, or other chemical cleaners.
- Wipe the unit with a soft, slightly damp cloth, then dry it.
- Clean the air inlet and outlet grids as they become dirty.
Cleaning the Water Tank:
- Switch off the power, remove the air outlet grid (1), and the vaporizing filter lid (2).
- To remove the vaporizing filter lid (2), turn it clockwise. The lid has «?/?» symbols for easy removal/installation. When installing, align the lock symbol «?» on the lid with the mark on the control panel and turn the lid counterclockwise until it clicks into place.
- Remove the filter (3) from the water tank (4) and clean the tank walls with a soft cloth.
- Fill the tank with water and rinse.
- If scale is present, fill the tank with water and add 2 tablespoons of vinegar. Let it sit for about half an hour, then drain and rinse with running water. Citric acid descaler can also be used.
Cleaning the Vaporizing Filter:
- Lift the filter and wait for water to drain back into the tank.
- Remove the filter from the tank and shake it slightly over a bathtub or sink with both hands.
- Do not clean the filter with a brush or in a washing machine.
- Wash with cold running water and let it air dry naturally.
- If scale is hard to remove, soak the filter in neutral or acidic warm water for 30 minutes before cleaning.
Troubleshooting:
| Problem | Possible causes | Solutions