PART 1: PREPARING THE FRAME HEIGHT
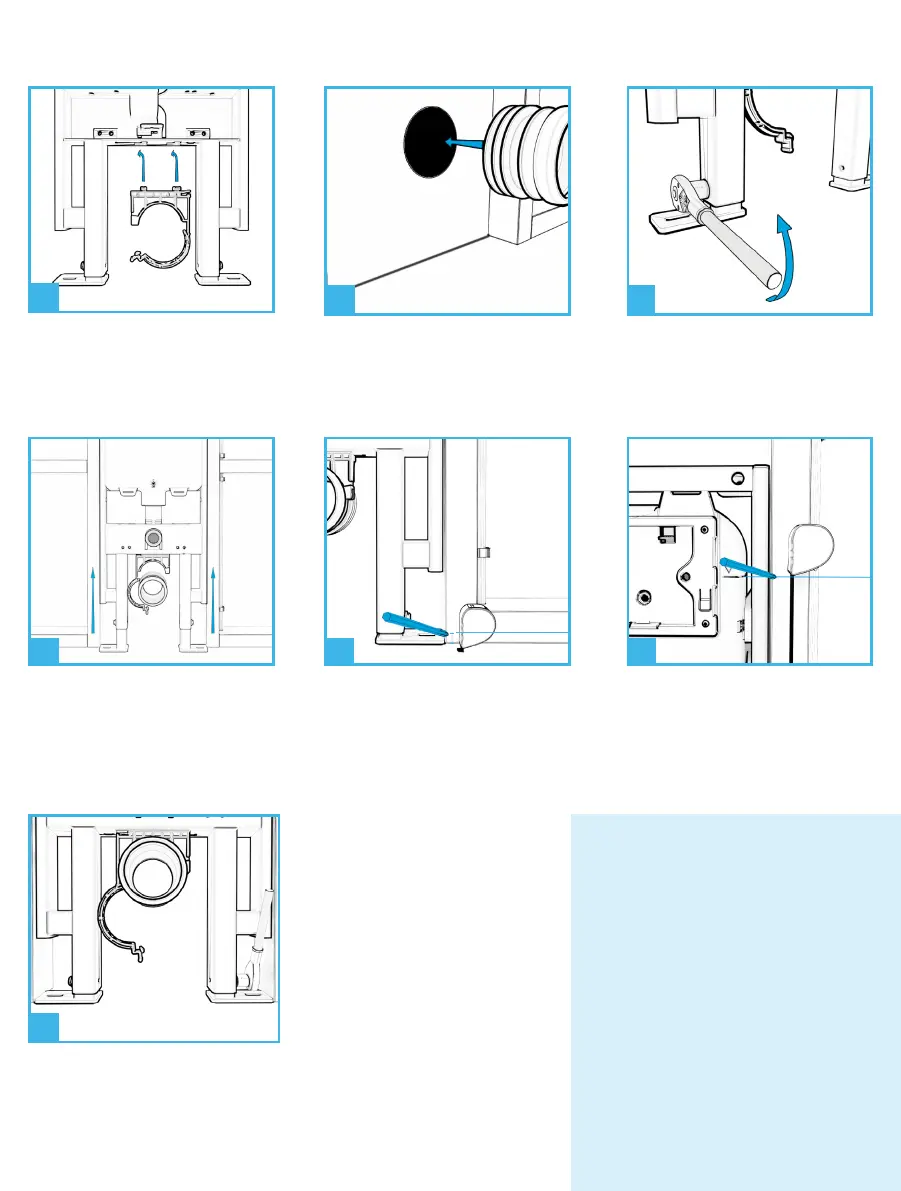
Insert the drain connector clip into
the frame and slide to the left to
lock into position. The clip can be
flipped 180° to suit the pipework.
1
Position the frame into place.
4
Insert the supplied drain connector
into the soil pipe. Optional angled
drain connectors are available for
connection to floor outlets.
2
Loosen both height adjustment
bolts on the frame using a socket
wrench or spanner.
3
Measure from the sub floor and
mark on a joist the height of the
intended finished floor level.
5
Tighten the height adjustment bolts
on both frame legs and check that
the height hasn’t slipped.
7
6
Measure up from the FFL 1m and
mark on the joist. Raise the frame
so that the recommended 1m
indicator on the frame lines up with
the 1m marking on the joist.
FITTING FLEXIBILITY
FINISHED
FLOOR LEVEL
FFL + 1M
The cistern frame has been designed
to fit in almost every scenario. It has
even been designed to be just 75mm
deep, meaning that it will fit within the
void of a typical stud wall.
There are two fixing options,
depending on whether you are
securing it to a solid masonry wall
behind the frame (option A), or to the
timber studs either side of it (option B).