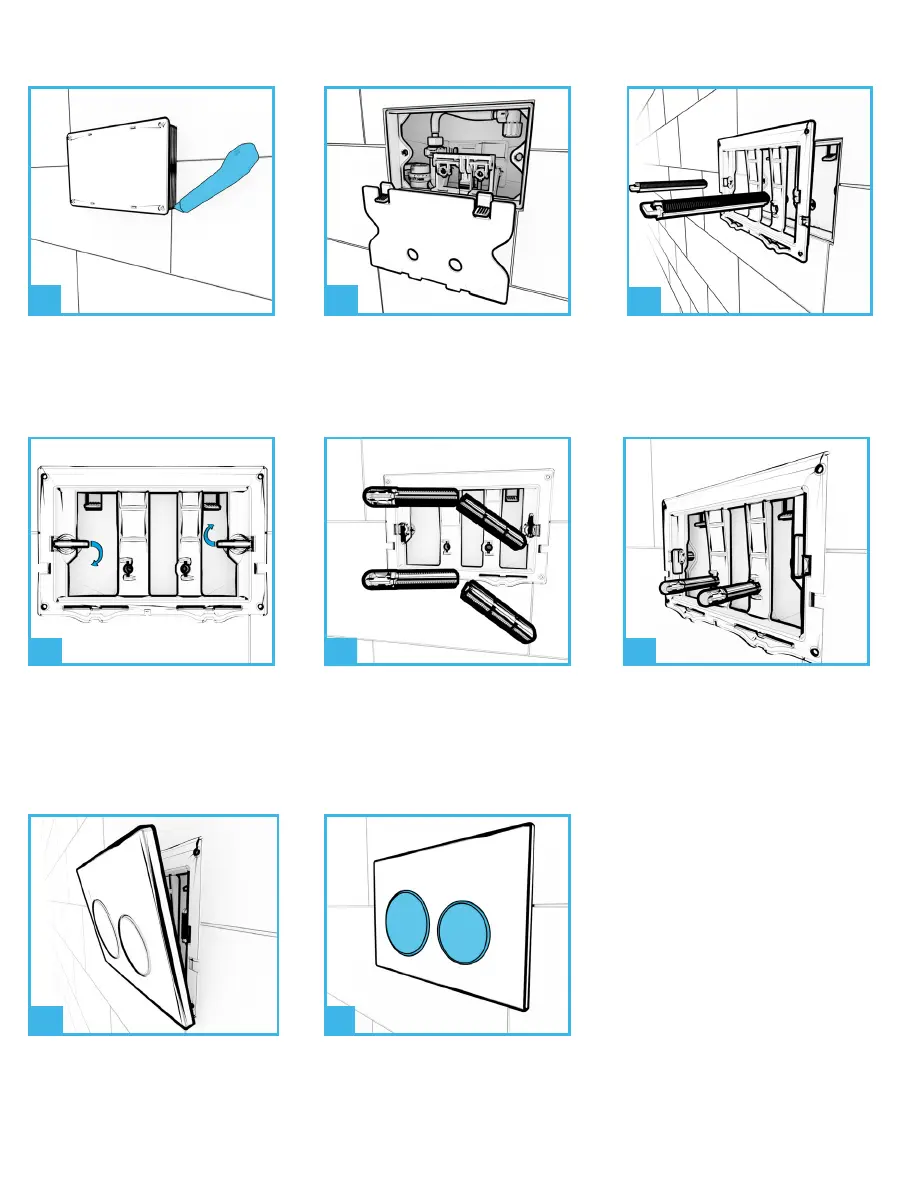
The left button is for a full flush
and the right button is for half flush
operation.
41
Apply the flush button, firstly onto
the lower spring clips and then
return the top edge to the wall and
allow to drop onto the clip.
40
Attach the flush plate bracket using
the rods provided.
36
Cut and discard the corrugated part
of the cover with a knife, flush with
the finished wall tiles.
34
Remove inspection cover and turn
on the water, using the isolation
valve inside.
35
Depending on the depth of your
wall, the central button rods may
need breaking o before inserting.
38 39
Insert the central button rods and
secure by twisting the rod wings.
They should be in a vertical postion
once fully secured.
Rotate the clips as shown to lock
and secure.
37
PART 4: FINISHING THE WALL & HANGING THE TOILET