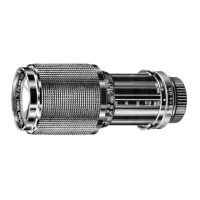
The Vivitar VIV-DF-183 is an AF TTL (Auto Focus Through The Lens) flash unit designed for use with both digital and film cameras. It features advanced technology to control the correct amount of light output for optimal exposure.
Compatibility:
The VIV-DF-183 flash comes in six different varieties, each compatible with specific camera brands and TTL systems:
- VIV-DF-183-CAN: Compatible with Canon Digital E-TTL, E-TTL II cameras, and E-TTL film cameras.
- VIV-DF-183-NIK: Compatible with Nikon Digital TTL, i-TTL cameras, and TTL, i-TTL film cameras.
- VIV-DF-183-OLY: Compatible with Olympus Digital TTL cameras.
- VIV-DF-183-PANA: Compatible with Panasonic Digital TTL cameras.
- VIV-DF-183-PEN: Compatible with Pentax Digital P-TTL and film cameras.
- VIV-DF-183-SON: Compatible with Sony Alpha & Konica Minolta Digital ADI, D Lenses cameras, and TTL film cameras.
Key Features:
- Red Focus Assist Beam: Aids in low-light focusing, ensuring accurate focus even in challenging lighting conditions.
- Automatic Shutter Speed Setting: The flash automatically matches the camera's shutter speed when ready to fire, simplifying exposure settings.
- Flash Readiness Indication: Provides a clear indication when the flash is ready to be used, both on the flash unit itself (Test/Ready lamp) and on the camera's display (depending on the camera model).
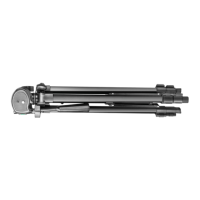
- Five Position Tilted Reflector: The flash head can be tilted to angles of 0°, 45°, 60°, 75°, and 90°, allowing for bounce photography to create softer, more natural-looking light.
- Red-Eye Reduction: (Available for VIV-DF-NIK, OLY, PANA, and PEN units) This function reduces red-eye by emitting pre-flashes before the main flash. Users should refer to their camera's instruction manual for setup.
- Front and Rear Curtain Synchronization:
- For Type PEN flash: Users can select either front curtain (►) or rear curtain (4) synchronization directly on the flash unit to match the camera shutter.
- For Type CAN, NIK, OLY, PANA, SON flashes: The camera controls front or rear curtain synchronization, requiring no setting changes on the flash unit. Rear curtain synchronization is particularly useful with slow shutter speeds or when photographing moving objects with their own light source, creating a more realistic impression of movement. This feature is only available on compatible cameras.
- Power Saving Function: To conserve battery power, the flash automatically switches to a power-saving mode if there is no communication with the camera for approximately three minutes. The Ready light will turn off in this mode. To reactivate, simply press the camera's shutter button or cycle the main switch off and on. While power consumption is drastically reduced in this mode, it is recommended to turn the flash off completely if not in use for an extended period.
Technical Specifications:
- Guide Number (ISO 100): 20(m) / 66(ft)
- Five Position Tilted Reflector: 0°/45°/60°/75°/90°
- Power Source: 2 x 1.5V AA size batteries (R6, LR6)
- Flash Duration: 1/2,000 - 1/40,000 sec.
- Recycling Time: 0.3 - 10 sec. with fresh batteries
- Number of Flashes: Approximately 100 times with fresh batteries
- Dimensions: Approx. 65 - 54 - 98mm
- Weight (w/o battery): Approx. 127 g
- Nikon D40 & D40x owners: The flash supports an ISO speed up to 800 in full auto mode. Performance may vary if the ISO speed exceeds this range.
- Specifications are subject to change without notice.
Operating Your Flash:
- Inserting Batteries: Turn the ON/OFF switch to the OFF position. Slide open the battery compartment cover, insert 2 AA batteries according to the polarity symbols, and close the cover. Ensure batteries are of the same brand and type with the same capacity.
- Mounting to Camera:
- For Type CAN, NIK, OLY, PANA, and PEN flashes: Release the Lock button, insert the mounting foot into the camera's accessory shoe clip, and press the Lock button to secure.
- For Type SON flash: Insert the mounting foot into the camera's accessory shoe; it will lock in place.
- Running a Test Flash: Slide the ON/OFF switch to "ON." The Test/Ready lamp will illuminate after a few seconds, indicating readiness. Press the Test/Ready button to discharge the flash and confirm proper operation. Wait for the Ready lamp to glow again before subsequent use.
- Camera Settings: Adjust your camera to the appropriate setting, typically the program position (refer to your camera's manual for flash synchronization details).
- Taking a Picture: Point the camera at the subject and focus. Press the shutter button halfway down to check the image, then press it all the way down firmly. The Auto OK indicator will light up when the picture is correctly exposed.
Bounce Photography:
To avoid harsh shadows from direct flash, tilt the flash head to bounce light off ceilings or walls. This technique creates softer, more natural-looking pictures.
- Use white or reflective surfaces for bouncing light to prevent unnatural color casts.
- Set the camera's exposure mode to Aperture Priority Auto ("A") or Manual ("M").
- Use a wider aperture than normal, as 2 or 3 stops of light can be lost when using bounce flash.
Maintenance and Tips for Better Photos:
- Storage: Switch the unit off and remove batteries when storing the flash or carrying it for a long time.
- Protection: Keep the flash away from dust and moisture to prolong its life. Do not expose it to excessive heat from sunshine, fire, or liquids.
- Repair: Never attempt to open or repair the flash yourself, as the internal electronic circuit carries high voltage. Contact a qualified repair service if the flash needs repair or is not working properly.